Project Overview
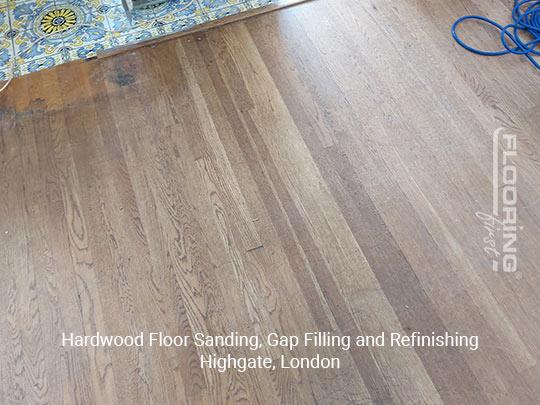
This Highgate property had original hardwood floors throughout the main living areas. The floor had been in place for many years and had developed gaps between the boards along with a surface finish that was scratched, dull, and uneven in places. The owners wanted a full sand, professional gap filling, and a fresh lacquer finish that would be durable enough for a busy household.
The Challenge
The gaps in this floor were significant enough that simply sanding over them would not have produced a satisfactory result. Gaps allow cold draughts, collect debris, and weaken the structural stability of the floor over time. They also look poor once a fresh finish is applied, as the new lacquer highlights any inconsistencies in the surface. The existing finish was also quite thick in areas, suggesting multiple coats had been applied over the years without a full strip back between them. This kind of layering can cause adhesion problems if you simply sand lightly and recoat without removing the build-up properly.
Our Approach
Floor Inspection and Board Stabilisation
We began by checking all the boards for movement and fixing any that had become loose. Boards that flex or creak need to be secured before sanding, otherwise the sanding process can make the issue worse and the finish will crack at the movement points.
Gap Filling
All gaps between the floorboards were filled with a mixture of resin and sawdust, collected during the first pass of sanding so that the colour of the fill closely matches the timber. This method produces a far more natural result than off-the-shelf fillers, which often dry to a noticeably different shade. The resin remains slightly flexible after curing, which means it moves with the wood during seasonal changes rather than cracking out.
Multi-Stage Sanding
With the gaps filled and cured, we worked through a full sanding programme across the whole floor, starting with a grit appropriate for the depth of finish removal needed and finishing with a fine grit to leave a smooth, consistent surface ready for the new finish.
Lacquer Application
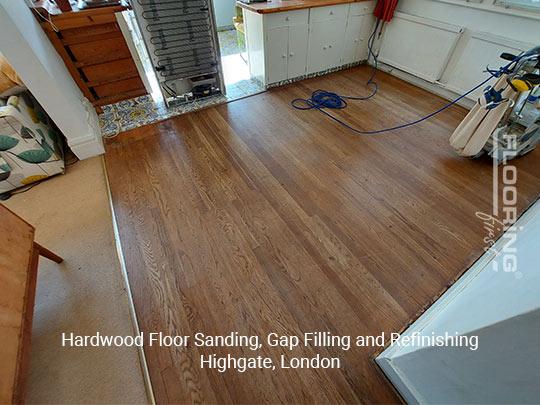
Three coats of a hard-wearing water-based lacquer were applied, with light buffing between coats. A water-based product was chosen to give a clear, natural-looking finish that would not yellow over time, which suits the light interior of this property well.
The Result
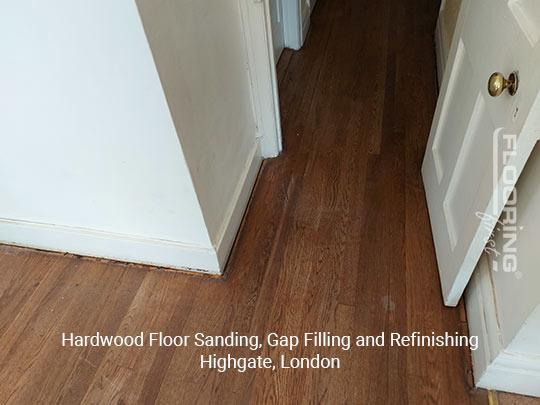
The floor looks significantly better than when we started. The gaps have gone, the surface is even and smooth, and the lacquer gives solid protection for everyday use. The client noted the difference in the draughtiness of the room, which the gap filling had clearly helped with. Hardwood floor sanding in London is typically priced from around £25 to £45 per square metre, varying with floor condition, area size, and finish type.
Frequently Asked Questions
How long does sanded floor lacquer take to dry before furniture can go back?
A water-based lacquer is typically touch-dry within a few hours of each coat, but the floor should be left for at least 24 hours after the final coat before furniture is replaced. Full hardness is usually reached within five to seven days, during which time heavy use should be avoided.
Does gap filling last permanently?
A resin and sawdust fill is long-lasting and much more durable than standard filler, but no gap fill is entirely permanent on a wood floor. Wood moves with the seasons, and over time some gaps may reopen slightly. Most clients find the results last many years before any touch-up is needed.
Can all hardwood floors be sanded, regardless of their age?
Most hardwood floors can be sanded regardless of age, as long as there is enough material remaining above the tongue. We check the board thickness during our initial inspection and will advise if there are any limitations. Very old floors are often in better condition for sanding than people expect.
Have a similar project? Call us on 020 88309782 or Book a Free Site Visit
Close