Gap Filling With Saw Dust & Clear Resin

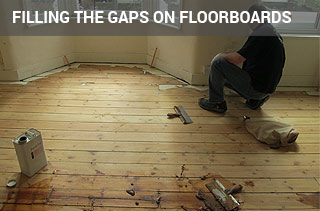
Gap filling does two things. First, it improves the look of your wooden floors, making them more attractive and second, it is the best way to deal with draughts. Once sealed, your floorboards will help to get the most out of your heating systems. You don't spend money - you save it by avoiding unnecessary bills during winter!
The Benefits of Gap Filling with Resin
There are two variations of the resin filler. The first is applied when mixed with sawdust, and the second is stand-alone. We find that using a resin filler mixed with sawdust is the best option because it allows the product to perfectly match the floor’s colour.
Resin filters are not only cheaper than nearly all other options but also allow the floor some movement. Even more, they can be used on floorboards without tongues or grooves as the sealant can be applied to the edge of the board until it fills the gap. If you have sanded your floor previously, you should use the dust with the filler. Floor sanding and gap-filling services complement each other very nicely, and there is no reason not to combine them.
How to Fill Gaps With a Filler Resin Mix?
 Water-based fillers are not a good choice because they can rust nails, shrink more than solvent fillers and take longer to dry. Solvent filters are probably the best option, but they give off some fumes and wearing a respirator will be wise when working with them.
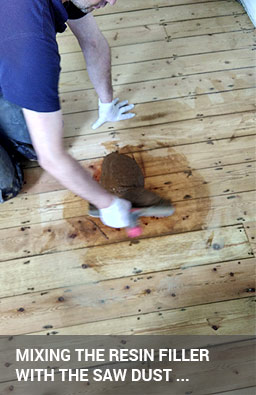
Gap filling with resin and sawdust is one of the most frequently used methods. Dust is collected from the fine floor sanding and mixed with a clear resin. One important thing to remember when using this method is the fact that the resin dries very fast. You only make enough to apply it in the next few minutes. If you see that the resin dries faster than you predicted, you can add more resin and stall the drying for a bit. Eventually, you have to discard even this, so work fast! Naturally, if used in a warmer room or during the summer, you must be even quicker with the application.
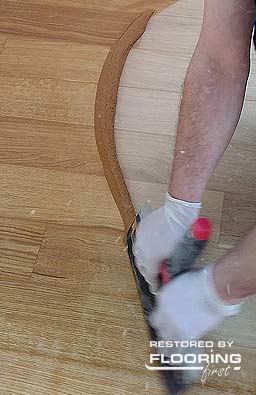
The mixture itself can be made anywhere. Either in a vessel or directly onto the floor. A small knife will be ideal for mixing. A bigger filling knife is best suited for the application itself, and the bigger it is, the easier the process will becomes. One filling won’t be enough. After the first coat had sufficient time to dry, you need a second and third one. If you want the best possible results, you will also consider lightly buffing and vacuuming before applying each new coat.
Different Floors Mean Different Filling Approach
 Moisture is the main reason for the appearance of gaps. Different wood species show specific levels of hygroscopy and, therefore, react to humidity in their own ways. The type of floor – parquet, hardwood and engineered also makes a difference. Engineered floors, for example, are more resistant to high moisture levels compared to hardwood because they are not made out of a single piece of wood.
Fixed engineered and board floors most of the time have bigger gaps. It’s possible to use coarse dust from rough sanding for those, but it should be done with care. The first wood floor sanding runs strip a lot of dirt as well as dust, and we don’t want it to become part of the filler mix. It’s probably best to reach medium sanding grit like P50 before filling, to make the floor both smoother and to ensure you have finer sawdust at your disposal.
A floating engineered floor is not directly nailed or glued to the subfloor. It will move constantly, especially if it has been badly laid, which is often the case. There is little point in filling every gap in such a floor because it won’t hold - the best option is to only deal with the larger gaps.
Parquets have relatively minor space between blocks as long as they have been laid properly. Smaller gaps require finer sawdust, which can be received mainly from sanding with higher grits. Other than that, the process goes pretty much the same as it does with the other floor types.
Frequently Asked Questions About Gap Filling With Saw Dust & Clear Resin
What is sawdust and resin gap filling?
This method mixes fine sawdust from your floor with a clear resin to create a filler that perfectly matches your wood’s colour and texture. It’s ideal for small to medium-sized gaps.
How durable is resin and sawdust gap filling?
When applied correctly, it provides a strong, long-lasting solution for stable floors. However, on older floors with movement, larger gaps may reopen over time and require alternative methods like wooden slivers.
Will the filled gaps be visible after finishing?
Because the filler is made with your floor’s sawdust, the colour match is excellent. Once sealed with oil or lacquer, the filled areas blend almost seamlessly with the boards.
Can resin gap filling fix draughty floors?
Yes — this method significantly reduces draughts and prevents dirt buildup between boards, making your floors more comfortable and easier to maintain.
Is resin gap filling suitable for parquet floors?
Yes — resin and sawdust filling works well for parquet as it keeps the patterns tight and stable, though only small to medium gaps can be treated effectively with this method.
How long does it take for the filler to dry?
The resin hardens within 30 minutes to an hour, allowing sanding and finishing to continue the same day. This makes it a fast and efficient repair solution.