Looking for a Floor Sanding Company in Ealing?
We are a leading floor restoration company serving Ealing and the surrounding areas. We specialise in professional, tailored, and affordable sanding services, delivered by our team of fully insured and friendly flooring experts. Our technicians possess the skills and knowledge to rejuvenate your precious wooden floors, ensuring they look as good as new.
We prioritise the protection of your property by using state-of-the-art dustless floor renovation equipment. Whether you need restoration for floorboards, parquet blocks, hardwood, or engineered wood floors, we’ve got you covered. We understand the lasting impact of our services, so we strive to deliver results that are both durable and stunning.
Our commitment to quality extends to the products we use. We only use top-tier wood floor sealants, including hard-wearing varnishes and durable hardwax oils from Bona, Loba, Osmo and Junckers. With FlooringFirst!, you can trust that your floors are in the best hands.

Our Range of Flooring Services in Ealing
- Floor Repairs - we handle partial refitting and local replacement of floorboards, parquet, engineered, and hardwood flooring. Our services also include repairs for water-damaged floors.
-
Skirting Boards, Beading, and Mouldings - installation of new skirting boards, and the replacement of beading and mouldings for a polished finish.
Wooden floors can transform the ambience of your home and play a crucial role in your business's image. At FlooringFirst!, we make it easy to achieve the perfect flooring solution. When you hire our experts, you can expect more than just beautifully finished wooden floors. You'll receive prompt, reliable service from a team that truly cares about your satisfaction. That's the FlooringFirst! promise.
Dust-free Floor Sanding and Restoration in Ealing
Our wood floor sanding services in Ealing are designed to restore and rejuvenate your aged and distressed real wood flooring. Each project is tailored to meet the specific requirements and preferences of our clients. We handle every stage of the process, ensuring a smooth and obstacle-free experience. If unexpected situations arise, we discuss plans with the owner before proceeding.
We focus on essential steps to achieve perfect results, giving even the most damaged and old wooden floors a chance for a new life. Our professional team in Ealing brings dedication, experience, and commitment to delivering stunning outcomes that last for decades.
Different types of real wood flooring require specific sanding approaches, and we are skilled in handling all of them with care. We use cutting-edge equipment to deliver top-notch results while minimising disruption to your home or business. Additionally, we use premium-quality sealing and maintenance products from world-renowned manufacturers, ensuring long-lasting results.
Comprehensive Floor Sanding Services in Ealing

Our wood floor sanding services in Ealing include a no-obligation site visit and a detailed quotation, along with expert advice on floor sealing products and maintenance. When you choose FlooringFirst! in Ealing, you receive meticulous service and outstanding customer care, available seven days a week. All our services are backed by our Floor Service Guarantee and comprehensive Public & Treatment Risk Insurance.
By hiring our wood floor sanding company, you ensure a mess-free and stress-free restoration process for your beloved wooden flooring. Each project begins with a free inspection of your floor's condition. Once our team assesses the floor in detail and determines the necessary steps for the best results, they proceed with the restoration work.
Expert Parquet Restoration Services in Ealing
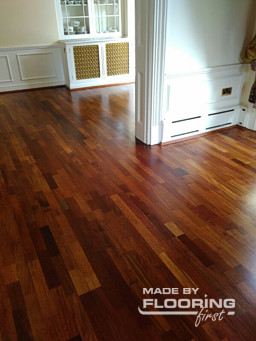
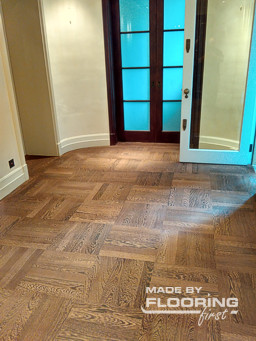
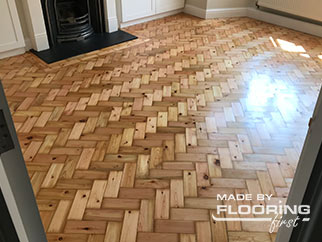
Parquet restoration is one of the most challenging services due to the intricate patterns that require precise handling to avoid damaging the wood. Our experienced team in Ealing uses advanced equipment to ensure every detail is meticulously sanded and finished.
We guarantee:
- Minimal disruption and mess
- Use of high-quality finishing products
- Long-lasting results
- Competitive pricing
With years of experience, our services are tailored to both domestic and commercial needs, offering flexible scheduling, including weekends and outside business hours. Trust us for professional, detailed, and reliable parquet restoration.
Professional Floor Repair Services in Ealing

Wood floors can suffer from various types of damage, but our floor repair team in Ealing is here to restore them to their former glory. Whether your floor has minor scratches or major imperfections, we can help.
Our services include:
- Repairing scratches, dents, gaps, marks, stains, and damaged floorboards
- Fixing loose or broken floorboards, nails, and screws
- Addressing issues like cupping and ballooning due to moisture and humidity
- Ensuring subfloor integrity for lasting results
With extensive experience and advanced techniques, we deliver top-notch results tailored to your floor's needs. Our commitment to customer satisfaction, attention to detail, and professional service make us the best choice for floor repair in Ealing.
Premium Finishes for Floor Restoration in Ealing
Experience the natural beauty of your wood floors enhanced by our premium finishes. Whether it's a full restoration or a refinishing project in Ealing, we have the expertise and products for stunning results.
Our finishes include:
- Bona Mega Lacquer: Quick-drying, water-based option available in extra-matt, matt, satin, or gloss finishes for diverse preferences.
- Bona Traffic HD Lacquer: Durable option for heavy foot traffic areas, with anti-slip variants for commercial settings.
- Junckers Floor Lacquers: Known for quick-drying properties and extra durability, ideal for commercial-grade applications.
- Specialised Primers: Enhance adhesion and wood characteristics while ensuring fast drying times.
- Loba WS Fusion 2K Lacquer: Two-component, waterborne finish providing exceptional durability and wear resistance.
Our floor sanding services epitomise exceptional craftsmanship, delivering breathtaking and long-lasting transformations for your home or business. Contact us at 020 88309782 to schedule your floor sanding appointment.


What Our Clients from Ealing Say About Us
“Very good job from the crew. Would definitely use your services again in the future. Thanks.”
Mr. H. Jondo, from Ealing, W5
“The work was carried out with care and enormous attention to detail. The workers were considerate and very pleasant. What more could you ask?”
Mr. G. Hutthings, from Ealing, W5
“Excellent and courteous service.”
Mrs. B. Jermyn, from Ealing, W13
“
Very satisfied.
”
Mr. C. Enskat, from Ealing, W3
“
These are two very conscientiousand hard working people
”
Mr.C. Vargas, from Ealing, W5 4SA
“Just a note to say how very pleased we were with the work carried out by Flooring First in our bedroom.
We were impressed from first to last with the professionalism shown by all your employees. Nothing was too much trouble, Sergei took the time to explain the process and the alternatives when we initially
asked for a quote. Both he and Eric, especially, who did the actual job, talked us through what they thought would be best for us and then went on to do an absolutely brilliant job on our bedroom floor.
We could not be more pleased with the result. We could not be more thrilled.
Thank you”
Mr. P. Jennings, from West Ealing, W13 9TF
“Really good workers. I am very very happy with the finish. Excellent job!”
Mr. L. Besse, from Ealing, W5 1NF
Floor Care Tips and Advice:
Find Our More on Sanding in Ealing
Local Project: Restoration Of The Parquet Flooring In St. Catherine's Church in Ealing
This is an interesting case explaining the renovation process of the old parquet flooring in St. Catherine’s Church. There are some interesting things to know about this project, first the clients complained that the whole flooring construction was literally moving. Except that the floor was laid from two different wood species, which is making its look so attractive. When the church was renovated in 1915 they have installed the first half of the flooring, as can you see on the photos, with lighter wood specie. Then 40 years later during another refurbishing process in 1955 was installed the rest of the floor with parquet blocks cut from Mahogany, which is much darker. This is the living proof for the durability and the longevity of the real wood flooring. Even after decades of high foot traffic, the original look of the wood can be restored.
First, our team had to fix the major problems. To deal with the floating floor, we had to remove, clean and refit every single parquet block. This process also included replacing some of the damaged blocks. Once the whole structure was stable again we could start with the actual restoration job. The first step was to strip off the old finish in few rows with a belt sander. When we have to work in historical landmarks such as churches, usually there are old wooden furnishes, timber side panels and ceilings with a specific authentic look, achieved due to the passage of the time. The owners must be warned that sanding will reveal the original colour of the wood, which will be much brighter and the flooring might lose its patina. The results of our hard work are remarkable and we successfully kept the charm of this century-old parquet flooring.
After the surface of the flooring was smooth and levelled, we’ve used the saw-dust remains from the sanding and mixed them with resin filler to fill the gaps between the parquet blocks. This service made the whole construction more solid and stable. The next step was to polish the surface one more time, so it can be perfectly smooth before the application of the finishing product.
The last part of the restoration job was to apply a protective sealant. In this case, our team used ‘Junckers HP Commercial’ which is hardwearing water-based lacquer. The sheen preferred from the owners was matt.
Local Project: Restoration Of Floorboards and Stairs in Ealing
A common case in our practice are the damaged wooden floors in newly bought houses. Sometimes their condition seems so bad, that our clients think that the only possible solution is replacement with new flooring. One of the main advantages of the wooden floors is that they could be refinished. Few millimetres under the damaged surface, the timber might be in perfect condition, which means the flooring has the potential to shine again like it is brand new. Our surveyor inspects the thickness of the boards and if it allows beign treated with belt sander we schedule the job.
The work can start after the area is clean of any furniture. Usually, this is the point where the damaged boards are replaced, luckily in this property it was unnecessary. The first stage of the refinishing process is the sanding – this process includes removing the layer of old finish. This happens in few rows with changes in the density of the sandpaper grit between them. The size goes from lower to higher: from 24 up to 60 or even 80 grit. After the surface is smooth and even our team could apply the stain. The preference of our clients was a distinctive colour, that matched well with these mature floorboards. After the stain was applied equally, there was no trace of the previous dull appearance. Followed by three coats of commercial grade finish, the floor will look like this for a long time. The lacquer our team used to seal the flooring was 'Junckers HP Commercial'. We've followed the same step by step process with the old stairs. As you can see from the photos below, their condition was bad, especially in the area that suffered from the heavy footfall.
Local Project: Wood floor repair, sanding and gap filling in Ealing
What was the job?
Real wood floors are a great choice for every home and commercial space, probably the best choice. Due to their beauty and attractiveness, the variety of styles and colours, amazing durability and hard-wearing power, real wood floors are a highly sought-after and well-loved choice. However, no matter how high-quality and amazing real wood floors are, they all require a good maintenance routine and more in-depth professional services every now and then. When maintained properly, these floors can last for up to a whole century and still look amazing. For this recent project, our job was to take care of a beautiful hardwood floor in need of some repair and restoration jobs, sanding and refinishing, and gap filling.
What we did?
We started the floor renovation project by inspecting the condition of the floor at the moment. This allows us to find out more about how we can improve the condition of the floor and what are repair jobs have to be done, if any. In this case, our professionals concluded the need for more in-depth renovation and restoration jobs. We have started by refitting some of the floorboards. Over time and due to the impact of moisture, humidity and temperature fluctuations, some of the floorboards may get loose, which affects the structural stability and durability of the floor while posing some risks of more serious damage. If the floorboards are in good condition and they do not require replacement, we simply refit them back in their place.
Next, we continue with the first round of sanding. By sanding the floor we are stripping off the top layer of the floor along with the old finish, dirt build-ups and surface issues. The surface is left smooth and free of issues and imperfections. Meanwhile, we can take care of the gaps between the floorboards that also often appear over time and are taken care of with the help of a professional gap filling service. Finer and smaller gaps are filled with a mix of resin and wood dust collected during the sanding process, wider and larger gaps are filled with pine slivers. Gap filling improves the stability and insulation properties of the floor. Next, we continue with more sanding. Once sanding is done and the surface of the floor is perfectly smooth, even and uniform, we finish things up with the application of a high-quality lacquer finish that is meant to visually improve the floor, while protecting it from surface issues for a few years.
The Bottom Line
Real wood floors are a great investment of your hard-earned money because when maintained regularly and properly, they last for up to a century and you will enjoy them for many years. In order to make sure that your wooden floor is not only going to survive the century but also look and feel stunning, make sure to always hire professional help for the more in-depth maintenance treatments, as well as for when the floor is in need of repair and restoration.