Back to Wood Floor Fitting
How to Install LVP Flooring Over a Concrete Subfloor
 Can you install LVP on concrete? Yes, Luxury Vinyl Plank (LVP) flooring is an excellent choice for installation over concrete subfloors. Whether you're renovating a basement, ground-floor flat, or modern new-build, LVP offers a durable, moisture-resistant solution that pairs well with the properties of concrete. Thanks to its layered construction and resilient core, it adapts well to the cool, hard nature of concrete surfaces.
One of the biggest advantages of LVP is its flexibility in installation methods. You can choose between:
- Glue-down LVP – ideal for high-traffic areas or commercial spaces where maximum stability is needed.
- Click-lock floating LVP – perfect for DIY projects, it locks together and "floats" above the concrete with an underlay beneath.
However, despite its compatibility, it's essential to prepare the concrete properly, checking moisture levels, ensuring levelness, and using the right underlay or adhesive depending on the chosen method. When done right, LVP over concrete provides a warm, stylish, and long-lasting floor that handles the UK’s varied indoor climates extremely well.
Tools & Materials You’ll Need
Before you start your LVP installation over a concrete subfloor, gather all the necessary tools and materials to ensure a smooth process. The specific items you'll need may vary slightly depending on whether you're going for a glue-down installation or a floating click-lock system, but here's a comprehensive list to get you started:
- LVP flooring – make sure to order 10% extra to account for cuts and waste
- Underlay – essential for floating floors to add cushioning and sound insulation
- Moisture barrier – such as a damp-proof membrane (DPM) or moisture-resistant underlay
- Adhesive – only needed for glue-down LVP (consult the manufacturer's recommendation)
- Utility knife – for cutting planks to fit edges and corners
- Spacers – to maintain expansion gaps around walls and fixtures
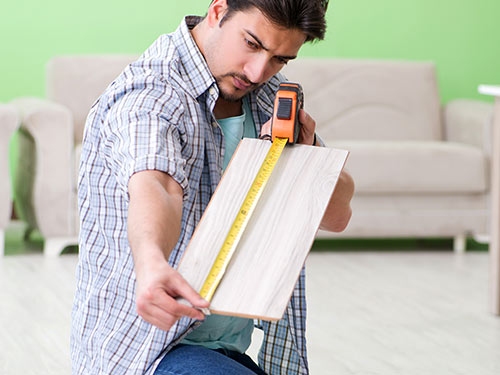
- Measuring tape & straight edge – for accurate cuts and layout
- Chalk line – for snapping layout reference lines on the floor
- Floor roller – for pressing down glue-down LVP after installation
- Knee pads – especially helpful for larger floor areas
Having these tools ready before you begin will save you time and help avoid common installation delays. If you're unsure about which materials are best for your subfloor condition, get in touch with our team for expert advice or a site survey.
Step 1: Inspect and Prepare the Concrete
A successful LVP installation starts with proper subfloor preparation. Concrete may appear solid, but it must meet specific criteria before laying any flooring on top. Skipping this step can lead to movement, adhesive failure, or long-term damage to your new LVP flooring.
Here’s how to prepare your concrete subfloor:
- Check for moisture – Use a moisture meter or calcium chloride test to ensure the subfloor is dry. Moisture content should be within the limits set by the LVP manufacturer (typically under 75% RH).
- Assess for cracks or damage – Fill minor cracks with patching compound. For large cracks or uneven spots, use a self-levelling compound to create a flat surface.
- Ensure the subfloor is level – LVP requires a level surface. No more than 3mm deviation over 1 metre is recommended.
- Clean thoroughly – Sweep and vacuum to remove dust, debris, grease, or any residue that could interfere with adhesion or underlay placement.
At FlooringFirst!, our professional installers always begin with a full site assessment to check for moisture, flatness, and compatibility. This ensures your LVP floor performs beautifully and lasts for years to come.
Step 2: Use a Moisture Barrier (If Required)
Concrete subfloors — especially those at or below ground level — are prone to absorbing moisture from the surrounding environment. This can cause damage to your LVP if not properly addressed. That’s where a moisture barrier comes in.
When do you need a moisture barrier?
- For glue-down LVP: A damp-proof membrane (DPM) or moisture-blocking primer is strongly recommended.
- For floating LVP: Many underlays now include built-in moisture protection, but always verify compatibility with the flooring brand.
- For basements and ground floors: Always assume a barrier is needed unless a professional moisture test confirms otherwise.
Popular options include 1000-gauge plastic sheeting, 2-part epoxy sealers, or moisture-resistant underlays. Installing the right barrier not only extends your floor’s life but also improves insulation and soundproofing.
If you’re unsure whether your installation needs a barrier, speak with our experts or book a free site survey for peace of mind before starting.
Step 3: Acclimate Your LVP Flooring
 Before installation begins, it's essential to acclimate your LVP flooring to the room’s conditions. Luxury vinyl planks may expand or contract slightly based on the temperature and humidity, and skipping this step could lead to gapping or buckling later on.
How to properly acclimate your flooring:
- Leave the planks in the room of installation for at least 48 hours before fitting.
- Keep them flat in their boxes or stacked evenly — don’t lean them against the wall.
- Maintain stable room conditions — ideally between 18°C and 27°C, with relative humidity between 35% and 65%.
This step is especially important in UK homes where seasonal changes or new builds can create unstable conditions. Taking time to acclimate your planks ensures a smoother installation and prevents post-installation issues. For more guidance, see our DIY laminate floor fitting tips.
Step 4: Installation Techniques
There are two main methods for installing LVP over a concrete subfloor: floating click-lock and glue-down installation. Your choice will depend on the product type, subfloor condition, and intended use of the space.
Floating Click-Lock Installation
This is the most common method for DIY-friendly installations:
- Lay an underlay over the concrete for cushioning, soundproofing, and added moisture resistance.
- Begin at a straight wall, laying planks from left to right with spacers to maintain a 10mm expansion gap around all edges.
- Click planks together at the short edge first, then angle the next row into place.
- Trim edges using a utility knife or jigsaw to fit around door frames and irregular spaces.
Glue-Down Installation
Preferred in high-traffic areas or commercial settings where extra stability is needed:
- Apply pressure-sensitive adhesive or a full-spread glue (depending on the product) evenly across the subfloor using a trowel.
- Lay the planks carefully onto the adhesive, pressing them down and ensuring full contact.
- Use a floor roller to remove air bubbles and strengthen adhesion — this is crucial for long-term durability.
- Allow the glue to cure as per manufacturer's instructions before walking on the floor or placing furniture.
Whichever method you choose, be sure to follow the manufacturer’s guidelines for your specific LVP product. These guidelines may include subfloor tolerance, recommended adhesives, and curing times — all of which are essential for warranty protection and long-term performance.
Step 5: Finishing Touches
Once the flooring is laid, completing the installation with clean and secure finishing touches will give your room a polished look and help maintain long-term stability.
- Install skirting boards or beading to cover the expansion gaps along the walls. If you’re reusing existing skirting, quarter-round mouldings (scotia) can bridge the gap without removing them.
- Fit thresholds and door trims where your new LVP floor meets other flooring types. These transition strips allow for expansion and keep different floor levels safe and smooth.
- Roll the floor (for glue-down installations) using a 45–60 kg roller to ensure proper bonding and eliminate air pockets. This step is essential to avoid lifting or bubbling over time.
Before replacing furniture, allow adequate time for the adhesive to cure fully if you opted for a glue-down installation. Most manufacturers recommend waiting 24–48 hours. For more details, visit our floor installation service overview or contact our team for expert fitting help across London.
Common Mistakes to Avoid
Even though LVP is known for its ease of installation, mistakes during prep or fitting can lead to long-term issues. Here are the most common errors and how to avoid them:
- Skipping moisture testing – Never assume a concrete subfloor is dry. Failing to check moisture levels can lead to warping, mould growth, or adhesive failure. Use a reliable moisture meter or hire professionals for testing.
- Incorrect subfloor preparation – Uneven surfaces, cracks, or dust can all interfere with installation. Level, clean, and dry the concrete before laying planks or applying adhesive.
- Forgetting expansion gaps – If using floating LVP, always leave a 10mm expansion gap around all edges of the room. This prevents buckling when the flooring expands.
- Using the wrong adhesive – For glue-down installations, always follow the LVP manufacturer’s recommendation. The wrong type can lead to weak adhesion and bubbling.
- Failing to acclimate flooring – Skipping the acclimatisation process can result in planks expanding or contracting after installation.
Want to avoid these headaches? Let our LVT floor fitting experts handle the job with precision and care, ensuring flawless results every time.
Is Professional Installation Worth It?
 While LVP flooring is designed for user-friendly installation, it’s important to weigh the pros and cons of going the DIY route versus hiring professionals, especially when working with concrete subfloors.
DIY installation is often suitable if:
- You’re using a floating click-lock system
- The subfloor is level and moisture-free
- You have time, basic tools, and attention to detail
However, professional installation is highly recommended when:
- The concrete subfloor is cracked, uneven, or requires moisture control
- You’re using a glue-down LVP system
- The area is large, commercial, or complex (e.g. irregular shapes, multiple rooms)
At FlooringFirst!, we have over 20 years of experience installing LVT and LVP across London properties — from modern apartments to retail and hospitality spaces. We handle everything from site surveys and product selection to subfloor preparation and perfect finishing. Let us save you time, effort, and costly mistakes.
Conclusion
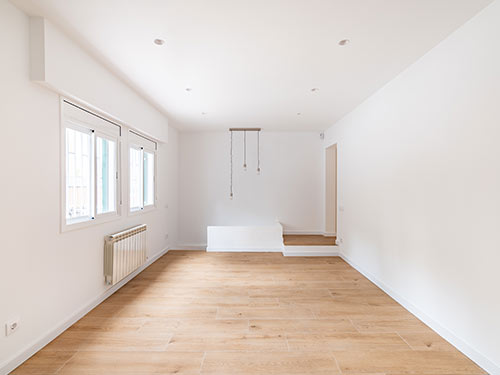
Installing Luxury Vinyl Plank (LVP) over a concrete subfloor is a smart, durable, and stylish choice for many UK homes. Whether you're renovating a basement, updating your kitchen, or modernising a high-traffic hallway, LVP offers the perfect blend of aesthetics and performance, especially when installed correctly.
With the right preparation, moisture control, and installation method, your new floor can last for decades with minimal upkeep. If you’re confident in your DIY skills, floating click-lock planks make a great weekend project. But for complex layouts or glue-down systems, it’s worth calling in a professional.
Need expert help? Explore our LVT floor installation service in London or contact us for a free consultation today. Let our team of professionals ensure your floor is built to last — and looks stunning in the process.