Back to Wood Floor Fitting
How to Lay Laminate Flooring: A Complete DIY Guide
Laminate flooring is a popular choice for homeowners seeking an affordable, stylish, and durable surface that mimics real wood. With its user-friendly click-lock systems and wide variety of finishes, it’s also one of the easiest floors to install as a DIY project.
In this guide, you’ll learn how to prepare your subfloor, choose the right tools, and install laminate flooring step by step. We’ll also include professional tips and tricks to help you avoid common mistakes and get a smooth, professional-looking result that lasts.
If you prefer to have the job done by experts, check out our professional laminate floor fitting service for fast, hassle-free installation.
Tools and Materials Needed
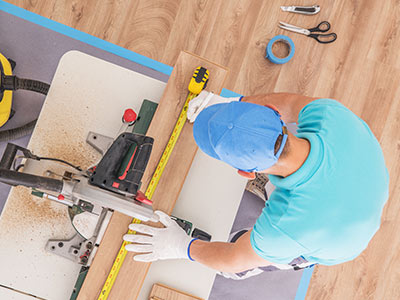
Before you begin, make sure you have all the necessary tools and materials on hand. Being properly prepared will save time and help you achieve a smooth and professional finish.
- Laminate flooring planks
- Underlay (foam, acoustic, or moisture barrier type, depending on the subfloor)
- Measuring tape
- Pencil and ruler
- Spirit level
- Utility knife
- Jigsaw or circular saw (for trimming planks)
- Spacers (for expansion gaps)
- Pull bar and tapping block
- Rubber mallet
- Moisture meter (recommended for subfloor checks)
- Vacuum cleaner or broom (to clean the subfloor)
Optional but useful tools include a knee pad for comfort, a combination square for accuracy, and a laminate cutter for cleaner cuts with less mess.
Subfloor Preparation
Preparing the subfloor is one of the most important steps in achieving a successful laminate floor installation. A clean, dry, and level surface ensures your flooring fits correctly, lasts longer, and looks great.
Follow these steps to prepare the area properly:
- Clear the Room: Remove all furniture, old flooring (if necessary), and obstacles. Make sure the floor is free of nails, staples, and debris.
- Clean Thoroughly: Vacuum or sweep the subfloor to remove all dust and particles. Any dirt left behind can interfere with the underlay or laminate locking system.
- Check for Moisture: Use a moisture meter to ensure the subfloor is within safe humidity levels (usually below 12%). For concrete subfloors, use a damp-proof membrane if required.
- Level the Surface: Use a spirit level to check for dips or high spots. Fill low areas with a self-levelling compound and sand down any high points. The surface should be level within 3mm over a 1m span.
- Lay the Underlay: Choose an underlay suitable for your floor type (acoustic, moisture-resistant, or thermal) and roll it out across the entire surface, ensuring there are no overlaps unless the product allows it. Tape the seams if needed.
Taking the time to get this step right will prevent creaks, unevenness, and premature damage to your laminate flooring.
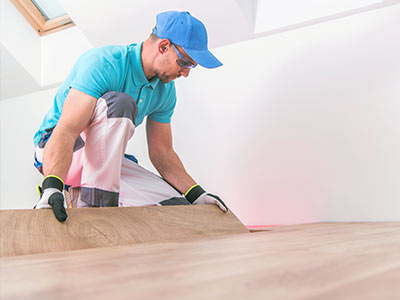
Laminate Flooring Installation – Step by Step
Once your subfloor is prepped and underlay installed, you're ready to begin laying your laminate flooring. Follow these steps for a smooth installation:
1. Acclimatise the Flooring
Let the laminate planks sit in the room where they will be installed for at least 48 hours. This allows the material to adapt to the room's temperature and humidity, preventing future expansion or contraction.
2. Plan Your Layout
Measure the room and plan your layout before cutting any boards. Start along the longest, straightest wall and work from left to right. If your room is irregular or includes obstacles, dry-lay the first few rows without clicking them in to visualise how the planks will fit.
3. Install the First Row

Place spacers along the wall to maintain the necessary expansion gap (usually 10–12mm). Lay the first plank with the tongue side facing the wall. Connect each subsequent plank by angling and locking them together. Cut the final plank in the row to fit using a jigsaw or laminate cutter.
4. Stagger the Joints
Start the second row with the leftover piece from the previous cut to create a staggered pattern. Ensure that joints between rows are offset by at least 30cm for structural strength and visual balance.
5. Continue Laying the Floor
Use a tapping block and mallet to gently secure each plank into place without damaging the edges. Maintain consistent spacing around all walls and obstacles using spacers.
6. Cut to Fit Around Obstacles
For door frames, pipes, or corners, measure carefully and mark your cuts before trimming planks. Use a jigsaw or hole saw for precision. Undercut door jambs so the laminate can slide underneath neatly.
7. Finish the Final Row
You’ll likely need to trim the final row lengthwise to fit. Measure the space, subtract the expansion gap, and cut accordingly. Use a pull bar to lock the last planks in place against the wall.
Pro Tips for a Flawless Finish
If you want your laminate floor to look like it was installed by a professional, these tips and tricks will help you achieve the best possible results:
- Lay planks parallel to natural light sources: This reduces the appearance of seams and creates a cleaner, more spacious look in the room.
- Double-check each row: Make sure joints are fully locked and edges are flush before moving on to the next row. Small gaps can create long-term issues.
- Use offcuts smartly: Start new rows with leftover pieces from the previous one—as long as they are at least 30 cm long—to minimise waste and maintain the staggered pattern.
- Don’t hammer the edges directly: Always use a tapping block to avoid damaging the tongue or groove of the planks.
- Undercut door frames instead of cutting planks around them: This provides a cleaner look and better expansion control.
By combining accuracy with patience, you can ensure your floor not only looks stunning but also lasts for many years without lifting, creaking, or shifting.
Finishing Touches and Aftercare
Once your laminate flooring is fully installed, it's time to take care of the final details and start maintaining it properly to preserve its beauty and performance.
Remove Spacers and Install Skirting
After the floor is complete, carefully remove all spacers used to maintain expansion gaps. Install skirting boards or beading to cover the gaps around the perimeter. Never nail or glue skirting into the laminate itself—it must remain a floating floor.
Clean the Floor Gently
Vacuum or sweep away any dust left from the installation. Then use a laminate-safe cleaner and a slightly damp mop to remove any marks. Avoid soaking the floor with water, as moisture can damage the joints over time.
Use Furniture Pads and Rugs
Protect the surface from scratches by adding felt pads under furniture legs. Area rugs in high-traffic zones such as hallways or entrances can also extend the life of the floor and prevent early wear.
Maintain the Expansion Gap
Make sure nothing heavy is pressing against the walls that could affect the floating mechanism. If you install kitchen units or heavy built-in furniture, do so over the underlay, not directly on the laminate surface.
Regular care and attention will help your new laminate floor stay beautiful and functional for years to come.
Common Mistakes to Avoid
Even though laminate flooring is DIY-friendly, a few common errors can result in a poor finish or reduce the floor’s lifespan. Here are some mistakes to avoid when laying laminate flooring:
Skipping Subfloor Preparation
Installing laminate over an uneven or dirty subfloor can cause creaking, movement, or visible gaps. Always level and clean the subfloor before installation.
Not Leaving an Expansion Gap
Laminate needs room to expand and contract with changes in humidity. Forgetting the expansion gap can lead to buckling or lifting along the edges.
Forgetting to Acclimatise the Boards
Installing boards immediately after purchase, without allowing them to adjust to the room’s climate, may cause the floor to shift or separate over time.
Improper Staggering of Planks
Aligning plank joints too closely between rows weakens the structure and ruins the natural look. Always stagger joints by at least 30cm.
Using Too Much Force
Hitting planks too hard with a mallet—or not using a tapping block—can damage the click-lock system. Be gentle and use the right tools to avoid splitting or chipping.
Frequently Asked Questions
Can I install laminate flooring over existing tiles or vinyl?
Yes, as long as the existing surface is flat, dry, and in good condition. Avoid installing over carpet or uneven floors. Always lay an underlay between the existing floor and the laminate planks.
Is an underlay necessary for laminate flooring?
Yes. Underlay provides sound insulation, moisture protection, and added comfort underfoot. Some laminate flooring may come with pre-attached underlay, but in most cases, a separate one is recommended.
Can I install laminate in kitchens or bathrooms?
You can install laminate in kitchens with care, but bathrooms are not recommended due to high moisture levels. Use waterproof LVT flooring for wet areas instead.
How long does it take to lay laminate flooring?
For a medium-sized room, DIY installation usually takes one day or less. Prep time, cutting, and obstacle work may add a few hours. Professional installation may be even faster.
How do I clean and maintain laminate floors?
Use a vacuum or soft broom for daily cleaning. For deeper cleaning, use a laminate-safe cleaner and a well-wrung, damp mop. Avoid excessive water or steam mops to prevent damage.