Back to Wood Floor Fitting
How to Install LVP and Vinyl Plank Flooring: Step-by-Step DIY Guide
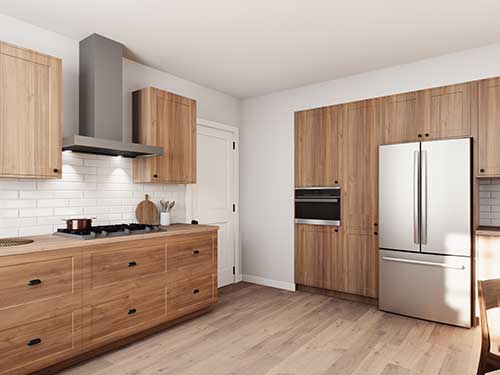
Luxury Vinyl Plank (LVP) and vinyl plank flooring are increasingly popular choices for both homeowners and businesses. Known for their durability, water resistance, and stylish designs, they offer the look of hardwood without the high maintenance or cost. Whether you're planning a DIY installation or simply want to understand the process better, this guide will walk you through every essential step—ensuring your vinyl plank flooring is installed correctly, efficiently, and with a flawless finish.
This step-by-step guide covers everything from preparation and layout planning to underlay installation and final finishing touches. Whether you're installing LVP on a concrete subfloor or a wooden base, we’ve got you covered with clear, professional advice.
What You Need to Get Started
Before starting your vinyl plank flooring installation, make sure you have the right tools and materials ready. Choosing between a floating (click-lock) and glue-down installation will slightly change the items you need, so we’ve included both below.
Tools and Materials
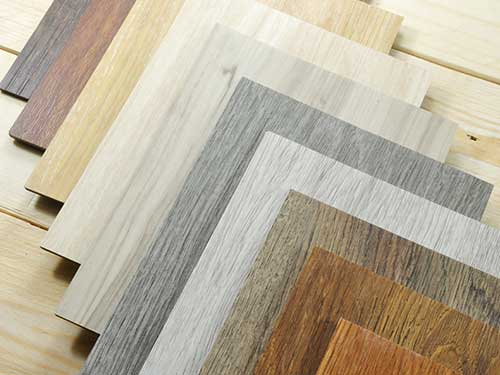
- Luxury vinyl planks (LVP) or vinyl flooring boards
- Underlay (if required by your product)
- Utility knife or vinyl cutter
- Measuring tape and ruler
- Spacers (for expansion gaps)
- Pencil and chalk line
- Rubber mallet and tapping block
- Jigsaw or fine-tooth saw (for cutting shapes around obstacles)
- Spirit level and straight edge
- Adhesive (for glue-down installations only)
- Knee pads (for comfort during installation)
With everything in place, you're ready to begin preparing the subfloor—arguably the most important part of the installation process.
Step 1: Prepare Your Subfloor Properly
A clean, level, and dry subfloor is crucial for the success and longevity of your vinyl plank installation. Skipping this step may lead to bumps, gaps, or premature wear. Whether you're installing over concrete or timber, preparation is key.
For Concrete Subfloors
- Ensure the concrete is fully cured and completely dry—ideally under 75% relative humidity (RH).
- Check for level with a spirit level. If uneven, use a self-levelling compound.
- Apply a damp-proof membrane (DPM) if moisture is a concern.
- Remove dust and debris thoroughly before laying underlay or adhesive.
For Timber or Wooden Subfloors
- Ensure the boards are securely fixed and do not creak or shift.
- Replace damaged or rotting boards before installation.
- Sand any high spots to achieve a level surface.
- Vacuum and clean the area to remove any remaining debris or dust.
Once your subfloor is smooth and stable, you’re ready to acclimate your flooring planks before fitting.
Step 2: Acclimate the Planks
Before installation, it's essential to let your vinyl planks adjust to the temperature and humidity of the room. This helps prevent expansion or contraction after fitting, which can cause gaps or buckling.
How to acclimate your flooring:
- Bring the boxes of vinyl planks into the room where they will be installed.
- Lay them flat and unopened in the space for at least 48 hours.
- Make sure the room temperature stays between 18°C and 27°C during this period.
- Relative humidity should remain between 35% and 65%.
Acclimating your vinyl planks ensures a more stable and lasting floor. Once this is done, you're ready to plan your layout for a neat and symmetrical installation.
Step 3: Plan Your Layout
Taking the time to plan your layout will ensure a more professional finish and help reduce waste. The goal is to avoid very thin plank cuts along walls and ensure the joints are staggered properly for both aesthetics and structural stability.
Key Layout Tips
- Measure the room and divide the width by the width of a plank to see how many full rows you’ll need.
- Adjust the first row if needed to avoid having a very narrow strip at the opposite wall—split the difference between the first and last row.
- Stagger joints by at least 15–20 cm between rows to strengthen the floor and enhance the look.
- Decide on direction: For a natural flow, lay the planks parallel to the longest wall or toward the main light source.
Use a chalk line to mark a straight starting line across the room. Begin from one corner and work row by row, ensuring your first row is perfectly straight—it sets the foundation for the entire floor.
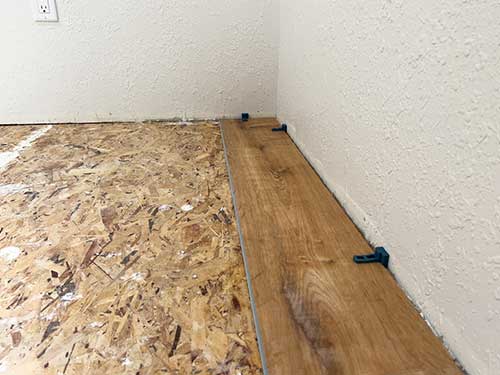
Step 4: Install the Underlay (If Needed)
Whether or not you need underlay depends on the type of vinyl plank you're installing and the subfloor conditions. Many click-lock LVP floors come with pre-attached underlay, while others require a separate layer for cushioning, insulation, or moisture protection.
When to Use Underlay
- If the vinyl planks do not have built-in underlay.
- When installing over cold or uneven concrete floors for added comfort and sound insulation.
- To act as a moisture barrier in rooms like kitchens, utility areas, or basements.
How to Lay It
- Roll out the underlay in the same direction you plan to lay the planks.
- Make sure the pieces are laid edge-to-edge without overlapping.
- Use tape to secure seams if recommended by the manufacturer.
Once the underlay is down, you’re ready to begin laying the actual planks. Start in one corner of the room and follow your planned layout for best results.
Step 5: Begin Laying the Flooring
Now it's time for the most rewarding part of the project—laying your vinyl planks. Depending on the product you've chosen, you’ll use either the floating click-lock system or a glue-down method. Most DIYers prefer click-lock for its ease and speed.
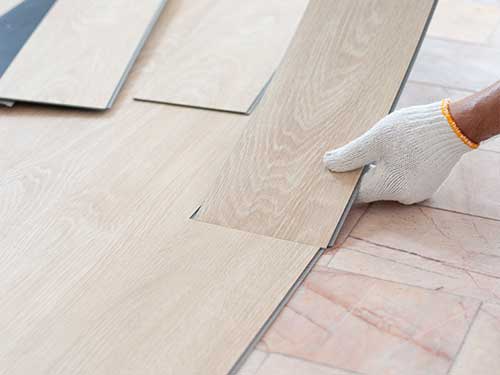
Floating Click-Lock Installation
- Start from the left-hand corner of the room, placing the first plank with the tongue side facing the wall.
- Use spacers to leave a 5–10 mm expansion gap between the plank and the wall.
- Connect the second plank by angling and clicking the tongue into the groove of the first plank.
- Continue across the first row, cutting the final plank as needed to fit.
- Begin the second row using the cut-off piece from the previous row (if longer than 20 cm) to maintain staggered joints.
- Use a tapping block and rubber mallet to ensure tight joints without damaging the planks.
Glue-Down Installation (Optional)
- Spread adhesive evenly over the subfloor using a notched trowel.
- Lay planks carefully into the adhesive, pressing firmly.
- Roll the floor with a flooring roller to ensure full bonding and remove air pockets.
- Only apply enough adhesive for the section you can complete in 30–45 minutes.
Work row by row, checking alignment as you go. Always stagger end joints and make sure each plank is locked or bonded securely before moving on.
Step 6: Cutting Planks to Fit
As you approach walls, door frames, or fixed features like radiators and pipes, you’ll need to make accurate cuts to ensure a clean and professional finish. Fortunately, LVP and vinyl plank flooring are easy to cut with simple tools.
How to Make Straight Cuts
- Measure the remaining space with a tape measure, allowing for the expansion gap.
- Mark the plank using a pencil and a straight edge or ruler.
- Score along the line with a utility knife, then bend and snap the plank cleanly.
Cutting Around Obstacles
- Use a jigsaw or fine-tooth handsaw for curved or detailed cuts, such as around radiator pipes or toilet bases.
- Always double-check your measurements before cutting to avoid waste.
- For tricky shapes, create a cardboard template first, then trace it onto the plank.
Clean, precise cuts will make all the difference in how polished your installation looks. Once the planks are in place, the final steps are to leave expansion gaps and finish with trims and skirting.
Step 7: Leave Expansion Gaps
Even though LVP and vinyl planks are more dimensionally stable than hardwood, they still expand and contract slightly with temperature and humidity changes. Expansion gaps allow this movement to occur without causing the planks to buckle or lift.
How Much Space to Leave
- Leave a 5–10 mm gap around all walls, pillars, door frames, and other fixed objects.
- Use spacers between the planks and the wall to maintain consistent spacing during installation.
- Never install planks tightly against the edge—this can cause long-term damage.
These gaps will later be covered by skirting boards or beading, so they won’t affect the appearance of your floor. Once your entire floor is laid, it’s time to finish off the edges for a clean, polished look.
Step 8: Install Trims and Skirting
With all vinyl planks in place and expansion gaps maintained, the final step is to add finishing touches that conceal the gaps and give your room a complete, seamless look. This includes skirting boards, scotia beading, and door threshold strips.
Finishing Options
- Skirting boards: Ideal if you’ve removed the original ones before installation. Nail or glue them to the wall, not to the floor.
- Scotia beading: Perfect if you’re keeping the existing skirting—install along the bottom edge to hide the expansion gap.
- Door thresholds: Use reducer strips or T-bars at transitions to other flooring types for a smooth, safe finish.
Avoid nailing or gluing any trims directly onto the vinyl flooring. The planks need room to expand and contract freely beneath the trims. Once installed, your floor will have a professionally finished appearance and be ready for use after a short settling period.
Step 9: Aftercare Tips
Once your vinyl plank flooring is installed, a little care will go a long way in preserving its appearance and durability. LVP is low-maintenance, but following the right aftercare routine ensures it stays in top condition for years to come.
Post-Installation Tips
- Wait at least 24 hours before placing heavy furniture on the floor—especially for glue-down installations.
- Use felt pads under furniture legs to avoid dents and scratches.
- Install doormats at entry points to reduce dirt and grit.
Regular Cleaning Advice
- Sweep or vacuum daily to remove dust and debris.
- Use a damp mop and a pH-neutral floor cleaner—never soak the floor or use abrasive products.
- Wipe up spills immediately to prevent staining or seepage into joins.
If properly maintained, your LVP or vinyl plank flooring will retain its look and resilience for many years. Simple steps like these can help avoid common issues such as edge curling or surface wear.
Common Mistakes to Avoid
Even with a clear plan and quality materials, small errors can lead to big issues in your vinyl flooring installation. Avoiding these common mistakes will help ensure your floor looks and performs perfectly for years to come.
Top Issues to Watch Out For
- Skipping subfloor preparation: Uneven or damp subfloors can cause planks to shift, lift, or wear unevenly.
- Not leaving expansion gaps: Failing to leave space around the perimeter can cause buckling or tenting as the floor expands.
- Incorrect acclimation: Installing planks too soon after delivery may result in gapping or movement after settling.
- Wrong cleaning products: Harsh chemicals or excess water can damage the protective surface of the planks.
For a more in-depth look at what to avoid, visit our full guide: Top 10 Vinyl Plank Flooring Mistakes to Avoid.
Conclusion: Confidently Install Your LVP or Vinyl Plank Floor
Installing LVP or vinyl plank flooring is a rewarding project that can dramatically transform the look and feel of any room. With the right tools, proper preparation, and attention to detail, you can achieve a professional-grade finish even as a DIYer. From subfloor checks to the final trim, each step plays a role in ensuring the durability, stability, and beauty of your new floor.
If you're unsure about any part of the process—or if you'd simply prefer guaranteed results—our experienced fitters are here to help. We offer expert LVT flooring installation across London, tailored to both residential and commercial properties.
Need professional help? Book a free site visit or contact our team for personalised advice and assistance. Let FlooringFirst! Take the hassle out of fitting and deliver results you’ll love for years.