Back to Wood Floor Fitting
Top 10 Vinyl Plank Flooring Installation Mistakes to Avoid
 Vinyl plank flooring has quickly become a favourite among homeowners and DIY enthusiasts due to its affordability, durability, and stylish finish. But despite its user-friendly design, first-time installers often make crucial mistakes that can affect both aesthetics and longevity.
If you’re planning to spruce up your floors with vinyl plank, here's a complete overview of the top 10 installation mistakes beginners make—along with expert advice on how to avoid them.
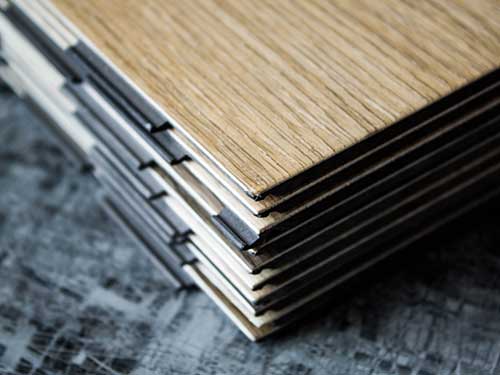
1. Skipping Acclimation of Vinyl Planks
A common mistake among beginners is installing vinyl planks immediately after unboxing them. However, vinyl flooring needs time to acclimate to the room’s temperature and humidity. Skipping this important step can lead to issues such as gapping, warping, or buckling.
Tips for proper acclimation:
- Leave the planks in the room where they'll be installed for at least 48 hours.
- Ensure the room temperature stays between 65°F and 85°F during this period to help the planks adjust properly.
Taking the time to acclimate your vinyl planks will result in a smoother, longer-lasting installation.
2. Not Preparing the Subfloor
A crucial mistake to avoid when installing vinyl plank flooring is neglecting the preparation of the subfloor. Vinyl planks require a smooth, clean, and flat surface to ensure proper installation and optimal performance. Installing over a dirty or uneven subfloor can lead to visible imperfections, poor adhesion, or premature wear.
Steps to properly prepare the subfloor:
- Clean the subfloor thoroughly, removing any dust, debris, and grease to ensure a clean surface for the planks to adhere to.
- Level the surface by using a leveling compound to fill in dips or address high spots. This ensures an even, smooth foundation for your vinyl planks.
Proper subfloor preparation is key to achieving a flawless, long-lasting installation.
3. Ignoring Underlayment Requirements
Underlayment plays a vital role in the performance and longevity of vinyl plank flooring. Some vinyl planks come with pre-attached underlayment, but many others require a separate layer. Underlayment helps with sound reduction, provides extra comfort, and acts as a barrier to moisture, especially on concrete subfloors.
Key underlayment tips:
- Always check the manufacturer’s guidelines to see if underlayment is needed or already included.
- Use a vapour barrier when installing over concrete subfloors to prevent moisture from seeping up and damaging the flooring.
Proper underlayment ensures the best installation and enhances the durability and comfort of your vinyl flooring.
4. Installing Without a Moisture Test
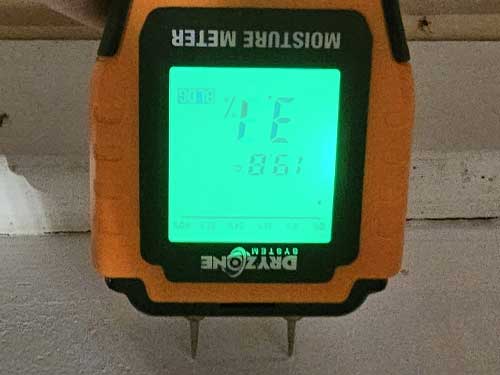 Moisture is one of the biggest threats to vinyl plank flooring, particularly when installing over concrete. If the subfloor has too much moisture, it can lead to warping, mould growth, and long-term damage to your flooring.
Moisture testing tips:
- Use a moisture meter or perform a calcium chloride test to measure the moisture levels of the subfloor.
- If moisture levels exceed manufacturer recommendations, install a moisture barrier to protect the flooring from future issues.
Testing and addressing moisture before installation ensures a stable, long-lasting floor.
5. Failing to Plan the Layout
Starting the installation without properly planning the layout can lead to uneven rows, unsightly thin strips along the edges, or even poor structural integrity. A little planning ahead can save you a lot of frustration and ensure a more professional-looking finish.
Layout planning tips:
- Dry run first: Lay out the planks without adhesive or locking them in place, using spacers to simulate the final arrangement. This allows you to check how the planks fit and make necessary adjustments.
- Stagger the seams: Arrange the planks so that the end seams are not aligned in adjacent rows. This not only improves the appearance but also enhances the overall strength and stability of the floor.
Proper layout planning makes a significant difference in both the aesthetics and durability of your vinyl plank flooring.
6. Forgetting Expansion Gaps
Vinyl flooring naturally expands and contracts with changes in temperature and humidity. If you forget to leave proper expansion gaps, the floor may buckle, shift, or even separate at the edges as it moves.
How to prevent this issue:
- Leave a 1/4-inch gap around the perimeter of the room and any fixed objects like cabinets or door frames. This allows the vinyl to expand and contract freely.
- Use spacers during installation to maintain consistent gaps, ensuring even expansion across the floor.
Proper expansion gaps are essential to prevent long-term damage and ensure the flooring remains stable.
7. Not Checking Plank Quality & Batch Numbers
Using vinyl planks from different batches can result in noticeable colour variations, inconsistent locking systems, or surface defects, which affect the overall appearance and performance of the floor.
How to prevent this issue:
- Purchase all planks from the same batch number to ensure uniform colour and texture.
- Inspect each plank for any damage or imperfections before installation, as even small defects can lead to issues down the line.
By ensuring batch consistency and checking for quality, you’ll achieve a seamless and professional-looking floor.
8. Cutting Corners on Tools
Using improper or low-quality tools can lead to frustrating installation processes and a subpar finish. Quality tools not only make the job easier but also contribute to a more polished, professional result.
How to prevent this issue:
- Invest in essential tools like a tapping block, pull bar, and spacers to secure the planks and create tight seams.
- Make precise cuts with a utility knife or a flooring shear to ensure clean edges and smooth installations.
Using the right tools ensures both speed and accuracy, resulting in a flawless vinyl plank flooring installation.
9. Improper Locking Technique
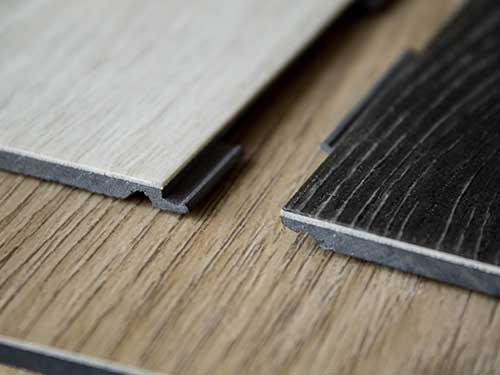 Vinyl plank flooring with a floating installation relies on precisely locking the tongue-and-groove joints to create a secure and stable floor. Forcing planks or skipping steps during installation can lead to gaps, instability, and damage to the joints.
How to prevent this issue:
- Angle and snap planks into place gently: Ensure the edges align properly before locking them in.
- Avoid excessive force: Never hammer directly on the planks, as this can damage the locking system. Use a tapping block or pull bar to gently nudge planks into position.
By handling the locking process with care, you ensure a sturdy, seamless floor that lasts.
10. Neglecting Final Touches & Transitions
While the installation of your vinyl plank flooring may seem complete, neglecting the final touches and transitions can detract from the overall appearance and durability of your floor. Proper transitions and baseboards protect against wear, provide a clean edge, and give your room a polished, finished look.
How to avoid this mistake:
- Install matching transition strips: Use them between rooms or where different flooring types meet to create a seamless look.
- Reinstall baseboards or add quarter rounds: These cover the expansion gaps around the perimeter of the room, giving the floor a clean, professional finish.
By paying attention to these final details, you ensure that your flooring not only performs well but also looks great.
Conclusion: Install Like a Pro
By understanding and avoiding these common mistakes, even first-time installers can achieve professional results when laying vinyl plank flooring. Proper preparation, careful attention to detail, and following manufacturer guidelines will ensure your floor not only looks great but also lasts for years. Take your time with each step, and with a little patience, you'll have a durable, stylish floor that stands the test of time. Enjoy the process, and enjoy your new floor!