Back to Wood Floor Fitting
How Long Does It Take to Install LVT Flooring? Full Timeline Guide
 When planning a new floor installation, timing is everything. Whether you're coordinating a larger renovation, preparing to move into a new property, or simply want to avoid prolonged disruption at home, knowing how long an LVT flooring project will take helps you plan more efficiently. It's also essential for commercial spaces that require minimal downtime, such as offices or retail units.
Many homeowners assume that all floors take the same time to fit, but LVT has some unique advantages. It’s typically quicker to install than traditional wood or tile, and depending on the method — glue-down or click-lock — the process can be completed in just a couple of days. In this guide, we’ll walk you through all the key phases so you know exactly what to expect.
Factors That Affect LVT Installation Time
While LVT flooring is known for its quick and hassle-free installation, the exact timeline can vary depending on several important factors. Understanding these variables can help you prepare in advance and avoid unexpected delays.
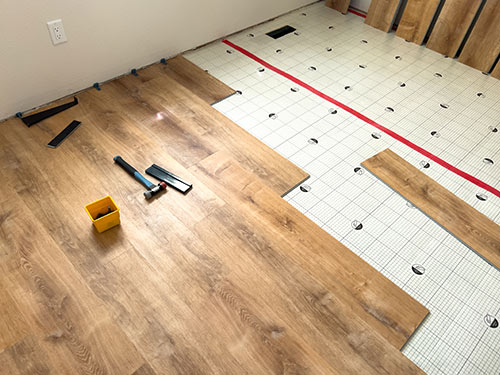
- Subfloor condition: The subfloor must be clean, dry, level, and stable. If levelling compounds or a damp-proof membrane (DPM) are required, this can add an extra day or two before installation can begin.
- Room size and shape: A simple square room is much faster to fit than a space with multiple corners, alcoves, or awkward transitions between rooms. Larger areas may also require more than one day, depending on the installer’s schedule.
- Type of LVT: Glue-down LVT takes longer to install due to adhesive curing time, while click-lock LVT is quicker and usually ready for light foot traffic the same day. The fitting method can significantly impact the overall duration.
- Furniture and obstacles: Any furniture or fixtures left in the room will slow things down. It’s best to clear the space entirely before your installers arrive.
- Acclimatisation time: Most manufacturers recommend leaving the LVT to acclimatise for at least 24–48 hours before installation begins. This helps prevent future expansion or contraction issues.
Pre-Installation: Acclimatisation & Site Prep (1–2 Days)
Before laying a single plank, proper preparation is crucial for a long-lasting LVT floor. Skipping or rushing these steps can lead to performance issues, such as lifting edges or premature wear. That’s why most professional installers dedicate at least 1–2 days to pre-installation tasks.
- Acclimatisation: LVT flooring needs time to adjust to the temperature and humidity of the room where it will be installed. Planks or tiles should be removed from packaging and left flat in the space for at least 48 hours. This helps prevent expansion or shrinkage after installation.
- Clearing the room: All furniture, appliances, rugs, and obstacles should be removed. This not only speeds up installation but also ensures a cleaner, more precise finish.
- Moisture testing: Subfloors — especially concrete — must be checked for moisture. If levels are too high, a damp-proof membrane (DPM) may be required to protect the LVT from damage.
- Subfloor levelling: Uneven subfloors must be corrected using a levelling compound. Even minor imperfections can cause LVT to wear unevenly or separate at the joints. A flat, smooth surface is essential for a flawless fit.
Our team at FlooringFirst! always includes a full subfloor assessment and preparation service as part of our LVT installation process in London to ensure the best results.
Installation Process: What Happens on the Day
 Once the acclimatisation and subfloor preparation are complete, it’s time for the main event: installing your LVT flooring. While the timeline varies depending on the size and complexity of the space, most domestic rooms can be completed in a single day by an experienced team.
- Click-lock LVT: This type of flooring is designed for quick and easy installation. Planks or tiles are simply clicked together, and in many cases, no adhesive is needed. A professional installer can usually fit up to 30–40 m² per day, depending on the room layout.
- Glue-down LVT: This method takes more time because it involves applying adhesive to the subfloor and allowing for proper curing. Expect around 20–30 m² per day with this approach. The floor must also be left undisturbed for at least 24 hours after fitting to allow the adhesive to set fully.
- Detail work: After the main flooring is laid, finishing touches such as skirting boards, thresholds, trims, and door bars are added. These small details can take additional time, especially in more complex layouts or multi-room installations.
At FlooringFirst!, we tailor the installation method to your needs — whether you’re after speed, flexibility, or a more permanent finish. Our team ensures every detail is completed to the highest standard.
Post-Installation: When Can You Walk on the Floor?
Once the flooring is installed, your next question is probably: “When can we start using it?” The answer depends on the installation method used and whether adhesive was involved.
- Click-lock LVT: This type is ready for light foot traffic immediately after installation. Because no glue is used, there’s no drying time required, making it ideal for projects with tight timelines or quick turnarounds.
- Glue-down LVT: This method requires more patience. Most adhesives need between 12 and 24 hours to fully cure, during which time the floor should remain undisturbed. Walking on it too early can shift the planks or weaken the bond, compromising the result.
- Returning furniture: With click-lock flooring, furniture can typically be returned the same day, while glue-down installations require you to wait until the adhesive is fully cured. Avoid dragging heavy items — use felt pads and lift when possible.
To ensure everything sets properly and looks perfect, our installers always provide post-installation guidance tailored to your specific LVT product. Learn more about how we manage this process on our LVT fitting service page.
How Long Does It Take to Install LVT Per Room?
While overall LVT installation is relatively fast, the timeline varies depending on the size and layout of the space. A small bathroom will take less time than an open-plan living area, and glue-down installations take longer than click-lock systems. Below is a general guide to help you estimate:
| Room Type |
Size (Approx.) |
Click-Lock Installation |
Glue-Down Installation |
| Bathroom / Small Hallway |
5–8 m² |
Half day |
1 full day |
| Bedroom / Kitchen |
10–15 m² |
1 day |
1–1.5 days |
| Living Room / Lounge |
20–25 m² |
1–1.5 days |
2 days |
| Whole Flat / House |
50–100+ m² |
2–4 days |
3–5+ days |
These estimates assume proper subfloor conditions and full site preparation. Unexpected repairs or complex room layouts may extend the timeline slightly. For a more precise estimate, book a free site survey with our LVT experts.
Tips for a Faster and Smoother Installation
Want your LVT flooring fitted quickly and without complications? While some delays are unavoidable, many can be prevented with proper planning and communication. Here are some proven tips to help speed up the process and ensure a flawless finish:
- Use a professional fitter: While DIY may seem tempting, a qualified installer ensures proper preparation, correct fitting methods, and long-term durability. Professionals work faster — and get it right the first time.
- Clear the room in advance: Remove all furniture, rugs, and personal items before installation day. This simple step saves hours and allows the flooring team to start work immediately.
- Coordinate with other trades: If you’re also renovating your kitchen, decorating, or upgrading electrics, plan the schedule so flooring comes after major dusty or disruptive work.
- Choose the right LVT type: If time is tight, opt for click-lock LVT, which installs faster and doesn’t require adhesive drying time. Glue-down LVT is better for long-term commercial use but takes longer to finish.
Need advice or want a stress-free experience? Our LVT supply and installation team handles everything from planning to final clean-up, so you don’t have to worry.
Conclusion: Plan for the Best Results
LVT flooring is one of the quickest and most efficient types of flooring to install, especially when compared to hardwood or tile. Still, the total installation time depends on a few key factors, including the type of LVT, subfloor condition, and room size. With proper planning and a professional installer, you can expect your new floor to be ready in just a few days, often sooner.
Whether you're renovating a single room or transforming your entire home, understanding the LVT installation timeline can help you plan with confidence. And if you're aiming for the best results without delays, working with a trusted specialist makes all the difference.
FlooringFirst! offers a complete LVT flooring installation service in London, from subfloor prep to final fitting — backed by over 20 years of experience. Book a free site visit today and let our team help you get it done right and fast.