Back to Maintenance & Care
Water-Damaged Wood Floor Repair – Restore Your Floors

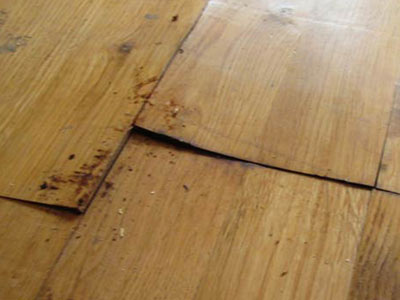
Wooden floors are vulnerable to water damage, and sometimes, even a small incident like a spilt glass of water can leave permanent marks. More serious situations, such as plumbing leaks, rising damp, or flooding, can cause severe and sometimes irreversible damage to your hardwood or parquet flooring.
To protect your investment and keep your flooring looking its best, it’s crucial to act fast. Preventing water damage where possible and responding appropriately when it occurs are both essential if you want to preserve your wooden floors for decades.
In this guide, we explain how to identify, prevent, and fix water damage to wooden floors. Whether you’re dealing with minor warping or major damage due to a leak or flood, we’re here to help.
If the issue seems too advanced or you're not confident in handling it yourself, we strongly recommend contacting an experienced professional. At FlooringFirst!, we offer specialised wood floor repair services in London backed by over 20 years of industry experience. Our team is always ready to assess the damage and provide an effective, long-term solution.
How Water Is Removed From Wood Floors?
The quicker you address water damage on wooden floors, the better the chances of saving your floor from permanent harm. As soon as you notice signs of water exposure — from minor leaks to full flooding — it’s vital to act immediately to dry the area thoroughly.
Hardwood flooring is porous, meaning it naturally absorbs water and retains moisture for long periods. If not properly dried, the trapped moisture can lead to warping, expansion, contraction, or even floorboard separation. Worse, it can create the ideal environment for mould and mildew to grow, especially if dirt is present.
While it may be tempting to dry the floor yourself, this process is more complex than it appears. Simply wiping the surface won’t be enough — moisture can seep between floorboard seams, under baseboards, or through scratches in the finish. For a thorough job, it’s best to call experienced professionals.
At FlooringFirst!, our London wood floor repair specialists use commercial-grade water extraction vacuums designed to pull moisture from deep within the wood structure. Our team ensures all infiltration points — including seams, finish cracks, heating vents, and subfloor layers — are carefully treated to prevent long-term damage.
Preventing mould growth is all about removing both moisture and the organic dirt it feeds on. That’s why complete drying and deep cleaning are essential after any water-related incident. If the water has reached your subfloor, special attention is needed to avoid structural damage and odours. Below, we break down the key steps our experts take when performing hardwood floor water damage repair in London homes and businesses.
Step 1: Remove Surface Water Immediately

The first and most critical step in addressing a water-damaged wood floor is to remove all standing water from the surface. The faster you act, the greater the chance of preventing moisture from seeping into the wood and causing lasting damage.
Professionals typically use a shop vacuum in wet mode (without a bag) to extract as much water as possible. If you’re handling this step yourself, you can also use:
- Dry, clean towels to blot up surface water
- A dry mop to gently absorb residual moisture
- Fans and dehumidifiers to promote air circulation
If your home is equipped with air conditioning, turn it on to assist with drying. In addition, open windows to increase ventilation and accelerate the evaporation of moisture.
Note: Removing water from the surface is just the beginning. Moisture may have already entered the wood grain, subfloor, or seams. For deeper drying and damage prevention, it’s highly recommended to contact a specialist. Reach out to our London wood floor repair team for professional assistance.
Step 2: Clean and Scrub the Floor to Remove Dirt
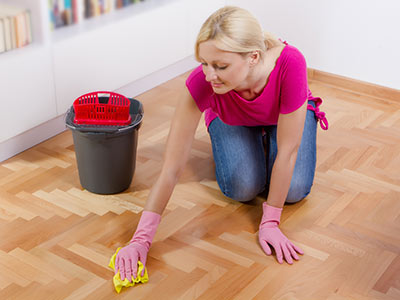
After surface water has been removed, it’s essential to clean the entire floor to eliminate any dirt, grime, or organic build-up that could contribute to mould or mildew growth. Moisture alone doesn’t cause mould — it’s the combination of water and trapped dirt that becomes hazardous over time.
To clean safely and effectively:
- Mix a mild pH-neutral hardwood floor cleaner or mild detergent with water in a bucket.
- Using a stiff brush or soft-bristle scrubbing brush, gently scrub the affected area, rinsing the brush frequently in the cleaning solution.
- Never pour the cleaning solution directly onto the floor — always apply it sparingly using the brush or a damp (not wet) cloth.
Thorough scrubbing removes not only dirt but also any potential spores that may lead to mildew formation. Once scrubbing is complete, dry the area using clean towels or a fan to ensure no moisture remains.
If you're concerned about mould or long-term odours, consider having a professional team carry out a deep floor restoration and disinfection process to ensure all risks are removed.
Step 3: Treat Mouldy or Mildew-Affected Areas
If you notice any signs of mould or mildew on your wooden floor, it’s essential to act quickly. Mould spreads fast in damp conditions and can cause long-term damage to both your floor and indoor air quality.
Professional floor repair specialists use targeted treatments like TSP (trisodium phosphate) or safe, modern TSP substitutes diluted with water. These products are highly effective in killing mould spores and removing stubborn discolouration.
How mould treatment is performed:
- The affected area is scrubbed thoroughly using a stiff brush and the TSP solution.
- Once the mould and any staining are removed, the area is wiped clean with clear water to neutralise the cleaner.
- The surface is then dried using an absorbent cloth or towel, followed by proper ventilation to speed up drying and prevent further fungal growth.
If mould has penetrated deeper into the wood or beneath the finish, it may be necessary to sand and refinish the floor. In such cases, we recommend our professional sanding services to restore the wood safely and thoroughly.
Step 4: Controlled Drying of the Wood Floor
After cleaning and removing mould from your water-damaged floor, the next essential step is to dry the wood thoroughly and safely. This part of the process should be approached with patience and care.
Proper drying involves a balance: drying too slowly invites mould recurrence, while drying too fast can lead to cracking, cupping, or gapping between floorboards. That’s why controlled drying is key.
Best Practices for Drying Wood Floors:
- Open windows and doors to allow fresh air into the space.
- Position fans to blow directly onto the affected areas.
- Use air conditioning systems and industrial-grade dehumidifiers to manage humidity levels.
- For optimal results, create cross-ventilation by opening windows or doors on opposite sides of the room.
Important: The drying process must be steady. Rapid drying can cause the wood to shrink too quickly, resulting in visible cracks or warping. If you're unsure about how to monitor or manage this process properly, it’s best to consult our professional floor repair team in London for assistance.
Step 5: Sanding and Refinishing the Floor

Once your wooden floor is completely dry, you may notice signs of distortion such as cupping, ballooning, or warping. This is normal after water exposure, but fixing it requires precision. At this stage, it’s highly recommended to bring in a professional wood floor repair and sanding team.
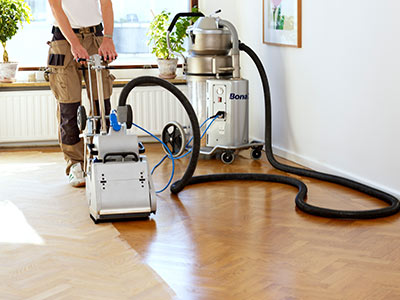
Wood floor sanding after water damage is not a DIY-friendly task. Uneven sanding can cause further damage and affect the integrity of your floor. That’s why FlooringFirst!’s experienced floor sanding specialists use commercial-grade equipment to carefully even out the surface and restore uniformity.
Before sanding begins, any loose or lifted floorboards caused by moisture must be secured and repaired. Only then can the floor be sanded properly to achieve a smooth, level finish.
Once the sanding is complete, the floor is refinished with multiple coats of high-quality sealant or wood floor finish. This protective layer helps safeguard your floors against future moisture damage and enhances the wood’s natural beauty.
If your floors are showing signs of water-related wear or damage, don’t delay — contact our London wood floor restoration experts for tailored advice and fast, professional results.