Back to Floor Sanding
Sanding-Free Hardwood Floor Refinishing: Quick and Easy Methods
 Refinishing hardwood floors can breathe new life into your home, giving it that fresh, polished look that instantly elevates any space. Traditionally, refinishing meant messy and time-consuming sanding, which can be a major deterrent for homeowners and professionals alike. But what if we told you that you could skip that step entirely?
Whether you're a DIY enthusiast keen on your next home project, a young professional upgrading your interiors, or a seasoned designer or tradesperson aiming to offer clients a cleaner solution, learning how to refinish hardwood floors without sanding opens up a wealth of possibilities. Especially in older properties across the UK, where maintaining the character of original floorboards is key, this method is fast, cost-effective and remarkably satisfying.
This practical guide will walk you through every step of refinishing hardwood floors without sanding—saving time, money, and mess, while still achieving fantastic, professional-looking results.
Why Refinish Without Sanding?
Sanding hardwood floors isn't just messy—it's noisy, labour-intensive, and potentially damaging to delicate or thin wood planks, especially in period properties found all over the UK. Sanding can also stir up dust that's difficult to control and hazardous to breathe in. For homes that are lived in, especially flats and terraced houses with less ventilation, sanding is often simply not practical.
Furthermore, many modern or slightly worn floors don’t need deep restoration. If your existing finish is dull, scratched, or lightly worn but the floorboards are overall in good shape, a sandless refinishing method allows for a quicker fix that's still durable and attractive.
Better still, skipping sanding can dramatically cut project costs, keeping your revamp under budget. It also allows professionals to offer more economical packages to clients who need fast turnarounds or less intrusive work.
Assessing Your Floors: Are They Suitable?
Before diving into a sandless refinishing process, it’s crucial to determine whether your floors are viable candidates. Not every hardwood floor is suitable for this method, so take time to examine the following:
- Finish Condition: You should see wear, light scratching or dullness, but not deep gouges or water damage. Severely worn floors may still require sanding and full refinishing.
- Type of Wood: Most hardwoods, including oak, ash and walnut (common throughout UK homes), respond well. Engineered wood floors often benefit too, but check that the veneer hasn’t worn through.
- Existing Finish Type: Polyurethane, wax, or oil-based finishes can each be recoated with the right products. Identify what’s already on there, as it will affect what process and products you'll use.
Need help diagnosing the finish? Try this test: put a few drops of water on the floor. If they bead up, the finish is intact. If the water soaks in, your finish may have worn out and need more intensive treatment.
Tools and Materials You'll Need
Luckily, skipping the sanding step also reduces tool requirements. But you’ll still need specific supplies to ensure the process goes smoothly:
| Tool/Material |
Purpose |
| Hardwood floor cleaner |
Removes surface grime, grease and prepares wood for recoating |
| Microfiber mop |
For applying the cleaner and degreaser evenly |
| Floor buffer / orbital floor polisher (optional) |
Lightly abrades the finish to improve bonding, often called “screening” |
| Screen pad or conditioning pad |
Creates a subtle texture on the surface for bonding |
| Recoating bonding agent or primer |
Ensures the new finish adheres to the old surface |
| Water-based polyurethane or an alternative floor finish |
Provides a durable, low-odour top layer with a fast drying time |
| Applicator pad or brush |
Spreads finish smoothly and evenly |
Thanks to a growing range of modern, user-friendly products in UK trade outlets, many of these supplies are readily available both online and in specialist shops.
Step-by-Step Guide to Refinishing Without Sanding
Step 1: Deep Clean the Floor
 Start with a scrupulous cleaning session. Use a commercial hardwood floor cleaner to lift dirt, body oils, and wax residues. A microfiber mop usually gives better results than a traditional mop, which may leave streaks or too much water on the wood. Allow the floor to fully dry—this is crucial.
Step 2: De-Gloss or Lightly Abrade
This step helps the new finish bond properly. If using a buffer or orbital polisher, attach a screen or maroon pad and go gently over the floor. If you're not using power tools, apply a liquid deglosser with a pad, following the product instructions carefully. Work in small sections and ensure even coverage.
Step 3: Apply Bonding Agent or Recoat Primer
Some products in the UK market can act as bonding agents to tie the old finish with the new coat. Apply using the recommended method—usually a microfiber pad or paint brush, depending on the product. Let it dry thoroughly before moving on.
Step 4: Apply New Finish
Choose a water-based polyurethane finish for fast drying and low VOCs—ideal for the UK’s cooler, more humid climate. Work in small sections, applying a thin and even coat using a synthetic applicator pad. Move with the grain and avoid puddles. Aim to ventilate the room but avoid draughts or open doors that could introduce dust.
Step 5: Let It Cure
After applying the first coat, allow 2–4 hours of drying time—check product guidelines. Light sanding with a screen pad between coats may be advised if you're applying multiple layers. Allow a full 24–48 hours of curing time before heavy furniture use, and up to 7 days for rugs to be placed.
Tips for a Flawless Finish
- Vacuum the floor using a soft brush nozzle before starting to remove fine debris.
- Work with natural light—close off artificial overhead lights as they can obscure minor imperfections.
- Always follow the grain direction when applying finishes or cleaning solutions.
- Mask off skirting boards with painter’s tape to avoid splashes and make cleanup easier.
- Use knee pads—your joints will thank you!
Don’t forget to communicate with housemates or household members about restricted access to rooms. Refinishing projects work best with minimal foot traffic.
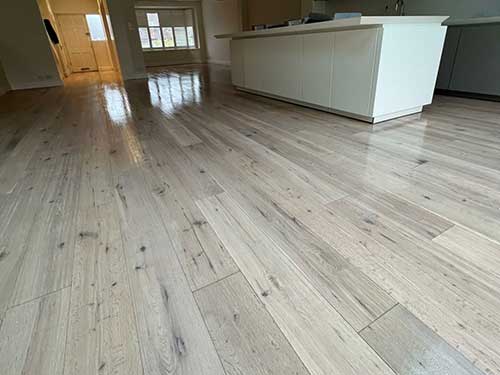
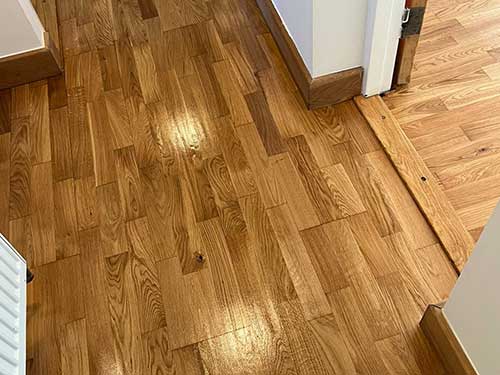
What to Expect: Results and Longevity
While this process won’t erase deep gouges or structural damage, it will dramatically refresh, protect, and revive your hardwood flooring. The sheen and uniformity you can achieve are more than adequate for most residential and light commercial applications.
A DIY or professional sandless refinish typically lasts 3–5 years, depending on usage, before needing another recoat. For busy areas like hallways and kitchens, consider reapplying a maintenance coat every few years to keep your floors protected and looking new.
If you're an architect or interior designer working with heritage properties, this option can be ideal when maintaining authenticity while modernising finishes. Tradesmen can sell this as a value-added service requiring fewer tools and less on-site disruption.
Final Thoughts
Refinishing hardwood floors without sanding is a game-changer for professionals and home improvers across the UK. It’s faster, cleaner, cheaper, and perfect for maintaining timber floors between full renovations. With a little patience and the right preparation, you can restore the beauty of your flooring and add real value to your interior space. By skipping sanding, you save yourself from the mess and stress—but still end up with a floor that looks magazine-worthy. Why not give your home the “wow” factor it deserves this weekend?