Back to Floor Sanding
Facts You Should Know Before Restoring Your Wooden Floor
Before we begin, it's worth noting that this article is not intended as a detailed DIY floor sanding tutorial. Instead, it provides a broad overview of the wood floor restoration process, particularly the risks, challenges, and decisions involved for those without professional experience.
If you're considering restoring your hardwood or softwood flooring, this guide will help you understand the key phases of the process, the importance of professional equipment and technique, and what steps typically follow sanding to ensure a successful and long-lasting result.
Floor Sanding vs. Refinishing vs. Restoration: What’s the Difference?
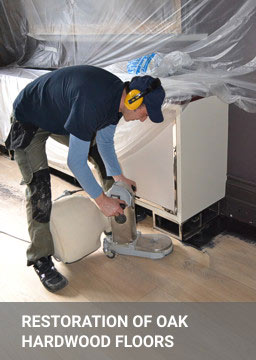
When discussing wood floor restoration, it's essential to understand the difference between the terms sanding, refinishing, and restoration. Although often used interchangeably, each represents a different scope of work and level of detail.
What Is Floor Sanding?
Wood floor sanding is the process of removing the old, damaged surface finish using abrasive machines. This process exposes the raw wood beneath and prepares it for a new finish. Sanding is a critical step, but it’s only one part of the overall restoration process.
What Is Floor Refinishing?
Refinishing refers to the combination of sanding and applying a new protective floor finish. This might be an oil, lacquer, or varnish, depending on your desired look and durability needs. It enhances appearance and protects the surface, but doesn’t involve structural repairs.
What Is Full Floor Restoration?
Floor restoration includes sanding and refinishing, but also involves essential repairs. This may include:
- Replacing or securing loose, damaged, or missing floorboards
- Filling large gaps between boards for a seamless finish
- Leveling the subfloor to ensure stability and evenness
True restoration ensures not just aesthetic improvement, but structural integrity. Unfortunately, some companies may blur these terms, offering basic sanding while advertising it as full restoration. That’s why understanding the difference — and working with experienced professionals — is so important.
Why Structural Repairs Matter Before Sanding
Sanding unstable, cracked, or broken boards can worsen the damage. For best results, always assess and repair the floor before sanding. This ensures a smoother finish, longer floor life, and fewer issues over time.
Why You Shouldn’t Sand Wood Floors Too Often
It’s a common misconception — often encouraged by manufacturers or aggressive contractors — that wood floors need sanding every 2–3 years. While this might be true for commercial premises with heavy foot traffic, it’s rarely necessary for residential homes.
For most households, professional floor sanding is only needed every 5 to 10 years, depending on wear, finish type, and general floor maintenance.
The Problem with Over-Sanding
Each sanding session removes approximately 1–2 mm of wood from the surface. While that may not seem like much, repeated sanding thins the boards, eventually reaching a point where further sanding becomes unsafe or impossible. This is especially important for engineered wood floors, which have a limited wear layer.
Excessive sanding may result in:
- Weakened structural integrity of floorboards
- Reduced floor lifespan and early replacement needs
- Increased vulnerability to dents, cupping, and damage
How to Extend the Time Between Sanding
Instead of sanding frequently, focus on proper floor care:
- Clean your floors regularly using appropriate cleaning products
- Use area rugs and protective mats in high-traffic zones
- Place felt pads under furniture legs
- Address scratches or damage early to prevent the spread
With proper maintenance, your floors will retain their beauty longer, and you’ll reduce the need for sanding, preserving the wood for decades to come.
Is Floor Sanding Still Dusty? Not Anymore.
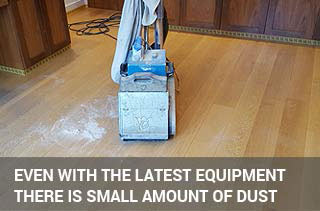
For many homeowners, the idea of floor sanding still conjures up images of thick clouds of dust filling every room. This concern stems from the era of early drum sanders, which did indeed leave a significant mess behind. Fortunately, today’s floor sanding process is dramatically cleaner thanks to advancements in technology.
Modern sanding machines are equipped with powerful dust extraction systems, including industrial-grade vacuums and sealed dust containment bags. These systems are designed to capture fine particles at the source, keeping your home significantly cleaner throughout the restoration process.
When you hire a professional floor sanding service like FlooringFirst!, you can expect:
- Minimal airborne dust during sanding
- Protective measures were taken to seal off nearby rooms
- Proper disposal of collected dust after the job is complete
Beyond just cleanliness, many floor sanding companies now use eco-friendly wood finishes that contain low levels of volatile organic compounds (VOCs). These modern sealants improve indoor air quality and reduce environmental impact — a win for your home and your health.
So, if you're putting off restoring your wooden floors because you fear a dusty disaster, rest assured: dust-free floor sanding is the new standard. With the right team and equipment, you’ll enjoy beautifully renewed floors without the clean-up chaos.
Why DIY Floor Sanding Isn’t for Everyone
While it may be tempting to rent a sander and try to save money with a DIY approach, floor sanding is not a beginner-friendly task. It’s labour-intensive, time-consuming, and technically demanding. Even with helpful YouTube videos or blog tutorials, most homeowners underestimate the precision and effort required to sand floors properly.
The Challenges of DIY Sanding
Professionals undergo years of hands-on experience to master sanding techniques. Without that skill, homeowners often encounter issues such as:
- Uneven sanding due to inconsistent pressure or movement
- Visible swirl marks, gouges, or dips in the floor
- Damage to floorboards from incorrect machine use
- Inadequate dust control, resulting in a messy environment
Even if your DIY sanding looks “good enough” at first, minor imperfections can become more visible after applying a finish. In worst-case scenarios, errors may lead to costly repairs or complete floor replacement.
Benefits of Hiring Floor Sanding Professionals
When you hire a professional floor sanding company, you're investing in:
- Precision sanding with high-grade industrial machines
- Access to advanced equipment with powerful dust extraction
- Expert knowledge of different wood types and grain directions
- Identification and repair of underlying floor issues before sanding begins
- Guidance on finish selection and post-sanding maintenance
Ultimately, professional sanding ensures a more even, polished, and longer-lasting result, with fewer risks and no guesswork. It's an investment in the life, beauty, and value of your floors.
What Makes the Wood Floor Restoration Process So Challenging?
Why do so many people underestimate wood floor sanding and restoration? On paper, the process might seem straightforward — rent a machine, follow a few instructions, and get a freshly refinished floor. In reality, the task is much more demanding, even for seasoned professionals.
Ask any experienced contractor, and they’ll tell you: floor restoration is hard work. It’s physically intense, requires technical precision, and demands careful attention to detail at every stage. Even professionals with years of training rarely call it an easy job, let alone an enjoyable one.
Before attempting a DIY project, it’s important to honestly evaluate your:
- Physical stamina and patience
- Ability to operate heavy sanding machines correctly
- Understanding of wood grain, sanding progression, and finishing techniques
What seems manageable in theory can quickly turn overwhelming without the right tools and knowledge. That’s why it's helpful to understand each stage of the wood floor restoration process before deciding whether to DIY or hire professionals.
Floor Preparation
Before the actual sanding begins, proper floor preparation is crucial. This ensures both a safe and efficient process and helps avoid damage to tools or the floor itself.
Clear the Room
Remove all furniture, rugs, and any floor coverings such as carpets or mats. The room should be empty to allow full access to the floor and avoid obstructions during sanding.
Clean the Surface
Thoroughly sweep or vacuum the area to remove dust, dirt, or small debris. These particles can interfere with the sanding process and may scratch or gouge the wood surface. A clean workspace is especially important if you're planning to fill gaps between floorboards later.
Secure the Fasteners
Inspect the floor carefully for protruding screws, nails, or staples. These must be countersunk or removed before sanding to prevent damage to the machinery and avoid injury. Use a nail punch or screwdriver to secure them just below the surface.
Some professional companies, including our team at FlooringFirst! — offer optional furniture removal services for added convenience, although this is usually quoted separately.
Taking the time to prepare your floor properly will result in a smoother sanding process, fewer delays, and a more professional outcome.
Step 2: Inspecting and Repairing Floorboards
Once the floor is cleared and cleaned, the next step is to assess its condition and carry out any necessary floorboard repairs. This is a vital part of the floor restoration process, ensuring a safe, even surface before sanding begins.
Check for Loose, Damaged, or Rotten Boards
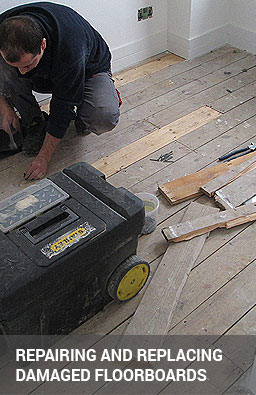
Most old floorboards can be salvaged. Minor cracks can be filled, and loose boards can be re-secured using nails or screws. However, boards affected by rot or woodworm infestation should be replaced to prevent long-term structural issues.
Replacement boards should match the original timber in both type and thickness, maintaining a consistent appearance and performance across the entire floor.
Bitumen Removal: A Hidden Challenge
If your property has Victorian or early 20th-century floors, there's a good chance you’ll encounter bitumen — a black, tar-like adhesive used historically beneath carpets or parquet. Unfortunately, bitumen is incompatible with modern adhesives and must be completely removed to ensure a stable, lasting bond for any future flooring layers.
Removing bitumen is a slow and messy job. It often requires professional-grade tools, chemical solvents, or heat guns to strip it effectively. But skipping this step can undermine the entire restoration, so it’s crucial for long-term durability.
Need help restoring a bitumen-covered floor? Contact our team for expert bitumen removal and structural repair services.
Step 3: Using the Right Equipment for Floor Sanding
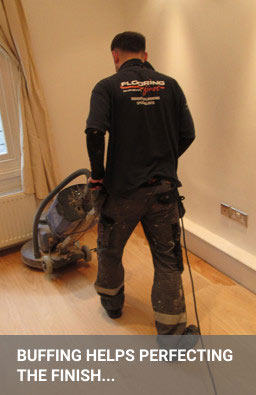
One of the biggest differences between DIY sanding and professional floor sanding services lies in the equipment used. While a variety of machines exist in the flooring industry, two main types are most commonly used: drum sanders and belt sanders.
Why We Prefer Belt Sanders
At FlooringFirst!, we choose belt sanders over drum sanders for most of our projects. Although drum sanders are cheaper to buy or rent, they can be more aggressive, harder to control, and often leave swirl marks or uneven results. Belt sanders, by contrast, offer:
- Smoother, more consistent sanding
- Better control for delicate or uneven surfaces
- Reduced risk of gouging or over-sanding
Trusted Brands: Bona and Lagler
Among the most reliable names in the industry are Bona and Lagler. At FlooringFirst!, we trust and use Bona's professional-grade equipment for most of our sanding and buffing tasks.
Some of the machines we regularly use include:
- Bona FlexiSand: A powerful buffer ideal for fine sanding and intermediate smoothing
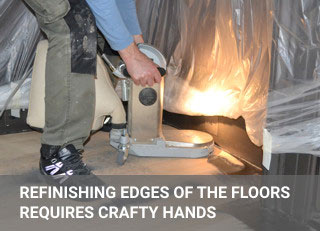
- Bona Edge: Designed specifically for edging work and hard-to-reach corners
By using advanced machinery and high-quality brands, we ensure flawless sanding results with excellent dust control, especially when combined with Bona’s integrated dust extraction systems.
Step 4: The Floor Sanding Process – From Rough to Refined
Once the floor has been fully prepared — cleared, cleaned, and repaired — the sanding process can begin. But contrary to popular belief, floor sanding isn’t just a matter of running a machine across the surface. It involves multiple stages, each with a specific purpose and sanding grit level, to achieve professional results.
The Three Stages of Floor Sanding
- Rough Sanding: This initial pass uses coarse-grit abrasives to remove the old floor finish and level uneven boards. It’s essential for eliminating surface damage, paint, or previous coatings.
- Medium Sanding: A mid-range grit is used to refine the floor further and smooth out marks left by the rough sanding stage. This step begins to reveal the wood’s natural grain and character.
- Fine Sanding: The final sanding pass uses fine abrasives to create a smooth, even surface. At this stage, the floor is ready for staining or finishing, with no visible imperfections or swirl marks.
Each stage demands careful machine handling and a deep understanding of wood species, grain direction, and sanding progression. Skipping or rushing any stage can compromise the entire project — leading to blotchy finishes or uneven results.
That’s why it pays to trust floor sanding professionals who follow the correct sanding sequence and use high-quality tools to ensure a flawless finish.
Step 5: Sanding Techniques – Why One Method Doesn’t Fit All
Every wooden floor is unique, and that means sanding techniques must be adapted to suit the floor type, condition, and grain pattern. Whether you’re working with solid hardwood, engineered flooring, or parquet blocks, technique plays a crucial role in achieving flawless results.
Sanding with the Grain
One golden rule applies to almost every floor: always sand in the direction of the wood grain. Ignoring this can cause swirl marks, uneven patches, and a rougher texture that becomes more noticeable after finishing. This is particularly critical with wide boards or softwood floors that show imperfections more easily.
The Challenges of Parquet and Engineered Floors
Parquet flooring poses unique challenges due to its intricate patterns, such as herringbone or chevron, where grain directions change frequently. Attempting to sand across varying grain angles without care can lead to surface tearing or visual inconsistencies.
Engineered floors add another layer of complexity: their thinner top wear layer can’t withstand multiple heavy sanding sessions. That’s why sanding these floors requires precise pressure, grit control, and often a gentler machine setting.
Skilled professionals adapt their approach based on the floor’s construction, grain orientation, and previous treatment. This tailored method preserves the floor’s structure while restoring its original beauty, without risking permanent damage.
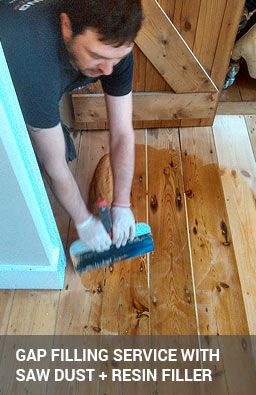
Step 6: Filling Gaps Between Floorboards
Gap filling is an essential step in the floor restoration process, both for improving appearance and enhancing comfort. Older wooden floors often develop visible spaces between boards due to natural expansion and contraction over time, but leaving these unaddressed can lead to both aesthetic and practical issues.
Why Gap Filling Matters
- Improves Appearance: Filling gaps gives the floor a seamless, finished look and prevents dirt, dust, and debris from collecting between boards.
- Prevents Draughts: Gaps in floorboards can contribute to heat loss and cold draughts in winter, especially in homes without subfloor insulation. Sealing these spaces can help improve energy efficiency and lower heating bills.
Methods of Gap Filling
- Resin and Sawdust Mix: Ideal for small to medium gaps. This method involves mixing fine sawdust from the final sanding stage with a flexible filler resin. The result blends naturally with the floor’s colour and texture for an invisible finish.
- Wood Slivers: Best for wider gaps where the resin mix may not hold. Thin wood strips are glued into the gaps, then trimmed and sanded flush with the surface, offering a sturdy and long-lasting solution.
If you're unsure which method is best for your floor, our floor repair specialists can assess your boards and recommend the ideal gap-filling approach for a clean and energy-efficient result.
Step 7: Staining and Finishing Your Wood Floor
Once sanding is complete, the final step in the floor restoration process is staining and finishing. These steps not only define the appearance of your floor but also protect it from daily wear and tear for years to come.
Staining: Colour Customisation with Precision
Wood floor staining is an optional but transformative process that allows you to change the floor’s natural colour. Whether you’re after a rich dark oak tone or a modern white-washed or grey finish, staining adds character and impact. However, it’s also one of the most delicate parts of the process.
If the floor hasn’t been sanded evenly, the stain will highlight every imperfection. Achieving flawless results — especially when colour matching to existing wood or furnishings — requires professional technique and experience.
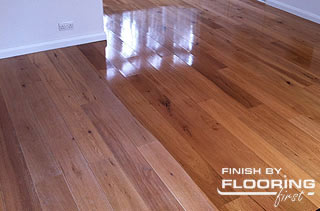
Finishing: Protecting the Surface
After staining (or directly after sanding if no stain is used), your floor must be sealed with multiple coats of finish. Typically, three to four coats are applied for optimal durability and appearance. Finishes fall into two main categories:
- Surface finishes – Lacquers and varnishes create a protective film on top of the wood. They offer excellent durability and are ideal for high-traffic areas. However, they can leave a slightly artificial, glossy look, which may not suit all interior styles.
- Penetrating finishes – Oils soak into the wood, enhancing its natural beauty and texture. They provide a softer, more organic appearance but generally require more frequent maintenance and offer slightly less protection than lacquers.
Choosing the right finish depends on your lifestyle, design goals, and maintenance preferences. For expert advice, refer to our complete guide to wood floor finishes.
Conclusion: Why Understanding the Restoration Process Matters
One of the greatest advantages of hardwood flooring is its ability to be sanded and refinished multiple times, restoring its beauty and extending its lifespan. Our goal with this article wasn’t to discourage you from choosing wood floors — quite the opposite. We believe hardwood remains one of the most durable, elegant, and sustainable flooring options available.
Instead, we hope this guide has helped you better understand what the wood floor restoration process involves, from preparation to finishing. Whether you plan to take on part of the process yourself or leave it to professionals, being informed allows you to make smarter, longer-lasting decisions about your flooring.
If you have questions or would like personalised advice, don’t hesitate to get in touch with our team. We’re happy to offer guidance or schedule a free, no-obligation site visit anywhere in London to assess your floor and discuss the best restoration approach.
At FlooringFirst!, we’re committed to helping you bring out the very best in your wooden floors.