Back to DIY Advice
Why a LVT Flooring is Opening Gaps or Cracks on Top of the Click After Installation
Luxury vinyl tile (LVT) flooring is a favourite for many homeowners thanks to its durability, stylish looks, and easy upkeep. But nothing ruins that brand-new floor feeling faster than spotting gaps or cracks opening up along the click-lock joints. Why does this happen—and more importantly, how can you prevent it? In this guide, we’ll break down the most common causes of gaps in LVT floors and explain why proper subfloor preparation and installation techniques make all the difference between a flawless finish and a frustrating repair job.
The Common Issue: Gaps and Cracks
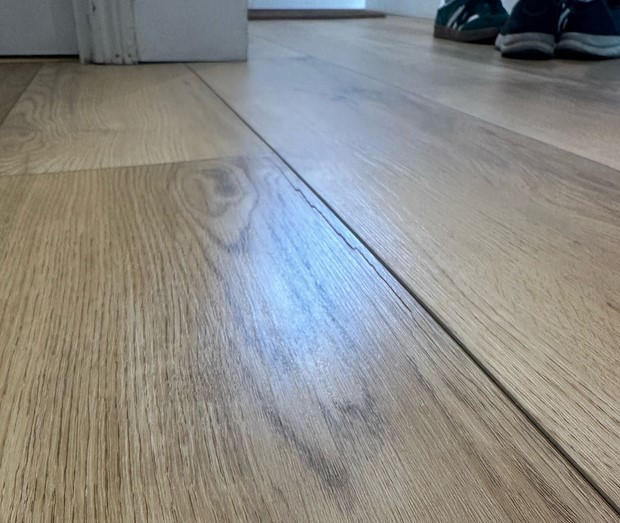
One of the top mysteries in the world of LVT flooring (right after “Why does my dog always find the one muddy spot in the garden?”) is: “Why does my LVT flooring develop gaps or cracks at the click joints after installation?” You install the planks, admire your work, post a proud selfie on Instagram… and a week later, you notice those sneaky little gaps laughing at you from across the room.
Here’s the truth: your LVT planks are not misbehaving out of spite, and they don’t secretly hate your decorating style. The culprit is usually one critical factor—the levelness of your subfloor. If the surface underneath isn’t perfectly smooth and even, those “click” joints will struggle to stay clicked. Think of it like trying to build a Lego castle on top of a pile of potatoes: no matter how good your Lego skills are, something will wobble.
Other sneaky accomplices include changes in temperature and humidity, skipping the acclimation step (yes, your LVT planks need a 48-hour “spa day” before being installed), or rushing the installation without leaving proper expansion gaps. Combine all these, and you’ve basically rolled out the red carpet for gaps and cracks to move right in.
The good news? With proper preparation—and a little patience—you can stop gaps from appearing and keep your new LVT floors looking flawless. It all starts with that boring-but-essential step: making sure your subfloor is as flat and level as a pancake. (Preferably a pancake without lumps.)
The Role of the Subfloor
The subfloor is the unsung hero of every flooring project. You don’t see it, you don’t Instagram it, and you definitely don’t brag about it to your friends… but without it, your LVT flooring is doomed. Think of it as the mattress under your fancy bedsheets: if it’s lumpy, saggy, or uneven, no amount of expensive linen will make your sleep (or in this case, your floor) feel right.
Here’s the catch: if your subfloor isn’t perfectly level, it becomes the troublemaker. Those little dips and bumps might seem harmless at first, but they put uneven pressure on the click-lock system. And while the click-lock design is clever (like Lego for adults), it wasn’t built to fight gravity and potholes at the same time. The result? Planks that shift, joints that pop, and gaps that grin at you every time you walk across the room.
This isn’t just a “looks” problem either. An uneven subfloor can lead to shortened floor lifespan, annoying squeaks, wobbly steps, and planks that simply refuse to stay in place. Basically, it’s like adopting a cat—you think it’ll be fine, but suddenly it’s climbing the curtains and scratching the sofa. The moral of the story: don’t ignore your subfloor. Level it, smooth it, and give your LVT the solid foundation it deserves. Only then will your floors stay flawless, gap-free, and ready for all the foot traffic life throws at them.
Why Leveling is Important
If your subfloor isn’t level, installing LVT flooring is like trying to butter toast on a trampoline—it just doesn’t end well. A flat, smooth base keeps your planks happy, your joints secure, and your sanity intact. Here’s why proper subfloor leveling is a big deal (and not just something contractors say to upsell you):
- Uniform Pressure Distribution – Think of your floor like a mattress. A flat base spreads the weight evenly so no single plank is left carrying the burden. (Nobody likes being the “middle seat on a budget airline.”)
- Enhanced Durability – A stress-free click-lock system lasts longer. Less pressure on the joints means fewer gaps and cracks over time.
- Improved Aesthetics – A level subfloor keeps your floor looking sleek and seamless. No bumps, no waves—just that “did a pro install this?” finish.
- Prevention of Noise Issues – Skip the squeaks and creaks that make every midnight snack run sound like a horror movie soundtrack.
- Better Adhesion for Glue-Down Installations – If you’re gluing your floor down, a level surface makes the adhesive work like a charm—no peeling, no lifting, no “uh-oh” moments later.

Effective Methods to Level Your Subfloor
If your subfloor is bumpier than a rollercoaster, your LVT flooring will let you know—loudly and quickly. Gaps, cracks, squeaks, you name it. The good news? You don’t need a degree in engineering to fix it. Here are two tried-and-true methods to get your subfloor smoother than a jazz playlist on a Sunday morning:
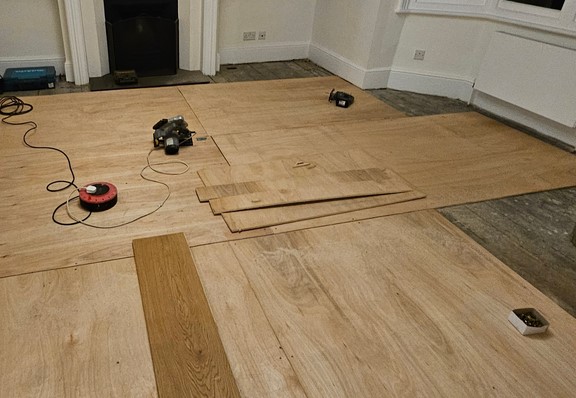
1. Leveling with Plywood
Plywood isn’t glamorous, but it’s the unsung hero of DIY flooring. Laying down a sheet of plywood as an underlayment is like giving your subfloor a fresh haircut—tidy, sharp, and ready for its close-up. It’s perfect for floors with just a few minor quirks that need evening out.
Key Benefits:
- Stable and uniform surface – No more “mini speed bumps” under your planks.
- Bridges minor flaws – Great for hiding those little dips and waves in wood or concrete.
- Budget-friendly – Easy on your wallet and simple enough for most DIYers to install.
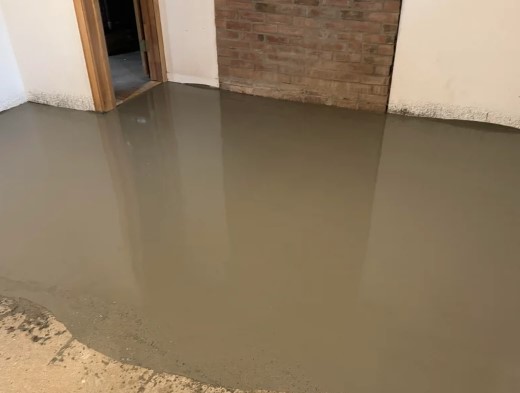
2. Self-Leveling Compound
If your subfloor has more craters than the moon, plywood won’t cut it—you’ll need the heavy artillery: self-leveling compound. This magic liquid spreads itself out (hence the name), filling in low spots and drying into a rock-solid, perfectly smooth surface. It’s like icing a cake, but for floors.
Key Benefits:
- Fixes major dips and humps – Creates the flat foundation your LVT deserves.
- Seamless finish – Say goodbye to wobbly planks and uneven seams.
- Boosts durability – Less stress on your click-lock joints means longer-lasting floors.
- Quick turnaround – Dries fast, so you won’t be camping out in your kitchen for a week.
Choosing the right leveling method is like choosing between sneakers and hiking boots—it all depends on the terrain. Get this step right, and your LVT flooring will stay gap-free, crack-free, and smooth enough to make your neighbours jealous for years to come.
Conclusion
The appearance of gaps and cracks in LVT flooring is often a direct result of an uneven subfloor. By investing in proper subfloor preparation—whether by installing a plywood underlayment or using a self-leveling compound—you can prevent these issues and ensure a long-lasting, visually appealing floor. Attention to detail during the installation phase not only enhances the aesthetics of your space but also protects your investment for years to come.
Taking the time to prepare your subfloor correctly is a small step that makes a big difference. Whether you’re a DIY enthusiast or a professional installer, remember that a level subfloor is the cornerstone of a successful LVT flooring project.
Frequently Asked Questions
Why is my new LVT flooring already showing gaps?
Chances are, your subfloor wasn’t level. When planks sit unevenly, the click-lock joints get stressed and start to separate. It’s not the LVT’s fault—it’s just physics being annoying.
Can I fix gaps in LVT without pulling up the whole floor?
Sometimes yes, sometimes no. Small gaps can occasionally be tapped back into place with a pull bar, but if the subfloor is the culprit, the problem will just come back. Think of it as a “Band-Aid” solution, not surgery.
Is underlayment enough to fix an uneven subfloor?
Nope. Underlayment is great for sound and comfort, but it won’t perform miracles. Big dips or bumps still need leveling with plywood or a self-leveling compound before laying your LVT.
What happens if I just ignore the gaps?
Your floor won’t explode, but it may keep shifting, creaking, or looking worse over time. Plus, dirt and moisture love to settle in those little cracks. Ignoring it is like ignoring a toothache—it only gets messier later.
Can a pro installer prevent these issues?
Yes, absolutely. Pros have the tools (and the patience) to make sure the subfloor is perfect before a single plank goes down. If you want guaranteed gap-free floors, calling in the cavalry is always a safe bet.