Back to DIY Advice
Cost-Effective Floor Repair Techniques – DIY Guide to Reviving Old Floors
 Want to give your home a facelift without emptying your wallet? Reviving old wooden floors is one of the smartest (and greenest) ways to do it. Instead of tearing everything out and splashing cash on brand-new boards, you can restore what’s already there — saving money and reducing waste at the same time. It’s budget-friendly, eco-friendly, and surprisingly stylish.
Here’s the best part: older floors have something new ones can’t buy — character. Every scuff, knot, and grain line tells a story, giving your home warmth and charm you simply can’t replicate with factory-fresh planks. Restoring these floors doesn’t just make them look great again; it also preserves a piece of history under your feet. And if you’re planning to sell one day, a revived wooden floor is a powerful selling point that adds value without costing you a fortune. In short: fixing your floor can feel like hitting the jackpot — without even leaving the house.
First Things First: Check What You’re Working With
Before you rush to grab a sander or a tin of stain, take a good look at your floor. Old wooden floors often come with their own “highlight reel” of problems — scratches from heavy furniture, mystery stains from past spills (thanks, pets), or those squeaks that sound like your house is gossiping every time you walk across it.
Start by identifying what’s actually wrong and how bad it is:
- Scratches: Light ones can often be fixed with a quick sanding or re-staining. Deeper gouges may need filler or even a board replacement.
- Stains: Minor spills usually buff out, but dark, set-in stains might require more aggressive treatment — or clever camouflage.
- Squeaks: Usually caused by loose boards. A few screws or nails in the right spots can bring back the peace and quiet.
Keep in mind that older floors need a gentler touch. They may be thinner or more delicate than modern boards, so go easy with tools and harsh products. Think of it like caring for vintage furniture — a little patience and the right approach will go a long way toward keeping it beautiful and functional.
DIY Floor Repair Techniques That Won’t Break the Bank
Sanding and Refinishing
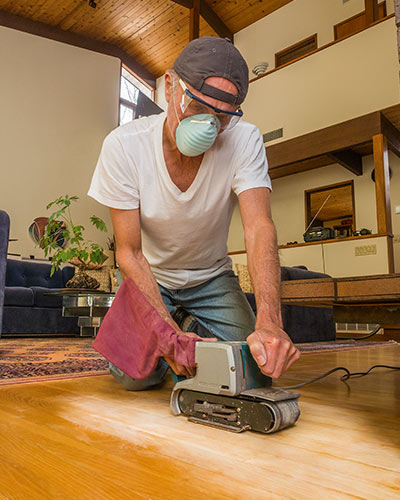
 When your floor looks tired, dull, or scratched all over, sanding and refinishing is like sending it to a spa. A drum or orbital sander removes the old finish and evens out the surface, leaving you with a blank canvas. From there, you can add a fresh coat of stain or even paint, then seal it for protection. It’s not the quickest DIY fix — and you’ll definitely break a sweat — but it’s cost-effective and can make an old floor look brand new again.
Filling Gaps and Cracks
Those little gaps and cracks between boards aren’t just unsightly; they can also collect dirt and dust. Luckily, fixing them is simple. For small gaps, wood filler or putty works like a charm: press it in, let it dry, sand smooth, done. For bigger gaps, epoxy filler is a tougher option that holds up better over time. Either way, it’s an easy way to refresh your floor’s look without calling in the cavalry.
Removing Stains and Blemishes
From spilled wine to muddy paw prints, stains are a floor’s worst enemy. The good news? Most can be tamed. Surface stains often lift with a scrub of vinegar and water. For the stubborn ones, a dab of diluted bleach can help — just don’t go overboard, or you’ll trade the stain for discolouration. Deep stains or scratches may need a filler and some sanding to blend them in. Small job? Grab a sanding block. Bigger mess? Rent a sander and tackle it like a pro.
Silencing Squeaky Floors
Few things are as irritating as a squeaky floor — it’s like your house is tattling on you. Start by finding the noisy culprit by walking the area. Once spotted, try sprinkling talcum powder or graphite between the boards to reduce friction. Still creaking? Secure loose boards with nails, screws, or adhesive. In stubborn cases, slide a shim between the joist and subfloor to stop the movement. Regular maintenance helps keep squeaks from returning — and restores peace and quiet to your home.
Budget-Friendly Floor Restoration Options
Staining wooden floors
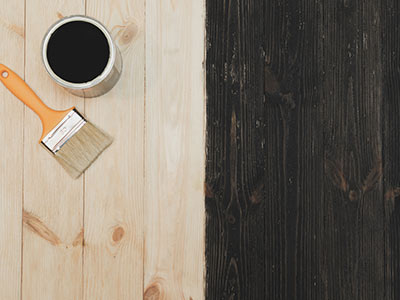
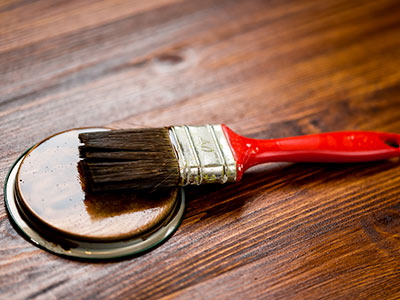
 When it comes to restoring wooden floors, there are many budget-friendly options available that can help homeowners transform worn-out surfaces with a fresh finish. One such option is to stain the floors. This is an effective technique that can rejuvenate old floors without the need for replacement. It involves removing the existing finish and sanding the floor back to its natural state, before applying a fresh coat of stain. Staining can help homeowners achieve a wide range of looks, from dark and dramatic to light and airy.
The process is relatively quick and easy and can be done by DIY enthusiasts with some basic tools and knowledge. One important thing to keep in mind when restoring wooden floors is to choose the right type of stain. Some stains can create a highly polished look, while others can create a more natural, matt finish. It’s also important to select a type of stain that is compatible with the wood species, as some woods may not take certain stains very well. For those on a tight budget, staining is an excellent way to restore wooden floors without breaking the bank. With a little time, effort, and the right materials, homeowners can give their floors a new lease of life and enjoy renewed beauty and durability for years to come.
Polishing and waxing
Another option is polishing and waxing, which is an affordable way to enhance the natural shine of the wood. This process can be completed without professional help, using simple products that can be found at your local hardware or home improvement store. The first step in this process is to get rid of any dirt or debris that has accumulated on the surface of the floor. This can be done using a soft-bristled brush or a vacuum cleaner. Afterwards, the floor can be polished using a polishing machine or a cloth. This will remove any minor scratches and will restore the shine to your wooden floor. A wax finish can be applied to enhance the natural beauty of the wood and to provide additional protection against wear and tear. With regular waxing and polishing, your wooden floors are likely to last longer and look better, while being a much more budget-friendly option as opposed to replacing them entirely. Not only does this restore the beauty of your wooden floor, but it also adds value to your property without spending too much money.
Utilising rugs and runners
Another option is to utilise rugs and runners which are effective in concealing imperfections while adding warmth and style to your floors. You can start by placing rugs in high-traffic areas like living rooms, hallways and entryways to not only protect the floors but also add an extra layer of comfort for your feet. Additionally, runners can be used to cover sections of the floor that have visible imperfections, like scratches or stains, while also creating a pleasing aesthetic feature.
Restoring Different Types of Wooden Floors
Hardwood Floors
 Classic hardwood floors are the superstar of wooden flooring — and luckily, they’re also some of the easiest to revive. The process usually follows three golden steps: sanding, staining, and sealing. Sanding wipes away years of scratches and scuffs, staining lets you refresh the colour (or completely change the vibe), and sealing locks everything in with protection against wear and moisture. Done properly, the result is a floor that looks brand new but keeps its natural character. If you’re not confident with heavy-duty sanders, consider calling in a pro — one wrong move can turn a chic restoration project into an expensive oops moment.
Engineered Wood Floors
Engineered floors are a little trickier. They can still be sanded and refinished, but only if the top veneer is thick enough — otherwise, you risk sanding straight through the surface. A safer, budget-friendly option is to refresh with a specialist cleaner designed for engineered floors. It’s a quick mop-and-wipe routine that lifts grime, evens out the look, and brings back some shine. For deeper damage, it’s usually best to let professionals handle it, as engineered wood needs more finesse to keep it looking its best.
Antique Wooden Floors
Antique floors are treasures — and like all treasures, they require delicate handling. Forget harsh chemicals or aggressive sanding; these can strip away the unique character and patina that make old floors so charming. Instead, stick to gentle cleaners, soft-bristled brushes, and microfiber mops for everyday care. If refinishing is needed, always get a professional involved, as the goal is to preserve history, not erase it. Regular inspections and gentle upkeep will keep antique boards strong, beautiful, and full of character for years to come.
Maintenance Hacks to Keep Your Floors Looking Fresh
So, you’ve brought your floors back to life — now the goal is to keep them looking that way. Restoration is only half the battle; smart maintenance is what keeps your floors shining for years without the need for repeat fixes. Here’s how to make your hard work last:
- Clean gently: Skip the harsh chemicals — they’ll strip finishes and dull the wood. Stick to gentle cleaners made for wooden floors and always follow the product’s instructions.
- Deal with spills immediately: Liquids and wood are sworn enemies. Wipe up accidents right away to avoid stains or water damage.
- Vacuum and sweep regularly: Dust and grit act like sandpaper underfoot. Use a soft-bristled vacuum attachment to clean without scratching.
- Protect from furniture: Add felt pads under heavy furniture legs to prevent dents and scuffs — your floor will thank you every time you move the sofa.
- Think prevention: A good doormat, regular sweeping, and routine maintenance go a long way in preserving your floor’s beauty (and your wallet).
Little habits make a big difference. With a bit of regular TLC, your revived floors will stay gorgeous for years — no emergency repairs required.
Conclusion: Affordable Fixes, Lasting Impact
Repairing and reviving old floors doesn’t have to drain your budget — or your patience. From simple gap filling to full-on sanding and refinishing, there are plenty of cost-effective techniques that breathe new life into tired boards. Add in regular maintenance, and you can extend the life of your wooden floors for decades while preserving their character and charm. The best part? Every squeak silenced, every scratch repaired, and every shine restored adds both comfort and value to your home.
FAQ: Cost-Effective Floor Repair
- What’s the cheapest way to revive wooden floors? Polishing, waxing, or staining are affordable options that instantly refresh the look without a full renovation.
- Can I fix floor squeaks without hiring a pro? Yes — often, tightening boards, adding screws, or sprinkling talcum powder between planks will do the trick.
- Is sanding always necessary? Not always. Minor scratches and stains can often be treated with fillers, cleaners, or polish. Sanding is best for floors with widespread wear.
- How do I know if my floor needs replacing instead of repairing? If the boards are badly warped, rotted, or paper-thin from multiple sandings, replacement may be the smarter option.
- How can I make my repair last longer? Consistent cleaning, spill management, and protective pads under furniture will keep your floor looking great and reduce future damage.