Back to DIY Advice
DIY LVT Floor Installation Guide: Step-by-Step Tips
 Thinking of giving your floors a glow-up without calling in the professionals (or selling a kidney)? Luxury Vinyl Tile (LVT) flooring might just be your new best friend. It’s durable, stylish, and so good at pretending to be real wood or stone that even your guests might get fooled. The best part? You can install it yourself with just a few tools and a sprinkle of patience.
In this guide, we’ll walk you through the step-by-step process of laying LVT flooring. From prepping the subfloor to snapping that final plank into place, you’ll learn how to get sleek, professional-looking results—without the professional bill. Grab your toolkit, roll up your sleeves, and let’s turn that floor into something worth showing off.
Why Choose LVT Flooring? (Spoiler: It’s Awesome)
LVT flooring is like the master of disguises in the flooring world. Want the look of oak hardwood? Check. Fancy marble vibes without the “don’t spill the wine” panic? Double check. Ceramic tile look without freezing your toes in winter? You got it. And here’s the kicker—it delivers all this at just a fraction of the cost of the real thing.
But good looks aren’t its only party trick. LVT can handle heavy foot traffic like a champ and laugh in the face of water spills, making it a go-to option for busy kitchens, splash-happy bathrooms, and anywhere else life gets messy. Maintenance? Easy. A quick sweep and a mop are all it needs to stay in tip-top shape.
Even better, you get to choose your installation adventure: glue-down for permanence, click-lock for that satisfying “snap” together feel, or loose-lay for the ultimate “I might move this later” flexibility. Whichever method you pick, just remember—follow the manufacturer’s instructions and prep that subfloor like a pro. Do it right, and your LVT floor will keep looking fabulous for years.
Pre-Installation Preparation
Before starting with the DIY LVT floor installation, it is important to thoroughly prepare the room and gather all the necessary tools and materials. The first step is to measure the dimensions of the room, including its length and width. This will help in determining the amount of LVT flooring needed for the project. Additionally, it is essential to assess the condition of the subfloor to ensure it is clean, level, and free from any damage. Any imperfections should be addressed and fixed before proceeding with the installation.
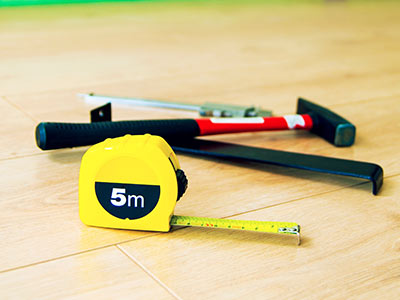
Once the room and subfloor are ready, it is time to gather all the necessary tools and materials. This may include a measuring tape, utility knife, straight edge, adhesive, and underlayment if required. It is important to have all the tools readily available to ensure a smooth installation process. LVT flooring should be acclimated to the room's environment. This means allowing the flooring to sit in the room for at least 48 hours to adjust to the temperature and humidity. This step is crucial as it helps prevent any warping or deformation of the flooring after installation. By following these pre-installation preparations, the LVT floor installation can proceed smoothly and effectively.
Getting Started: The Calm Before the Plank Storm
 First things first—give your room a clean slate. Clear everything out. Furniture, rugs, old carpet, random gym equipment you swear you’ll use—out it goes. If there’s old flooring like carpet or laminate, remove it. Your new LVT deserves a fresh stage, not a cluttered backstage mess.
Now, onto the subfloor spa treatment. Sweep away dust, patch up cracks, and make sure the whole thing is level. Why? Because an uneven subfloor will turn your “luxury” vinyl into “lumpy” vinyl faster than you can say “DIY fail.”
Once the base is sorted, grab your tape measure and start playing architect. Create a layout plan by figuring out the direction your planks will run, how they’ll fit the size of the room, and how to dance around obstacles like radiators, doors, or that oddly placed pillar you still don’t understand. Finally, pick your starting point. This is usually a corner, but depending on your plan (and the quirks of your room), it might be somewhere else. The goal? A layout that looks smooth, balanced, and Instagram-worthy once all the planks click into place.
Installing the LVT Flooring: Pick Your Adventure
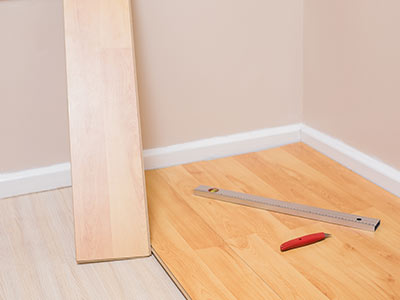 Here’s where the fun begins—actually putting your shiny new LVT floor down. The great news? You’ve got options, so you can pick the method that suits your DIY confidence (and patience level).
Click & Lock: The fan-favourite. Just line up the planks and snap them together like giant Lego pieces for grown-ups. No glue, no fuss, and you’ll feel like a pro in minutes.
Peel & Stick: Perfect for small spaces or when you want instant gratification. Peel off the backing, press the tile down, and voilà—you’ve just stuck the landing. Literally.
Glue-Down: For the “I want this floor to survive an apocalypse” crowd. You spread adhesive on the subfloor, place your planks, and get a rock-solid finish built for high-traffic chaos.
Floating Installation: Another crowd-pleaser. Planks interlock without glue or nails, which means you can pop out a damaged board down the line without tearing up the whole floor. Handy, right?
When it’s time to cut planks for corners or edges, reach for a utility knife or vinyl cutter. They’ll give you clean cuts and a polished look that screams “I knew what I was doing.” With these methods, you can match your installation style to your skill level—and end up with floors that look like a pro did the job.
Finishing Touches: The Grand Finale
 Congrats, you’ve got your new LVT floor down! But before you throw yourself a housewarming party, there are a few small details that take your work from “looks good” to “wow, did a pro do this?”
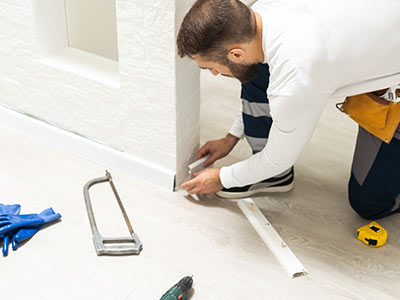
Trim & Mouldings: Think of these as the frame around your masterpiece. They cover up any gaps at the edges and make everything look polished. Plus, nobody will know if your cuts weren’t 100% perfect.
Transition Strips: Got a doorway leading into another room with a different floor? Transition strips save the day. They smooth out the change and stop people from tripping every time they cross into the kitchen.
Sealant or Top Coat: Optional, but highly recommended if you want your floor to laugh in the face of spills, scratches, and everyday chaos. It’s like giving your LVT a superhero cape of protection.
Final Clean-Up: Sweep away dust, dirt, and leftover crumbs from your celebratory snacks. Give the floor a once-over and check for any little details that need tweaking. The cleaner it looks, the more you’ll want to show it off.
With these finishing touches, your DIY LVT installation isn’t just done—it’s showtime. Pour yourself a drink, admire your handiwork, and enjoy the smug satisfaction of knowing you pulled this off.
Troubleshooting & Maintenance: Keep Calm and Fix Your LVT
Even the best DIY jobs hit a few bumps along the way—sometimes literally. One of the most common headaches is uneven subfloors. If you skipped this check, don’t be surprised if your planks start wobbling like a wonky table. The cure? A floor leveling compound or self-leveling underlayment to get things nice and flat before you lay down more planks.
Another rookie mistake? Planks not aligned properly. Misaligned planks can leave gaps or cause pieces to shift every time someone walks over them. The solution here is simple but vital: slow down, follow the manufacturer’s instructions, and double-check your work before moving on.
But hey, accidents happen. If one of your shiny new planks gets scratched, dented, or damaged, don’t panic. Replace the plank if it’s badly hurt, or use a filler for those smaller blemishes. Easy fix, no tears required.
Now let’s talk about keeping your floor fabulous: vacuum or sweep regularly to keep dirt from grinding into the surface, and when it’s time for a deeper clean, use a damp mop with a mild cleaner. Avoid drowning your floor in water—remember, it’s vinyl, not a swimming pool. Skip the harsh chemicals and steel wool too, unless you’re trying to add "rustic scratches" (which, spoiler alert, nobody is).
Finally, prevent future drama by using felt pads under furniture and wiping up spills before they become sticky science experiments. Do this, and your LVT floor will keep looking sharp long after installation day.
Safety First: Because Floors Aren’t Worth a Trip to A&E
 Before you grab your utility knife and channel your inner flooring ninja, let’s talk safety. Always suit up with the basics: gloves, goggles, and a dust mask. These may not make you look glamorous, but they’ll save your eyes, lungs, and fingers from any nasty surprises along the way.
LVT flooring often comes with adhesives, and some of them contain chemicals you definitely don’t want as your new perfume. Dispose of waste properly and always follow local regulations—because no one wants their DIY project to double as an environmental hazard.
Another golden rule? Keep the workspace tidy. Stray planks, tools, or spilled adhesive can quickly turn into tripping hazards. A slip may be funny in cartoons, but not when you’re carrying a saw. And don’t forget ventilation—open those windows or keep a fan running. Fresh air is your friend when working with adhesives and sealants.
Lastly, read (and actually follow) the manufacturer’s installation guidelines. Yes, even if you think you know better. They include specific safety precautions tailored to the product you’re using. Stick to them, and your project will be both safe and successful.
DIY LVT Floor Installation: Frequently Asked Questions
Can I install LVT flooring over existing tiles or vinyl?
Yes, you can! LVT is designed to go over many existing surfaces, including old tiles or vinyl. Just make sure the surface is clean, smooth, and stable. If the old floor has loose or damaged spots, fix them first. A self-levelling compound or primer can also help create an even base before laying your new LVT.
How long does it take to install LVT flooring?
On average, a medium-sized room takes one to two days for a DIY install. This includes prep time: acclimating planks, cleaning, levelling, and small repairs. If you’re experienced (or very determined), you might finish sooner—but always plan extra time so you’re not rushing the finishing touches.
Can I install LVT flooring in basements or bathrooms?
Absolutely! One of LVT’s biggest perks is its resistance to moisture and humidity, which makes it ideal for bathrooms, basements, and laundry rooms. Just prep the subfloor properly, use a waterproof adhesive (if your type requires it), and seal the edges to avoid water sneaking underneath.
Can LVT flooring be installed on stairs?
Yes, but this is where things get a little tricky. Stairs need special tools, precision cutting, and often stair nosing trims. If you want a flawless finish, it’s wise to follow the manufacturer’s guidelines to the letter—or call in a pro for this part.
Is professional installation recommended for LVT flooring?
Not strictly! LVT is designed with DIYers in mind, especially the click-lock or loose-lay systems. That said, if you’re dealing with complex layouts, stairs, or tricky subfloors, professionals can save you a lot of stress (and prevent costly mistakes). If you’re confident and follow the instructions carefully, DIY is totally doable.