Back to Wood Floor Fitting
Subfloor Preparation: Get Your Home Ready for New Flooring
 When it comes to fitting new wood or vinyl flooring, success doesn’t start with the planks — it starts with what’s underneath. Proper subfloor preparation is one of the most important steps in any floor installation project. It ensures your flooring lays flat, stays secure, and lasts for years without problems like creaking, buckling, or early wear.
In this guide, we’ll cover the essential steps involved in preparing your subfloor for a smooth, long-lasting floor installation. Whether you’re planning a hardwood, engineered wood, or LVT floor, these preparation tips apply to every project.
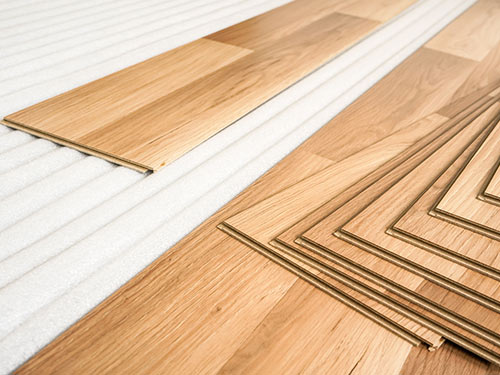
What Is a Subfloor and Why It Matters
The subfloor is the structural layer beneath your flooring — usually made of concrete, plywood, or chipboard — that supports everything above it. It’s not the visible flooring surface, but it plays a major role in the stability and performance of the final result.
There’s often confusion between subfloor, underlay, and finished flooring:
- Subfloor: The base structure that supports the floor (concrete or wood).
- Underlay: A thin layer used to cushion or insulate between the subfloor and flooring (where applicable).
- Flooring: The visible surface you walk on — wood planks, vinyl tiles, etc.
Neglecting the subfloor can lead to movement, noise, moisture damage, and premature floor failure. Preparing it properly ensures a secure, quiet, and durable finish.
Inspect the Existing Subfloor
Before any preparation work begins, a thorough inspection of the subfloor is essential. This helps identify potential issues that could affect the installation or shorten the lifespan of your new flooring.
- Check for damage: Look for cracks, warping, sagging areas, or water stains that may indicate underlying structural problems.
- Test stability: Walk across the floor and listen for squeaks or feel for movement. Loose boards or unstable sections should be repaired or replaced.
- Assess flatness: Use a long spirit level or straight edge to spot dips or high points that could interfere with flooring installation.
- Look for mould or moisture signs: Especially in older properties or ground floors, where dampness can be hidden beneath the surface.
Spotting these issues early gives you time to repair and reinforce the subfloor, saving money and hassle later on. For professional help with this process, book a free site survey and get expert advice on what your subfloor needs.
Test for Moisture
Moisture is one of the biggest threats to new flooring, especially wood. Before installation, it’s critical to test the moisture level of your subfloor to avoid future problems like warping, cupping, or adhesive failure.
- Use a moisture meter: This tool gives accurate readings of both concrete and timber subfloors. For timber, readings should generally be below 12%, and for concrete, below 75% relative humidity (RH).
- Watch for hidden damp: Even if a subfloor looks dry, moisture can still be present, particularly in basements, ground floors, or recently built homes.
- Install a damp-proof membrane (DPM): If moisture levels are borderline or if you’re laying wood flooring over concrete, a DPM can act as a reliable barrier.
Skipping moisture checks can lead to serious damage after the floor is installed. This step is especially important when installing engineered wood flooring or LVT flooring over concrete.
Clean and Clear the Area
Once you've inspected the subfloor and confirmed moisture levels are within the acceptable range, it's time to clean the entire area thoroughly. A clean, clutter-free subfloor provides a stable surface for bonding adhesives and underlays, and it helps ensure a smooth finish without bumps or defects.
- Remove all old flooring: Take up carpets, tiles, laminate, or any remaining adhesive or staples. Old glue or uneven residues can interfere with new installation layers.
- Clear debris and dust: Sweep, vacuum, and wipe down the subfloor to eliminate dust, grit, and loose particles that may cause unevenness or noise later.
- Fix damaged areas: Replace cracked or crumbling screed sections, fill small holes, and tighten or replace loose boards if dealing with a wooden subfloor.
Neglecting this step could lead to long-term issues like popping sounds, shifting planks, or visible irregularities beneath LVT or thinner flooring types.
Level the Surface
An uneven subfloor is one of the most common causes of flooring failure. Whether you're installing solid wood, engineered boards, or LVT, a level surface is essential to prevent gaps, movement, or visible imperfections in the final result.
- For concrete subfloors: Use a self-levelling compound to fill in dips and create a smooth, even surface. Follow drying times carefully before proceeding with installation.
- For timber subfloors: Sand down high spots or install plywood sheeting over uneven areas. Secure loose boards and fill small gaps or holes with a suitable filler.
- Check levelness: Most flooring types require the subfloor to be level within 2–3 mm over a 2-metre span. Use a long straight edge or laser level to verify tolerances.
Skipping this stage can cause long-term structural issues and affect the lifespan of your floor. If levelling feels daunting, get in touch with our team — we offer full subfloor levelling and preparation services across London.
Prepare the Subfloor Based on Flooring Type
Different flooring types have different requirements when it comes to subfloor preparation. Making sure your subfloor matches the needs of your chosen material is the key to a stable and long-lasting installation.
- For solid hardwood: The subfloor must be completely dry, flat, and firmly secured. Solid wood is less forgiving than other types and will expand or contract with humidity, so proper acclimatisation and expansion gaps are essential.
- For engineered wood: Slight subfloor imperfections are acceptable, but the surface must still be clean, dry, and level. Engineered floors can be floated, glued, or nailed, depending on the product and subfloor condition.
- For LVT or vinyl flooring: These products are thin and will reveal even the smallest subfloor flaws. A perfectly smooth, level, and dry base is critical, especially for glue-down installations. Plyboard or smoothing compounds may be required on timber subfloors.
Using the correct preparation method based on your flooring choice helps prevent installation delays and ensures the best finish possible.
Professional Subfloor Preparation Services
While some subfloor prep can be managed DIY, many homeowners and property managers choose professional services to ensure accuracy and avoid costly mistakes. An experienced team will know how to handle even the most uneven or moisture-prone floors — and have the right tools to do it efficiently.
- Expert assessments: Professionals can spot hidden issues like minor dips, moisture risks, or damaged screed that are easily missed without experience.
- Precision levelling: Using laser levels, self-levelling compounds, and moisture barriers, pros deliver a perfectly prepped surface ready for installation.
- Time-saving: Hiring a skilled team often reduces project delays and ensures your flooring is laid to the highest standard the first time.
- Peace of mind: Knowing your subfloor meets all requirements for your chosen flooring type means less risk of problems like creaking, shifting, or buckling later on.
If you're unsure about your subfloor’s condition, book a free site survey with our London team to get expert guidance before installation begins.
Conclusion
Subfloor preparation is the unsung hero of every successful flooring project. Whether you're laying solid wood, engineered boards, or LVT, your new floor is only as good as the surface it’s installed on. From checking moisture and cleaning up debris to levelling and choosing the right preparation based on material, every step matters.
By investing time (or professional help) into proper subfloor prep, you’ll avoid common issues like creaks, uneven boards, or premature wear — and enjoy a smooth, durable floor that performs beautifully for years to come.
Not sure if your subfloor is ready? Contact us today to get expert advice and reliable preparation services across London.