Back to Maintenance & Care
Cleaning Stains & Scratches on Varnished Floors
Hardwood flooring remains one of the most beautiful, attractive, and desirable flooring choices for homeowners. However, unlike some other resilient flooring options, wood requires consistent care and maintenance to preserve both its appearance and structural integrity.
Among the most common issues faced by homeowners are stains and scratches on hardwood floors. The way you treat these problems largely depends on the type of finish currently protecting your flooring. Since this guide is focused on varnished wood floors, we will explore the best practices to prevent, manage, and repair scratches and stains while keeping your varnished surface looking polished and well-protected.
What is Varnish?
 When discussing wood floor finishes, the term "varnish" is often used by homeowners, while professionals typically refer to the same product as lacquer. Historically, varnishes and lacquers were considered two slightly different products, but over time, lacquers became the preferred choice due to their durability and ease of application. Today, when people speak about varnished wood floors, they usually mean a lacquered surface.
Floor finishing products generally fall into two main categories:
- Penetrating finishes (oils) – These soak into the wood fibres and protect the surface from within. Penetrating oils are valued for their natural look and ease of spot repair.
- Surface finishes (lacquers/varnishes) – These create a protective film on top of the wood, shielding it against scratches, stains, and daily wear. Lacquer belongs to this group and is one of the most common choices for hardwood floor protection.
Understanding which finish your floor has is essential before attempting to repair scratches or stains on hardwood flooring. While penetrating oil finishes are generally easier to maintain and spot repair, lacquered or varnished finishes require a different approach to achieve the best results.
How to Identify if Your Floor is Varnished
Before treating scratches or stains, it is essential to know exactly what type of finish is protecting your wood floor. The method of repair will vary depending on whether the floor is coated with lacquer (varnish), a penetrating oil, or even an additional wax coating.
Here are two simple ways to check:
- Scratch test: Choose a discreet spot on the floor and gently scrape the surface with a coin or putty knife. If the finish flakes off rather than absorbing the scratch, it is likely a surface finish such as lacquer or varnish.
- Water drop test: Place a few drops of water on the surface. If no white spots or dull marks appear, this strongly suggests the presence of a lacquered wood floor finish.
Some lacquered floors are additionally coated with wax. To check for wax, rub a hidden area with a white cloth dampened in mineral spirits. If the cloth picks up a light brown or yellow residue, your floor likely has a wax coating on top of the lacquer. Identifying the correct finish ensures that you use the proper cleaning and repair methods for your hardwood floor.
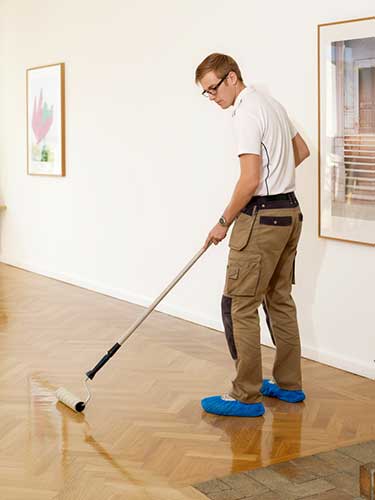
How to Remove Stains from Varnished Wood Floors
One of the main advantages of a surface-finished hardwood floor is its resistance to most liquids, provided spills are wiped up quickly. The golden rule of stain removal on wood floors is simple: do not let the liquid dry. Fast action is your best defence against permanent marks.
However, some substances, such as red wine, dyes, or strong-coloured foods, may still leave a visible mark even when cleaned immediately. In these cases, specialised hardwood floor cleaners are the safest solution. These products are formulated to lift stains without damaging the protective lacquer. Using household acids like ammonia or vinegar may seem tempting, but they can strip away the finish along with the stain, leaving the wood vulnerable to further damage. Always try professional wood floor cleaning products first before considering harsher alternatives.
Pet stains are among the most challenging. Pet urine contains ammonia that can break down the finish and seep into the wood, leaving dark spots that are extremely difficult to remove. If caught early, a hardwood floor cleaner may help. But once the stain has penetrated deeply, even vinegar or alternative cleaners will not restore the surface. In such cases, the only effective option is to sand and refinish the floor, removing both the stain and the old finish together. Where the damage is severe, changing the floor’s colour with a darker stain can help disguise permanent marks and restore an even appearance.
Fixing Common Issues on Varnished Floors
Even the most durable varnished or urethane wood floors can develop small problems over time. The good news is that most issues can be fixed with the right wood floor repair products and a little care. Here are the most common problems and how to resolve them:
- Scratches: Light scratches can often be repaired with a urethane floor touch-up kit, widely available from wood flooring retailers. These kits usually include colour-matching markers or fillers to blend scratches into the surrounding surface.
- Food, water, or pet stains (dog spots): Use a cleaner specifically designed for urethane-finished wood floors. For stubborn stains, scrub gently with a wood floor scrub pad recommended for urethane finishes until the spot is gone.
- Greasy spots: Substances like oil, grease, lipstick, or crayon can be lifted with a urethane wood floor cleaner. Avoid household detergents, as they can damage the finish.
- Cigarette burns: Minor burns can be treated by lightly sanding the area, applying a stain to match the existing floor, and refinishing. For deep burns that penetrate the wood, the affected plank or parquet piece may need replacement.
- Chewing gum, crayon, or candle wax: Apply a bag of ice until the material becomes brittle, then carefully chip it away. Once removed, clean the area with a urethane-approved floor cleaner to restore the finish.
Always prioritise products recommended by your wood floor manufacturer to ensure the finish is protected and the repair lasts long term.
Preventing Future Damage
Once scratches, stains, and other issues are repaired, the next step is preventing them from happening again. With the right wood floor maintenance practices, your varnished flooring can retain its beauty and durability for many years. Here are some simple but effective ways to protect your investment:
- Use protective pads: Attach felt pads to the legs of chairs, tables, and heavy furniture to prevent scratches when moving them.
- Clean spills immediately: Liquids left standing can damage even the toughest varnish. Wipe up water, wine, or food spills quickly to avoid stains.
- Place rugs and runners: Use mats in high-traffic areas, such as hallways and entrances, to minimise dirt and grit that can scratch the surface.
- Maintain pet care: Keep pets’ nails trimmed to avoid accidental scratches on your hardwood floors.
- Stick to proper cleaners: Always use wood floor cleaning products designed for varnished or urethane finishes. Avoid harsh chemicals like vinegar or ammonia that can strip the protective layer.
By combining regular cleaning with these preventative measures, you will not only protect your floors from future scratches and stains but also extend their lifespan and preserve their elegant appearance.
Conclusion
Varnished hardwood floors are both elegant and durable, but like any surface, they require proper care to remain in top condition. Understanding the type of finish on your floor is the first step toward applying the right treatment for scratches, stains, and everyday wear. With the correct cleaning methods and targeted repairs, most issues can be resolved without the need for a full renovation.
However, when damage is too severe or widespread, professional intervention may be the best option. Our team at FlooringFirst! specialises in floor sanding, refinishing, and repair services to restore even the most worn surfaces to their former glory. With expert care, your hardwood floors can continue to add warmth, beauty, and value to your home for decades to come.
Ready to give your floors the treatment they deserve? Get in touch with us today for professional advice and tailored solutions for all your wood floor maintenance needs.