Back to Floor Sanding
5 Common Floor Sanding Mistakes and How to Avoid Them
 As a wood floor sanding with many years of experience in the field, we have worked on so many wonderful solid wood, engineered wood, and parquet floors that it is impossible to remember them all. Wood floor sanding and refinishing projects are our favourites because of the dramatic change they can make for worn, distressed, and generally tired and sad real wood floors. Wood floor sanding can not only significantly improve the appearance of every wooden floor, but it is also very beneficial in terms of improving the floor's durability, hard-wearing power, longevity, and protection. Wood floors get worn and even damaged due to everyday use, high traffic, heavy footfall, and many other factors that will affect the appearance and condition of your wooden floor over the years.
While these are some typical traces of time and everyday use that leave imperfections that can be easily handled, unfortunately, there are some cases when floor owners have tried their best at a DIY wood floor sanding and renovation project but they failed. Sometimes DIY attempts can turn into such a nightmare that the final result is beyond repair. Fortunately, such situations are a rare thing. But still, if you decide to sand your floor on your own but you are not sure what you are doing, or you have just experienced a very poor floor sanding performance by someone who calls themselves a floor sanding specialist but they are not when real professional step into the game, wood floor sanding mistakes can be handled. Today, we would like to discuss the top 5 most common wood floor sanding mistakes and tell you how to avoid them.
Wrong Grit Sandpaper
Using the right grit sandpaper at each stage of the sanding process is crucial for achieving flawless results. Sandpaper comes in various grits, and each phase of sanding requires a specific one. Initially, the coarsest grit is needed to remove the old finish and address surface imperfections. As the process progresses, finer grits are used to smooth the surface and open the wood’s pores, preparing it for finishing.
It's essential to use the correct grit at each stage and to avoid skipping grits. The starting grit depends on the floor’s condition: its wear, whether it’s been sanded before, the type of finish, and the severity of any imperfections. For floors that only need a light refresh, you can begin with a finer grit. However, always start with the coarsest grit appropriate for the job and gradually move to finer grits. Starting with grit that's too fine will cause the sandpaper to clog quickly, making it ineffective and increasing your costs as you'll need to replace it frequently.
Key Tips:
- Begin with the coarsest grit for heavy wear or deep imperfections.
- Use progressively finer grits to ensure a smooth, even finish.
- Skipping grits can lead to an uneven surface and ineffective sanding.
Not Sanding Enough

Finding the right balance between enough sanding and over-sanding can be tricky. It varies depending on the specific wood floor you are working with. When you begin sanding, you’ll notice a dramatic difference as the old finish and accumulated dirt are removed. However, after this initial stage, progress may seem slower. But this doesn’t mean the job is done once the old finish and surface imperfections are gone.
You’re far from finished. Most floors are not perfectly flat, which means a sanding machine won’t reach every corner in one pass. You need to continue sanding until every inch of the floor is properly treated, ensuring a consistent and smooth surface across the entire floor. Don’t stop after just one or two passes - make sure the edges and hard-to-reach spots are fully sanded. The effort you put in at this stage is key to achieving flawless results.
Key Tips:
- Don’t stop early: Even when progress slows, keep sanding until all areas are uniformly smooth.
- Edge work matters: Make sure edges and corners are fully treated.
- Multiple passes: Plan for several passes with different grits for a perfectly smooth finish.
Not Sanding Diagonally
Sanding the floorboards diagonally is a technique that can make the entire sanding process quicker and more effective, especially for DIY enthusiasts. Sanding diagonally helps to level out any unevenness in the floor that may not be noticeable at first. Many floors have subtle high and low spots, and sanding in a straight line can miss these areas or exaggerate the unevenness. Diagonal sanding ensures a more even surface because the sander passes across the grain at an angle, allowing it to smooth out any irregularities more efficiently.
Additionally, sanding diagonally is useful when dealing with older, more worn floors or floors that have been sanded unevenly in the past. It provides a more uniform finish, reducing the risk of oversanding certain areas while leaving others untreated. For best results, follow up diagonal sanding with straight passes to refine the surface even further. This technique not only leads to smoother and more level floorboards but also cuts down on the time and effort needed for subsequent passes.
Key Benefits:
- Evens out high and low spots: Diagonal sanding smooths subtle unevenness in the floor.
- Speeds up the process: More efficient than sanding in a straight line.
- Prevents over-sanding: Reduces the risk of uneven sanding results.
Paying Too Much Attention to the Edges
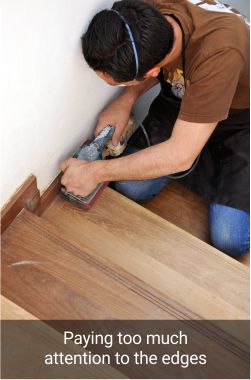
While it’s essential to ensure all areas of the floor are properly sanded, including the edges, there’s no need to overdo it. The sanding edger is designed for reaching these tricky spots, but working with it can be tiring and challenging, especially for DIY enthusiasts. The good news is that you don’t need to sand the edges to the same extent as the main surface. There’s no need to progress to the finest sandpaper grit for the edges as you would for the rest of the floor.
Lightly sanding these areas will still provide great results, and the floor will look even and smooth without requiring the same level of precision. This approach not only saves time but also reduces the physical strain of working on hard-to-reach corners. As long as the edges are properly treated, the floor will have a uniform appearance, and you’ll avoid unnecessary extra work.
Key Tips:
- Don’t oversand: Edges don’t need the same level of attention as the main floor.
- Use the edger efficiently: Light sanding with fewer passes will still produce an even finish.
- Save time and effort: Focusing less on the edges can speed up the process and make it less physically demanding.
Not Replacing Sandpaper With New Ones Often Enough
One common mistake is not replacing the sandpaper frequently enough, especially when it becomes clogged. This often happens due to a lack of experience or the desire to save money by using fewer sandpaper sheets. However, continuing to sand with worn or clogged sandpaper is a big mistake. It significantly reduces the efficiency of the sanding process, making it slower and less effective. Additionally, clogged sandpaper can create uneven surfaces and may damage the wood by leaving behind scratches.
To achieve quicker and more professional results, it's crucial to change the sandpaper as soon as it loses its effectiveness. Fresh sandpaper will allow you to sand more smoothly and consistently, improving the overall finish of the floor. Although it may seem like a way to save money, using fewer sheets can result in more time, effort, and potential mistakes, costing you more in the long run.
Key Tips:
- Monitor sandpaper wear: Replace as soon as it becomes clogged or ineffective.
- Save time and effort: Fresh sandpaper makes the job easier and faster.
- Achieve a smoother finish: Regularly changing sandpaper ensures a professional-quality result.
***Bonus Mistakes to Avoid***
Applying Too Much Pressure When Sanding

It’s easy to assume that pressing down harder on the sander will remove imperfections faster, but this can do more harm than good. Excessive pressure can cause the sanding drum to dig into the wood unevenly, leaving behind deep marks or gouges that are difficult to fix. Uneven sanding will not only affect the appearance but also the performance of any finishes applied later.
Key Tips:
- Let the weight of the machine do the work — no added pressure is needed.
- Maintain a steady and even pace to prevent the sander from dwelling in one area too long.
- Practice on a small area first to get a feel for the machine’s natural movement.
Not Vacuuming Between Sanding Passes
Failing to vacuum between sanding stages is a common mistake that leads to uneven results. Dust left on the surface can interfere with subsequent sanding grits and cause scratches, clog abrasives, and even affect the adhesion of your chosen finish. Cleanliness is key throughout the entire sanding process.
Key Tips:
- Use a powerful vacuum cleaner with a brush head attachment after every sanding pass.
- Pay special attention to corners, edges, and gaps between floorboards.
- Wipe the floor with a microfibre cloth after vacuuming to remove any remaining fine dust.
Skipping a Sanding Sealer Before Finishing
One mistake often made during DIY floor refinishing is skipping the use of a sanding sealer before applying the final finish. Without a sealer, the wood may absorb stain or finish unevenly, leading to blotchy results. A sanding sealer helps create a smooth, sealed surface that enhances finish adhesion and consistency.
Key Tips:
- Choose a sealer that is compatible with your final finish (lacquer, oil, etc.).
- Apply the sealer with a roller or brush in thin, even coats.
- Lightly sand with a fine-grit pad after the sealer dries for a perfectly smooth surface before finishing.