Back to DIY Advice
Restoring Your Parquet Floor: A DIY Guide for Lasting Beauty
 Parquet flooring never goes out of style. Whether arranged in a timeless herringbone, a classic basket weave, or an intricate mosaic, a well-kept parquet floor can last for decades — even generations. It’s a feature that instantly adds charm and character to any room, from a modern living space to a vintage-inspired bedroom.
Of course, even the most beautiful parquet can start to look a little tired over time. Scratches, dullness, and everyday wear are common, but the good news is that parquet can be restored. While complex repairs should always be handled by professionals, there are plenty of ways to refresh and rejuvenate your parquet floor yourself if the damage isn’t too deep. With the right tools, a bit of patience, and this step-by-step guide, you can bring your parquet floor back to life without breaking the bank.
Note: If you’re unsure about your DIY skills, or if the floor shows major damage, such as lifting blocks or loose patterns, it’s best to call a specialist. But for surface-level improvements, this guide will give you the confidence and know-how to do it yourself.
Revive Parquet Floors: DIY Restoration for Elegance and Durability
Begin your parquet floor restoration by clearing the space completely. Move out all furniture, rugs, and heavy objects, and store valuables safely out of the way. Once the room is empty, focus on removing dust and debris. Use a vacuum cleaner with a parquet-friendly attachment, or a soft brush head if available. A smaller, lightweight vacuum is ideal — easy to manoeuvre without risking scratches on your delicate wood blocks.
Gentle Cleaning for a Flawless Finish
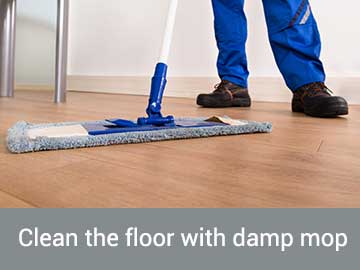
Cleanliness is key. Use a slightly damp mop (never soaking wet!) with warm water mixed with a hardwood floor cleaner or a neutral pH solution designed for parquet. Work across the surface carefully, paying attention to stubborn stains and areas of buildup. Repeat if necessary until the floor looks spotless, then finish with a final mop using clean warm water only, to remove any leftover cleaner.
Identifying the Existing Finish

Before applying anything new, you need to know what you’re working with. Pick a hidden spot, like under a sofa, and place a few drops of water on the surface for around 10 minutes. If white spots appear, your floor has an oil or wax finish. If no spots show, it’s likely lacquer or varnish. To remove white marks, gently treat the surface with wax-coated steel wool.
Choosing the Right Product for Finish Restoration
Now it’s time to choose your restoration product. Always match the solution to your parquet’s finish type. For lacquer or varnish floors, a parquet polish is usually the best choice. For oil- or wax-finished floors, consider hard wax or maintenance oil. These products are designed with DIYers in mind and are perfect for floors that are worn but not deeply damaged. Two coats of hard wax can work wonders on heavily used parquet.
Application and Recoating
Apply your chosen product carefully, following the manufacturer’s instructions. The goal of recoating is to refresh the finish without needing to sand down to bare wood. Work evenly, don’t rush, and let each coat dry fully before adding another. For tired parquet floors, this step alone can transform dull blocks into a surface that shines once again.
Hardwood Floor Buffing for Perfect Results
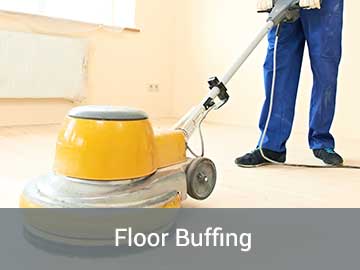
For the final touch, bring your floor back to life with hardwood floor buffing. Depending on the product you’ve used, check the recommended drying time before buffing. You can use a traditional buffing block for smaller areas or a semi-professional buffer with a large pad for a flawless, uniform finish. Buffing not only evens out the sheen but also leaves your parquet floor looking refreshed and elegant.
What You Will Need for the Project

- Vacuum cleaner with a hardwood/parquet attachment or a soft brush head
- Neutral pH wood detergent or parquet-specific cleaning product
- Mop and bucket
- Mineral spirits (for removing excess wax)
- Parquet maintenance products (oil, wax, or polish, depending on finish)
- Cleaning rags
- Buffing block or semi-professional buffer
- Large white pad for the buffer
Additional Tips
- Deep cleaning first: If your floor has heavy dirt buildup, apply a thin layer of wood detergent (without water) and leave it for 5 minutes before rinsing. Repeat if needed.
- Avoid wax buildup: Sticky or dark patches after waxing mean too much product was applied. Remove the excess with mineral spirits and a rag before rebuffing.
- Protect against scratches: Keep up regular cleaning and maintenance to prevent dents, stains, and marks.
- Use furniture pads: Place protective pads under the legs of heavy furniture to stop scratches before they start.
Important Warnings
- Ventilation matters: Always keep windows open and ensure fresh airflow when using maintenance products. Mineral spirits especially give off strong fumes that can be harmful if inhaled.
- Avoid harsh cleaners: Never use multi-purpose or dishwashing detergents on parquet floors. Stick to products designed for real wood only.
Conclusion: DIY Parquet Floor Restoration Made Simple
Parquet flooring is timeless, and with the right care, it can last for generations. By following a few simple steps — cleaning, choosing the correct products, recoating, and buffing — you can restore its shine and elegance without costly professional work. Regular maintenance, combined with protective measures like furniture pads and parquet-specific cleaning products, will keep your floor looking its best year after year. And remember, if the damage goes beyond light wear, it’s always safer to consult a parquet floor specialist.
FAQ: Parquet Floor Restoration
- Can I restore a parquet floor myself? Yes, if the damage is light. Cleaning, recoating, and buffing are manageable DIY tasks. Deep repairs, however, should be left to professionals.
- Do I need to sand parquet before recoating? Not always. For light wear, recoating with the right product is often enough. Heavy scratches or uneven blocks may require sanding by an expert.
- What products should I use? Always use products designed for real wood and suited to your finish type (wax, oil, or lacquer). Avoid multi-purpose cleaners.
- How do I know what finish my parquet has? Test with a few drops of water on a hidden spot. White spots indicate oil or wax; no change suggests lacquer or varnish.
- Is buffing parquet floors necessary? Yes — buffing smooths out the finish, blends the sheen, and helps the restoration last longer.
Our flooring service comes with obligation-free site visit, quick quotations and free advice. Give us a call on 020 88309782 to speak to a member of our staff, who can arrange for a free assessment of your floor sanding or wood floor fitting service at a convenient for you time.