Back to DIY Advice
Guide to Waterproofing Your Wooden Floor
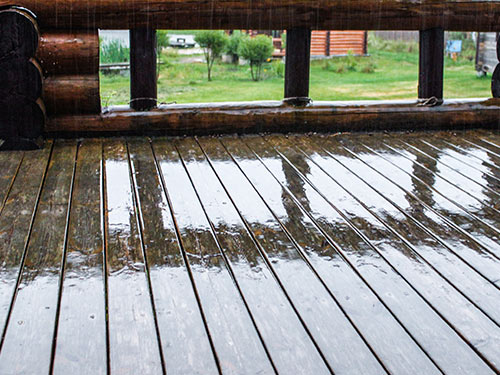
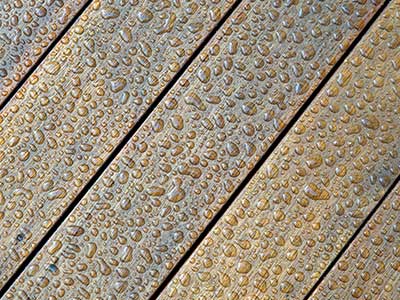 If you own a wooden floor, you already know the harsh truth: wood and water simply don’t get along. They’re not “frenemies” — they’re sworn enemies. A little excess moisture can leave stains and swelling, while a serious leak can destroy your floor beyond repair. And once that happens, the only solution is a full replacement — not exactly cheap, or fun.
The smarter move is to take preventive steps before damage happens. That’s where waterproofing (or at least boosting water resistance) comes in. But here’s the catch: waterproof and water-resistant are not the same thing. Waterproofing requires more work, specialised products, and usually professional application. Water-resistance, on the other hand, can often be achieved with the right finish and some smart maintenance.
If your floor already has a good finish, you’ve got a head start. Lacquers and varnishes offer solid protection against splashes, while oil finishes look gorgeous but don’t hold up nearly as well to spills. True waterproofing, however, is more complex and goes far beyond slapping on an extra coat of varnish. Before diving in, ask yourself: Do I really need full waterproofing, or is water-resistance enough for my space?
The market is full of products that promise to “waterproof” wood, but they’re not all created equal. Some are designed for light, everyday use, while others are heavy-duty solutions for extreme conditions. Your choice should depend on your goals: how much protection you need, what kind of traffic the room sees, and how much upkeep you’re willing to commit to.
For most households, full waterproofing isn’t necessary. Everyday scenarios — like damp feet walking from the shower, or a little rain tracked in from outside — can usually be handled with simple water-resistance methods. Think of it like giving your floor a raincoat instead of building it a submarine hull. Here’s how you can boost protection with a few DIY-friendly steps…
Preparation: The Secret to a Flawless Finish
Like with any floor treatment, success starts with prep. Skip this step, and no amount of waterproofing magic will save your floor from looking like a DIY disaster. Begin by clearing the room and giving your floor a thorough clean. Dust and dirt are the enemy — if left behind, they’ll get trapped under the product and leave you with bumps, uneven patches, and a finish that screams “I rushed it.”
Once the floor is spotless, inspect it carefully. Any scratches, gaps, or loose boards should be fixed before waterproofing. Think of it like painting a car — you wouldn’t spray a fresh coat over dents and rust. Repair what needs attention (either DIY or with professional help), and only then is your floor ready for its waterproofing makeover.
Sanding: Smooth Floors = Better Waterproofing
Waterproofing works best on a perfectly smooth surface, which is why floor sanding is such a crucial step. Think of it as prepping a canvas before painting — the smoother the base, the better the final result. If sanding is done poorly, no amount of product will hide the flaws.
Start with a coarse sandpaper to remove old finish and imperfections, then gradually move to finer grades for a silky, even surface. Work methodically: begin at the edges, move towards the centre, and finish at the doorway so you don’t sand yourself into a corner (literally). Once the floor is evenly sanded, give it another thorough vacuum and clean to remove every speck of dust — because trapped dust = bumpy waterproofing and a very unhappy DIYer.
Waterproofing: Layer It Like a Pro
Once your floor is smooth and spotless, it’s time for the main event: applying the waterproofing product. Whether you’re using polyurethane, resin, or another specialised formula, the golden rule is simple — follow the manufacturer’s instructions. Every product has its quirks, but most follow a similar three-layer process.
Apply the first coat evenly with a natural-fabric mop for smooth coverage. Let it dry completely (patience is key here), then add the second layer. Repeat the process for a third and final coat. For extra precision, many pros switch to a brush for the last coat, giving the finish a flawless, showroom-ready look.
Pro tip: Never rush drying time. Each coat must cure fully before the next one goes on. While waiting, keep an eye out for bubbles, streaks, or wrinkles. If you spot any, lightly sand the area once dry and smooth it out before continuing. Done right, this step leaves you with a waterproofed floor that not only resists moisture but also looks amazing.
Additional Tips for a Smooth Job
 Timing matters. The best moment to apply a waterproofing product is on a warm, dry day — it helps the coats cure evenly and speeds up drying. Cold or damp conditions can slow the process and leave you with a patchy finish.
And here’s a classic DIY rookie mistake to avoid: always start in the corner farthest from the door and work your way out. Otherwise, you’ll end up stranded in the middle of the room with no way out except to tiptoe across your freshly coated floor — undoing hours of work in a few seconds. Not the kind of “design feature” you’re aiming for.
Bottom Line
Even the best waterproofing isn’t a magic shield. Standing water will always be a threat, no matter how carefully you’ve treated your floor. Spills and splashes should be wiped up right away, and leaks need to be fixed before they reach your boards. In short: waterproofing buys you time, not invincibility — so stay alert and don’t take unnecessary risks with your wooden floor.
FAQ: Waterproofing Wooden Floors
- What’s the difference between water-resistant and waterproof? Water-resistant finishes (like lacquer or varnish) protect against splashes, while true waterproofing requires specialised products and methods.
- Can I waterproof my wooden floor myself? Yes, but only for light to moderate protection. Heavy-duty waterproofing is best left to professionals.
- How many coats of waterproofing product do I need? Usually three, with each coat left to dry completely before the next is applied.
- Does waterproofing make my floor maintenance-free? No, spills still need to be wiped up immediately, and regular cleaning is essential.
- Which finish is best for water resistance? Lacquer and varnish provide stronger protection than oil finishes, which soak into the wood but don’t repel water as effectively.
Waterproof vs. Water-Resistant Floors: What’s the Difference?
| Feature |
Water-Resistant |
Waterproof |
| Protection Level |
Handles splashes, spills, and light moisture if cleaned quickly. |
Designed to block water entirely, even with longer exposure. |
| How It’s Achieved |
By applying finishes like varnish or lacquer. |
Specialised products such as polyurethane or resin-based sealants. |
| Best For |
Everyday household use: kitchens, hallways, living rooms. |
High-moisture areas or where water exposure is frequent. |
| DIY-Friendly? |
Yes — can be applied at home with basic tools. |
Partly — some products can be DIY, but heavy-duty waterproofing is best left to professionals. |