Back to DIY Advice
Guide to Removing and Replacing Real Wood Floors
 Even the toughest, highest-quality wood floors eventually reach the end of their lifespan. Real wood is built to last — often close to a century — but years of wear, accidents, and everyday life can leave it too damaged to save. When that happens, replacement is the only option. The big question is: should you take the DIY route or hire professionals to handle it?
The answer depends on several factors. First, consider the type of flooring: solid wood, engineered wood, or parquet. Some are more DIY-friendly than others. Next, think about the size of the area you’re working on — replacing a few boards is one thing, tackling an entire living room is another. Finally, there’s the budget factor. At first glance, DIY may seem cheaper, but the reality isn’t always so simple.
Renting equipment can add up quickly, and mistakes from inexperience can easily lead to damage that costs more to fix than hiring a professional in the first place. In many cases, a professional team with the right tools and expertise can actually be the more cost-effective and stress-free choice. Before making a decision, weigh the pros and cons carefully — sometimes paying for specialists upfront saves you time, money, and headaches down the road.
When Should You Remove a Wooden Floor?
 Real wood floors are designed to last decades, sometimes even a lifetime. Naturally, they’ll show signs of age over time — scratches, dents, or fading — but that doesn’t mean it’s time to rip everything out. Most issues can be repaired, either through spot fixes or by sanding and refinishing. In fact, depending on its thickness, some wood floors can be sanded and restored up to six times, each time bringing back their original beauty and durability.
So when is replacement the only option? When even professional repairs and refinishing can’t save the floor. Severe structural damage, warping, or boards that are simply too thin for another sanding are clear signs it’s time for a new start. At that point, exploring the latest wood flooring options on the market is your best move.
Replacement isn’t always about damage, though. Sometimes, homeowners simply want a fresh look. If you’re tired of the same old floor and your budget allows, installing a new one is perfectly reasonable. Just remember, a full removal and floor fitting service can disrupt your daily routine for a short while. If you can handle the temporary inconvenience, the reward is a brand-new floor that completely transforms your space.
How to Remove Floating Wood Flooring
Out of all installation methods, floating floors are the easiest to remove. Why? Because they’re not glued or nailed to the subfloor — the boards are simply attached to each other. If your floor uses a click-lock system, it’s even simpler, as no adhesive is involved at all. In both cases, the removal process is DIY-friendly and fairly quick.
Start by removing the skirting boards, then lift the first row of floorboards from one end of the room. This first row is usually the trickiest because the expansion gap near the wall doesn’t give you much room to work with. A crowbar is your best friend here, making it easier to pry the boards up without damaging them.
Once the first row is out, the rest of the boards will come up much more easily. With tongue-and-groove installations, you may need to break the “tongue” connections to separate the boards, but even then, the process is straightforward. In short: if you’re going to DIY a floor removal, floating floors are where you’ll look like a pro.
How to Remove Glued Hardwood Flooring
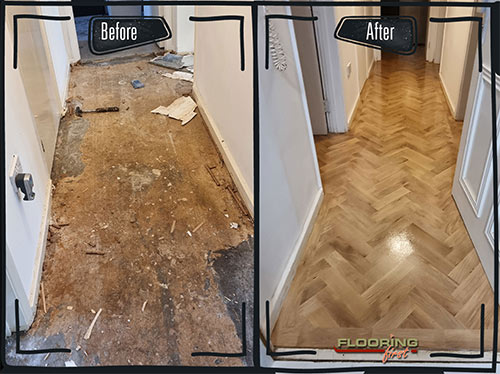
 If floating floors are the easy mode of removal, glued-down hardwood is definitely the hard mode. Here, the boards are fixed directly to the subfloor with a strong adhesive designed to last for decades. As you can imagine, prying them up isn’t a quick or simple task.
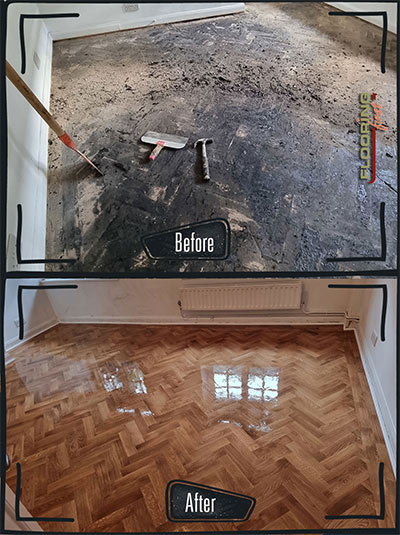
In some cases, especially if the adhesive is very old, you might be able to lift the boards by hand with some patience. But if the glue is still strong, you’ll need specialised tools such as chisels, scrapers, or a heavy-duty spatula to separate the boards from the subfloor. Be prepared: this kind of work takes time, muscle, and a lot of energy.
Because of the effort involved (and the risk of damaging the subfloor), hiring professionals is usually the smarter choice. They have the right equipment to get the job done faster and cleaner. Keep a vacuum handy, too — removing glued-down flooring creates plenty of dust and debris.
How to Dispose of Old Parquet Flooring
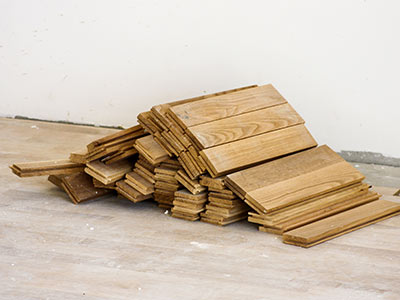
Once your parquet or hardwood floor is removed, the next question is: what do you do with it? The simple answer is that it counts as construction waste. And here’s an important rule — never burn old floorboards. Many contain adhesives, oils, or varnishes (especially older ones) that release harmful toxins when burned or break down in the environment.
So how do you dispose of it safely?
- Small quantities, untreated boards: If the wood hasn’t been treated with adhesives or heavy finishes, you can usually put small amounts out with your household waste.
- Larger quantities or treated boards: These may be classed as hazardous waste due to chemicals in adhesives, varnishes, or sealers. In this case, contact your local municipality or waste authority for proper disposal instructions.
Safe disposal protects not just you, but also the environment. When in doubt, check with your local waste management service before tossing anything out — it’s better than risking toxic materials leaching into soil or groundwater.
Know When and How to Replace Your Wooden Floor
Real wood floors can last for decades, but even the strongest flooring eventually reaches the point of no return. Whether you’re tackling a DIY removal or hiring professionals, the key is to understand your floor type, weigh the pros and cons, and prepare properly. Floating floors can be lifted with minimal effort, while glued or nailed boards demand more time, strength, and often professional tools. And don’t forget — safe disposal is just as important as removal.
If your floor is beyond repair, replacing it isn’t just about function — it’s an opportunity to completely refresh the look and feel of your home. Done right, the process brings you a floor that’s not only durable but also perfectly suited to your lifestyle and style preferences.
FAQ: Removing and Replacing Real Wood Floors
- Do I always need to replace old wood floors? No. Many floors can be sanded and refinished multiple times before replacement is necessary.
- Is removing wood flooring a DIY job? Floating floors are DIY-friendly, but glued or nailed floors usually require professional tools and expertise.
- How long does it take to remove a wood floor? A small floating floor can be removed in hours, while glued floors may take much longer.
- What’s the safest way to dispose of old parquet? Never burn it. Untreated boards can go with household waste in small amounts, but larger or treated quantities should be handled by local waste services.
- Is replacement worth it if my floor isn’t badly damaged? Yes, if you want a new style or upgraded material. Replacement can refresh your entire interior.