Back to DIY Advice
Floor Sanding Abrasives & Grits: How to Choose the Right Sandpaper

Floor sanding is not a job to take lightly. It requires skills, patience, and plenty of determination to see it through. While it’s tempting to rent a machine and give it a go, the difference between a professional-looking finish and a floor full of uneven scratches often comes down to one overlooked detail: your choice of abrasives.
The sanding process is usually broken into three stages: rough sanding, medium sanding, and fine sanding. Each step builds on the last, removing wear and scratches layer by layer until the surface looks smooth, clean, and ready for finishing. The right sandpaper grit at each stage makes all the difference — ignore it, and you may find yourself redoing the same work twice.
Choosing the Right Type of Sandpaper
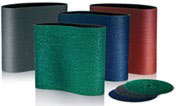
 Not all sandpapers are created equal — and definitely not all of them are suitable for floor sanding. Picking the right abrasive can save you time, money, and a lot of frustration. Here’s a quick guide to the most common types you’ll encounter:
Garnet – Best for fine sanding and hand stripping. It leaves a smooth finish but wears out quickly, which makes it less practical for large floor areas. Think of it as the “artist’s brush” of abrasives — great for detail, not for heavy-duty work.
Aluminium Oxide – A versatile option often used in power sanders. It works on wood, metal, and even plastics. More durable than garnet, but not ideal for the very final stages of sanding. It’s affordable, though it wears down faster on tough woods like oak.
Silicon Carbide – A true all-rounder. This sandpaper works on wood, metal, and more, with the bonus of being waterproof — meaning you can wet sand if needed. It cuts faster than aluminium oxide but comes with a higher price tag.
Zirconia Alumina – Available in variations like Zirconia mixed with Aluminium Oxide or Ceramic Zirconia. It’s denser than aluminium oxide, resists clogging, and helps avoid burn marks thanks to better heat dissipation. It’s the most durable (and most expensive) choice, making it ideal for rough sanding on uneven or distressed floors.
Quick tip: For most DIY floor sanding projects, a combination of Silicon Carbide for the rough stages and Aluminium Oxide for the finer stages will do the trick. But if your floor looks like it’s been through a war, investing in Zirconia could save you hours of effort and plenty of frustration.
Commercial vs. Industrial Sandpaper: What’s the Difference?
Sandpaper generally comes in two grades: commercial and industrial. At first glance, they may look the same, but the quality difference is night and day. Industrial-grade sandpaper uses tougher abrasive surfaces, stronger backings, and higher-quality bonding agents. The result? It lasts longer, cuts cleaner, and delivers a more consistent finish.
The catch is that industrial sandpaper is usually sold only through specialist suppliers, not your average DIY store. Commercial-grade sandpaper, on the other hand, is widely available and cheaper, but it tends to wear out faster and deliver less consistent results. For small DIY jobs, it might do the trick. But if you’re tackling a full floor sanding project, investing in industrial-grade abrasives can save you time, money, and plenty of frustration in the long run.
Understanding Sandpaper Grits
 The roughness of sandpaper is measured in grits. The rule is simple: the lower the number, the coarser the paper. Coarse grits remove more wood but leave deeper scratches, while higher grits remove less wood but leave the surface smoother. Choosing the right sequence of grits is one of the most important decisions in any floor sanding project.
By progressing step by step — from rough to medium to fine sanding — you strip away old finishes and scratches, leaving a smooth surface ready for finishing. Skip grits, and you’ll end up with scratches that refuse to disappear, no matter how much you sand.
Common Sandpaper Grits for Floor Sanding
- 24 grit: Very coarse, best for heavily damaged or uneven floors.
- 40 grit: Ideal for initial sanding on floors in reasonably good condition.
- 60 grit: A medium grit for refining after the first pass.
- 80 / 100 grit: Used for the final sanding before buffing and finishing.
 The condition of your wooden floor determines where you should begin:
- Badly worn floors: Start with 24 grit to remove deep scratches and level uneven boards.
- Floors in good condition: Begin with 40 or 60 grit to save time and wood.
- Finishing passes: Most wood species can be finished at 80 or 100 grit, followed by buffing with 120–180 grit depending on softness.
Pro tip: Don’t assume that a rough floor automatically needs the harshest grit. Factors like wood species (pine vs oak), floor type (solid wood vs engineered vs parquet), and machine choice (belt vs drum sander) all play a role. For example, a belt sander offers more control and may allow you to start at a finer grit than a drum sander would.
Refinishing Advice for a Flawless Finish
- Start strong: Your coarsest grit should be able to level the floor properly. If it doesn’t, repeat the process until it does — rushing here will cause problems later.
- Smooth the marks: Each successive grit must completely remove the scratches left by the previous one before you move on.
- Go fine for perfection: Finish with the finest grit suitable for your floor type. This ensures a silky-smooth surface that’s ready for staining or sealing.
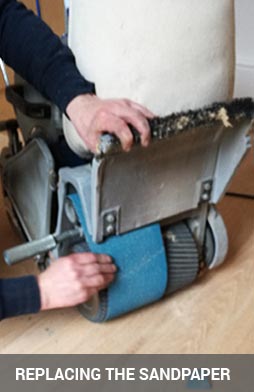
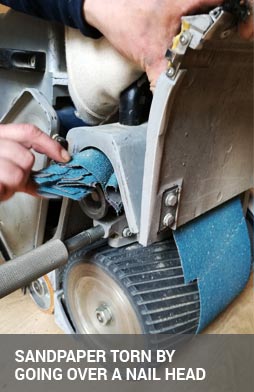
- Change abrasives often: Dull paper does more harm than good. Swap it out whenever you notice reduced efficiency.
- Calibrate your sanding belt: A misaligned belt leaves uneven marks across the floor — something even the finest grit won’t fix.
Remember: Floor sanding is like climbing stairs — you can’t skip steps and still expect to reach the top. Follow the grit sequence patiently, and your floor will thank you with a professional-looking finish.
Final Thoughts on Abrasives and Grits
Choosing the right abrasive and following the correct grit sequence is what separates a smooth, elegant wooden floor from one full of scratches and regrets. Patience, preparation, and the right tools are your best friends in the floor sanding process. Skipping steps or using the wrong sandpaper will only make the job harder — and the results far less satisfying. Take it slow, follow the sequence, and your floor will reward you with a professional-quality finish.
FAQ: Sandpaper and Floor Sanding
- What grit do I start sanding floors with? For badly worn or uneven floors, start with 24 grit. For floors in decent condition, 40 or 60 grit is usually enough.
- What grit do I finish a wood floor with? Most floors are finished with 80 or 100 grit, followed by buffing at 120–180 grit depending on the wood species.
- Can I skip grits to save time? No. Skipping grits leaves scratches behind that finer papers cannot remove, costing you more time and effort later.
- Which sandpaper type is best for floor sanding? Silicon carbide and aluminium oxide are common choices, but zirconia abrasives are best for heavily damaged or uneven floors.
- How often should I change sandpaper? Change abrasives as soon as they lose efficiency. Dull sandpaper wastes time and can damage your floor.