Back to DIY Advice
9 Secrets for Successful DIY Wood Floor Sanding

Sanding is the key to reviving tired, aged, or dull wooden floors, removing imperfections and restoring their natural beauty. Beyond just aesthetics, sanding enhances stability, durability, and insulation, while also preparing the surface for staining, refinishing, or sealing. If you’re considering DIY wood floor sanding, you’re not alone! While hiring a professional is an option, tackling the project yourself can be cost-effective and rewarding—but only if done correctly. Without the right preparation, tools, and techniques, mistakes can be costly and difficult to fix.
Before you get started, make sure to:
- Do your research—understanding the process is crucial for a smooth finish.
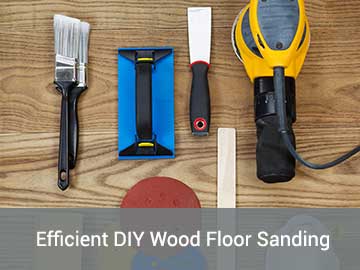
- Gather essential tools—including a drum sander, edging sander, sandpaper, and vacuum.
- Prioritise safety—always wear a dust mask, safety glasses, and hearing protection to protect yourself from noise and airborne particles.
Ready to take on this DIY challenge? Let’s dive into the 9 secrets for successful wood floor sanding and ensure professional-quality results at home!
Understanding Sandpaper Grits: Choosing the Right One for Your Floor
When tackling DIY wood floor sanding, knowing how to select the right sandpaper grit is crucial for achieving a smooth, professional finish. Sandpaper comes in different grit levels, each serving a specific role in the sanding process.
Here’s what you need to know:
- Coarse Grit (40-60 grit) – Best for removing old finishes, deep scratches, and imperfections. It works quickly but leaves the surface rough.
- Medium Grit (80-120 grit) – Ideal for blending and smoothing out rough patches left by coarse grit. It balances material removal with surface refinement.
- Fine Grit (150-220 grit) – Used for final finishing touches, ensuring the surface is smooth and ready for staining or sealing.
Pro Tip: Always start with a coarser grit to remove imperfections, then gradually work your way up to finer grits for a flawless finish.
By choosing the right grit progression, you'll avoid uneven surfaces and achieve a professional-quality result in your DIY sanding project.
Achieving a Smooth, Flawless Floor Surface
Sanding is the key to achieving a sleek, professional-looking wood floor. By using the right grit progression, you can eliminate imperfections like dirt buildup, chipped finishes, dents, and scratches—transforming a worn-out floor into a smooth, polished surface.
Here’s the step-by-step grit progression for the best results:
- Start with coarse grit (80 grit) – Removes major imperfections, such as deep scratches and uneven surfaces.
- Move to medium grit (100 grit) – Smooth out the roughness left by the initial sanding.
- Finish with fine grit (120 grit) – Refines the surface for a uniform, polished look.
- Optional: Use extra-fine grit (150 grit) – If you want an ultra-smooth finish before applying stain or sealant.
Pro Tip: Always sand in the direction of the wood grain to prevent scratches and achieve a seamless finish.
The Key to Flawless Sanding: Embrace Every Grit
For a perfectly smooth and polished floor, following a consistent grit progression is essential. Each grit level builds on the previous one, gradually refining the surface until you achieve the desired smoothness.
Why Grit Progression Matters:
- Coarse grits (40-80 grit) remove deep imperfections and old finishes.
- Medium grits (100-120 grit) smooth out the roughness left by coarser sanding.
- Fine grits (150-220 grit) create a sleek, even surface, ready for staining or sealing.
Pro Tip: Skipping grits can leave visible scratches and uneven patches. Always follow the recommended sanding sequence to ensure a flawless finish.
By methodically progressing through each grit, you allow the sanding process to work efficiently, resulting in a smooth, professional-quality floor.
Sanding with the Grain: A Must for a Flawless Finish

One of the golden rules of DIY floor sanding is always to sand with the grain of the wood. The grain refers to the natural direction of the wood fibres, typically running along the length of each floorboard.
Why Sanding with the Grain Matters
- Prevents scratches – Sanding against the grain can cause deep, visible scratches that are hard to fix.
- Maintains wood integrity – Working with the grain helps preserve the strength and structure of the floorboards.
- Ensures a smooth finish – Sanding in the right direction results in an even, professional-quality surface.
Warning: Sanding against the grain can lead to rough patches, uneven textures, and costly repairs—or even require full board replacement!
Pro Tip: Before starting, take a moment to identify the wood grain direction and adjust your sanding technique accordingly. This simple step can make a huge difference in the outcome of your floor restoration.
By following this fundamental practice, you'll achieve a beautifully smooth and damage-free floor with lasting results.
Proper Lighting: The Key to Flawless Sanding
Lighting plays an important role in achieving a smooth, even finish when sanding wooden floors. The right lighting setup helps reveal hidden scratches, uneven patches, and minor imperfections that could become highly visible once stain or finish is applied.
Why Adequate Lighting Matters
- Exposes imperfections – Subtle scratches and sanding marks are easier to spot under proper lighting.
- Prevents costly mistakes – Stain and finish highlight even the smallest flaws, making early correction essential.
- Saves time – Catching mistakes before staining prevents the need to redo the entire sanding process.
How to Optimise Lighting for Sanding
- Use strong, adjustable lighting – Portable work lights or LED task lights provide the best visibility.
- Position lights at an oblique angle – Angled lighting casts shadows that highlight any surface irregularities.
- Check from different angles – Walk around the room to inspect the floor under various light positions.
Pro Tip: If possible, work in natural daylight or supplement artificial light with a bright, cool-toned LED to mimic natural conditions.
By prioritising proper lighting, you’ll ensure a smooth, flawless floor finish and avoid costly do-overs.
Efficient Sanding: Tips for Speed and Precision
Achieving a smooth, even floor surface requires the right approach—and the right tools. While sanding by hand is time-consuming, using a sanding machine can significantly speed up the process and improve results.
Choosing the Right Sanding Equipment
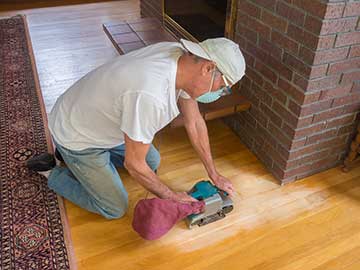
- Drum Sanders – Best for sanding large floor areas quickly and removing deep scratches or old finishes.
- Edge Sanders – Ideal for reaching corners, edges, and areas where a drum sander can't go.
- Random Orbital Sanders – Great for blending areas and achieving a smooth, swirl-free finish.
- Palm Sanders – Best suited for detailed finishing work on small sections.
Rent vs. Buy: What’s the Best Option?
Buying professional-grade sanding machines for a single DIY project can be costly and impractical. Instead, renting equipment from a local tool rental company is a budget-friendly and efficient alternative.
Skipping certain tools—such as using only a drum sander and neglecting edge sanding—can lead to uneven results, affecting the final finish.
Pro Tip: If rental options are unavailable or feel overwhelming, hiring a professional might be the best choice for high-quality, hassle-free results.
By using the right sanding machines in combination, you'll achieve a faster, smoother, and more professional-looking finish—without unnecessary frustration.
Sanding Strategically: Work Smarter, Not Harder
Even brand-new wood floors require sanding before applying finishes or stains. Whether due to transportation marks, minor surface imperfections, or unfinished boards, sanding is essential for achieving a flawless, professional look.
However, since wood floor projects take time - from installation to sanding, finishing, and drying—waiting until the entire floor is installed before starting the sanding process can prolong your project unnecessarily.
Why “Sand as You Go” is a Game-Changer:
- Reduces overall project time – Start sanding installed sections instead of waiting for the full floor to be fitted.
- Maximises efficiency – Use waiting periods (like glue drying) to sand adjacent areas and keep progress steady.
- Eases the workload – Tackling sanding in stages prevents fatigue and makes the process more manageable.
- Ensures a smoother transition to finishing – By sanding in increments, you prepare sections of the floor for staining and sealing sooner.
Pro Tip: If you're a DIY beginner, breaking up the sanding process into sections makes the task less overwhelming and allows you to adjust techniques as you go.
By strategically sanding as you install, you’ll speed up the entire project and achieve a polished, high-quality finish with less stress and downtime.
Removing Dust After Sanding: A Crucial Step for a Flawless Finish

Dust may seem like a minor inconvenience, but leaving it behind after sanding can cause scratches, uneven finishes, and visible imperfections once sealants or stains are applied. Proper dust removal ensures your floor remains pristine and smooth, allowing finishing products to adhere evenly and beautifully.
Why Dust Removal is Essential
- Prevents scratches – Fine dust acts as an abrasive, damaging the raw wood surface.
- Ensures a smooth finish – Dust trapped under stain or sealant creates a rough, uneven look.
- Maintains a clean workspace – Reduces airborne particles and improves air quality while working.
How to Effectively Remove Dust Between Sanding Rounds:
- Use a vacuum cleaner – A shop vacuum with a brush attachment is ideal for lifting dust without damaging the surface.
- Wipe with a damp microfiber cloth – This picks up any remaining fine dust particles.
- Tack cloth for final cleaning – A tack cloth ensures the surface is completely dust-free before applying stain or sealant.
- Leverage dust collection systems – Many modern sanding machines come with built-in dust extraction, but manual cleanup is still necessary.
Pro Tip: Avoid using a regular household broom, as it can stir up dust rather than remove it. Instead, opt for vacuuming and damp wiping for the best results.
By taking the time to thoroughly remove dust, you’ll achieve a smoother, more professional-looking finish that enhances the beauty of your wooden floors.
Securing Your Foundation: Nail Care and Gap Filling for a Flawless Finish
Before you begin sanding, proper floor preparation is key to avoiding damage to your equipment and ensuring a smooth, professional finish. Loose nails and gaps between floorboards can create uneven surfaces, cause scratches, and even damage sanding tools, so it’s essential to address them first.
Step 1: Inspect and Secure Nails
- Check for protruding nails – Run your hand or a scraper lightly across the floor to detect any raised nails.
- Hammer them down – Use a nail punch to sink them slightly below the surface, preventing damage to the sander.
- Replace any loose nails – If necessary, replace nails with flooring screws for better long-term stability.
Step 2: Fill Gaps Between Floorboards
Gaps between floorboards can make a floor look unfinished and allow dirt buildup. A great DIY solution is to use a natural, seamless filler made from your sanding dust.
How to Make and Apply a Gap Filling Mixture
- Collect sawdust from your initial sanding session (make sure it matches your floor’s colour).
- Mix it with a wood resin or adhesive to create a thick paste.
- Apply the mixture into gaps using a putty knife, ensuring even coverage.
- Let it dry completely before moving on to finer sanding.
Why This Works: Using your sawdust ensures the filler blends naturally with your wood, avoiding unnatural colour differences.
Step 3: Choose the Right Finish for Protection
Once your sanding is complete, finishing the surface properly is essential for long-term durability and beauty.
Best Finishes Based on Your Needs:
- High-traffic areas - Use a hard-wearing polyurethane finish for durability.
- Natural wood lovers - Opt for oil-based finishes to enhance grain and colour while nourishing the wood.
- Low-maintenance option - Choose scratch-resistant, easy-to-clean finishes for effortless upkeep.
Sanding your wood floors may seem like a daunting task, but with the right techniques, tools, and attention to detail, you can achieve stunning, professional-quality results on your own. By understanding sandpaper grits, maintaining a steady progression, using proper lighting, and sanding with the grain, you ensure a flawless, smooth surface ready for finishing. Additionally, removing dust, securing nails, and filling gaps contribute to the longevity and beauty of your floors.
Whether you're restoring old wooden floors or refining newly installed ones, patience and precision will pay off. With proper finishing, your floors will not only look beautiful but also withstand daily wear and tear for years to come. So, roll up your sleeves, follow these expert tips, and enjoy the satisfaction of a perfectly sanded and finished wood floor!