Project Overview
This Croydon project involved a full floor restoration combining sanding, staining, gap filling, and lacquer sealing. The client wanted to change the colour of the floorboards as well as restore their condition, so the project required careful planning around the staining process. The result was a floor that looked considerably different in colour from the original while still retaining the character and natural grain of the timber.
The Challenge
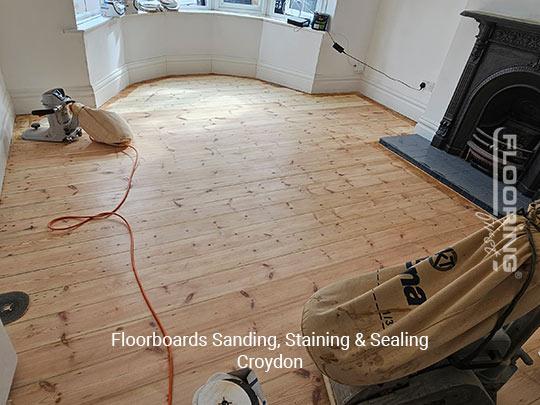
Before the floor restoration work began, a thorough inspection was carried out. The goal was to understand the extent of the damage and the best approach to address it. The floor sanding process began to remove years of wear and reveal the natural timber beneath. This process also helped eliminate the scratches and imperfections that had built up across the floor's surface.
Staining adds a layer of complexity to a floor restoration project. The stain must be applied to a perfectly sanded, clean surface with no residue from previous finishes. Any contamination in the surface, even minor traces of old wax or oil, will cause the stain to take unevenly and produce a patchy result. This means the sanding process has to be more thorough and the surface preparation more careful than for a straightforward re-lacquer job.
The boards also had a number of gaps that needed addressing before staining. Gap filling after staining is not practical because the filler colour would not match the stained floor. Everything had to be done in the right sequence.

Our Approach
The first phase was sanding. We used a drum sander with a coarse-to-medium sequence to strip the old finish fully and remove surface damage. Once the floor was clean timber throughout, we ran a fine grit pass to prepare the surface for staining. Thorough vacuuming and tacking followed, as any dust left on the surface will be sealed in by the stain and become visible.
Gap filling came next, before any stain was applied. We used a filler matched to the intended post-stain colour rather than the raw timber colour. This requires some experience: the filler needs to be slightly lighter than the final stained colour because the stain will darken it slightly when applied. We tested the stain on an offcut first to check the colour match before committing to the whole floor.
The stain was applied in sections using a wide brush and lint-free cloth, working with the grain and maintaining a wet edge to avoid lap marks. The stain was allowed to penetrate the timber, and the excess was wiped back before it dried. On a pale stain this can be done quickly, but on a darker tone careful timing is needed to prevent blotching.
Once the stain had dried fully, a high-quality lacquer was applied in three coats. Each coat was sanded lightly before the next to maintain adhesion and remove any dust nibs. The final coat was left to cure before the floor was returned to use.
The Result
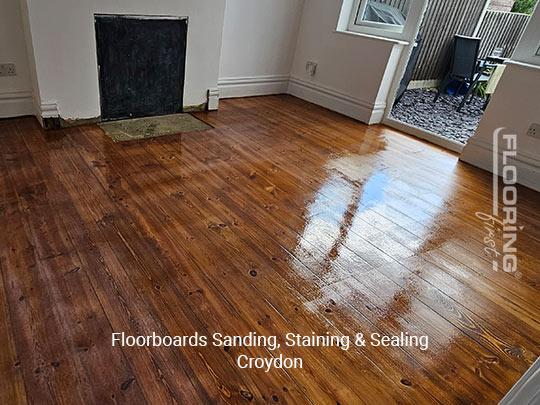
Addressing the gaps between the floorboards produced a smooth and consistent surface. The staining added depth and richness to the wood while transforming the colour of the room considerably. The lacquer sealant provided a durable top coat that protects the floor from daily wear and is straightforward to keep clean. The client was pleased with the colour change and commented that the room felt much more updated once the floor was done. The floor now provides reliable protection against wear and requires only standard routine maintenance.
Frequently Asked Questions
Can any floorboard be stained, or does the species matter?
Most timber species accept stain, but they take it differently. Pine, which is common in older Croydon properties, is an uneven absorber: knots and grain variations take stain at different rates, which can produce a blotchy finish if preparation is not thorough. Hardwoods tend to take stain more consistently. Proper sanding and an even wood conditioner treatment before staining makes a significant difference on pine and softwood floors.
Do gaps need filling before or after staining?
Always before. If you stain first and fill after, the filler will sit on a stained surface and will not absorb the stain itself, so it will look noticeably lighter than the surrounding wood. Filling before staining means the filler gets coloured along with the timber, and the match is much closer. We colour-test the filler against the intended stain tone before committing to the whole floor.
What does floor sanding and staining cost in Croydon?
In Croydon and South London, floor sanding with staining and lacquer typically costs between £30 and £45 per square metre. Staining adds some cost over a straightforward reseal because it requires additional preparation time and more careful technique. Gap filling is usually included in the overall price rather than charged as a separate item.