Project Overview
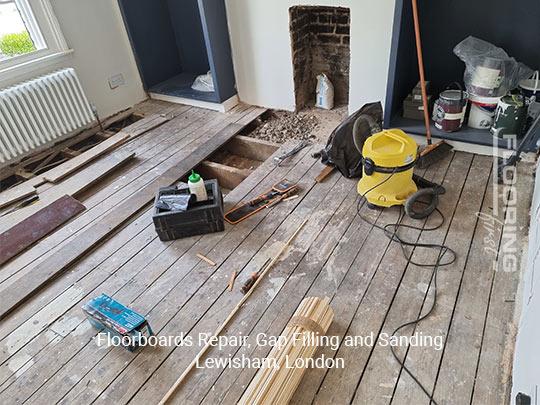
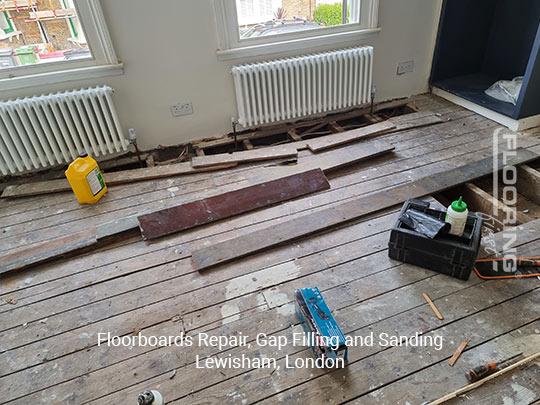
This solid wood floor in Lewisham had been in place for many years and showed the typical signs of age and heavy use. Several boards were beyond repair, gaps had opened between others, and the finish across the whole floor was severely worn. The job required a combination of board replacement, gap filling and a full sand and refinish to bring the floor back to a usable, attractive condition. Projects like this, which combine structural repair with cosmetic restoration, are good examples of why early professional assessment saves money in the long run. Sanding costs in London typically run from £25 to £45 per square metre depending on the condition of the floor and what prep work is needed.
The Challenge
The most time-consuming part of this project was sourcing replacement boards that would blend with the original floor. Real wood floors in older properties are often made from timber that is no longer readily available in standard dimensions, so finding a match requires working with specialist suppliers and sometimes accepting a slight variation in width or colour that will even out after sanding. The structural condition of the subfloor also needed checking before any new boards went down. Once replacement was done, the transitions between old and new boards had to be sanded smooth so no ridge was left visible. Additionally, the gaps were varied in size from hairline to several millimetres, each requiring a different approach to filling.
Our Approach
Board assessment and replacement. We walked the floor carefully to identify every damaged or unsound board. Boards that had split, cracked severely or could not be re-secured were lifted, and new boards of a matching species and thickness were cut and fitted. Nail holes from the old boards were filled.
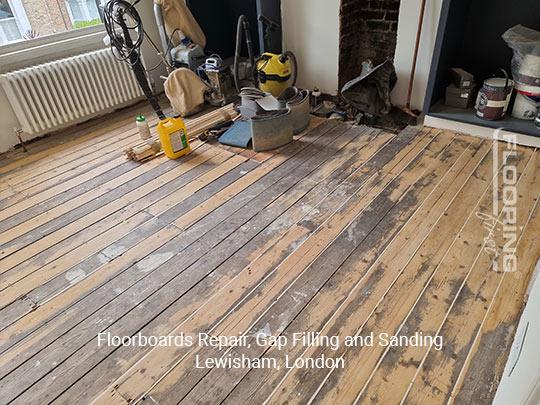
Gap filling. The gaps were filled using a resin and sawdust compound mixed to match the existing floor colour. Larger gaps were built up in stages to avoid shrinkage. Once dry and cured, the filler was level with the surrounding boards.
Progressive sanding. The floor was sanded in multiple passes, starting with a medium grit to remove the old finish and flatten any transitions between old and new boards, then moving to fine grits to produce a smooth, consistent surface across the whole floor.
Finishing. Two coats of a hard-wearing lacquer were applied to seal and protect the surface. The lacquer brings out the colour of the wood and provides a durable barrier against everyday wear.
The Result
The floor came out looking uniform and fresh. The new boards blended well once sanded and finished, and the gap-filled areas were barely detectable. The owners now have a solid, stable floor with a proper protective finish that will stand up well to daily life. The whole restoration was significantly cheaper than replacing the floor with new timber.
Frequently Asked Questions
How do you match replacement boards to an old floor?
We work with a network of specialist timber suppliers who stock reclaimed and reproduction boards in period dimensions. Sanding the whole floor after fitting new boards helps blend old and new by giving everything a uniform colour and finish.
Can all gaps in floorboards be filled?
Most gaps can be filled effectively with a resin and wood dust mixture. Very wide gaps, usually those over about 8mm, may need a pine sliver rather than filler paste to give a stable, long-lasting result.
How long does a sanding and repair job take on an average room?
A single room of 15-25 square metres with board replacements and gap filling usually takes two days: one day for the structural work and the fill to cure, and a second day for sanding and finishing.