Project Overview
This engineered wood floor in Pimlico had been in place for several years and was beginning to show a range of problems: a handful of damaged boards, gaps opening between others, and a finish that no longer offered any meaningful protection. The owner wanted the floor restored to a standard fit for a Pimlico flat, and the combination of targeted board repairs, gap filling and a full sand and re-oil achieved exactly that. The total scope of work was larger than a straightforward refinish but smaller than a full floor replacement, and the result justified the decision to restore.
The Challenge
The combination of repairs, gap filling and refinishing on an engineered floor is more technically demanding than any one of those tasks in isolation. The repaired boards need to sit perfectly flush with the surrounding floor before sanding, or the sanding machine will either leave a ridge at the junction or sand through the new board more quickly than the surrounding original material. The gap filling compound also needed to be applied carefully to avoid contaminating the surface of the boards on either side of the gap, which would show up as patchy discolouration under the oil finish. Getting all three elements right in the correct sequence is the difference between a tidy, professional result and one that looks patchwork.
Our Approach
Board repairs first. Damaged boards were removed and replaced with matching engineered boards. Any boards that were simply loose or squeaking were re-secured with flooring adhesive and left to cure before sanding began.
Gap filling. Gaps between boards were filled with a flexible resin compound mixed with wood dust to match the floor colour. The filler was applied, allowed to cure, and then lightly sanded flush with the surface.
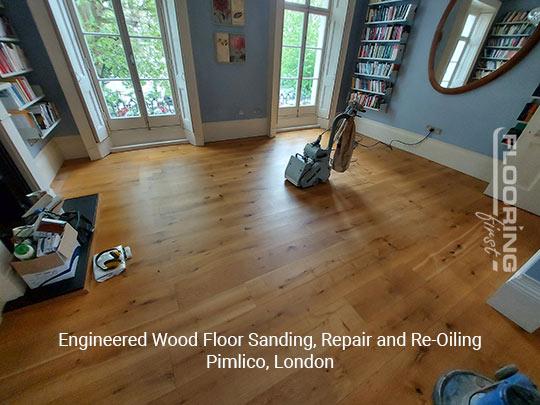
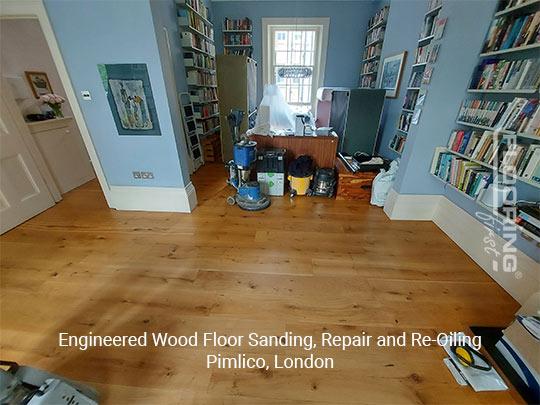
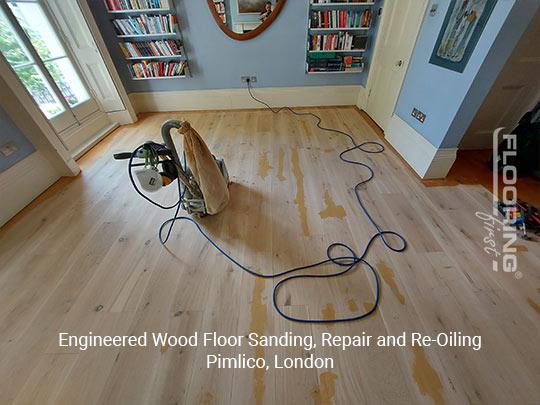
Sanding. The floor was sanded using a controlled sequence of grits appropriate for engineered wood. Starting with a medium grit to remove the old finish and flatten all repairs, progressing to fine grits for a smooth, consistent surface throughout. Edge sanding completed the perimeter.
Oil finish application. An oil finish was applied in two coats. Oil was chosen because it penetrates into the wood's structure rather than sitting on top, providing protection from within and giving a natural, warm appearance that suits the character of the property.
The Result
The repaired and refinished floor looked clean, uniform and well-maintained. The replacement boards blended effectively after sanding, the gaps were eliminated, and the oil finish gave the whole surface a warm, natural appearance. The owner now has a floor that is structurally sound, properly protected and considerably more attractive than it was when we arrived. Oil finishes do need re-applying periodically, but maintenance is straightforward and does not require any sanding between top-up coats.
Frequently Asked Questions
Can damaged engineered boards be replaced without replacing the entire floor?
Yes, in most cases. As long as matching boards can be sourced, individual damaged boards can be removed and replaced. The whole floor is then sanded, which ensures a uniform appearance across old and new boards.
What is the difference between oil and lacquer for engineered floors?
Lacquer sits on top of the wood as a hard film, while oil penetrates into the grain. Lacquer is more scratch-resistant in the short term; oil looks more natural and is easier to maintain and spot-repair. Both are suitable finishes depending on the use and preference of the owner.
How often does an oiled engineered floor need maintenance?
In a well-used residential property, an oiled floor usually benefits from a maintenance oil coat every one to two years. This does not require sanding; the existing oil is lightly buffed and a new coat applied on top.