Project Overview
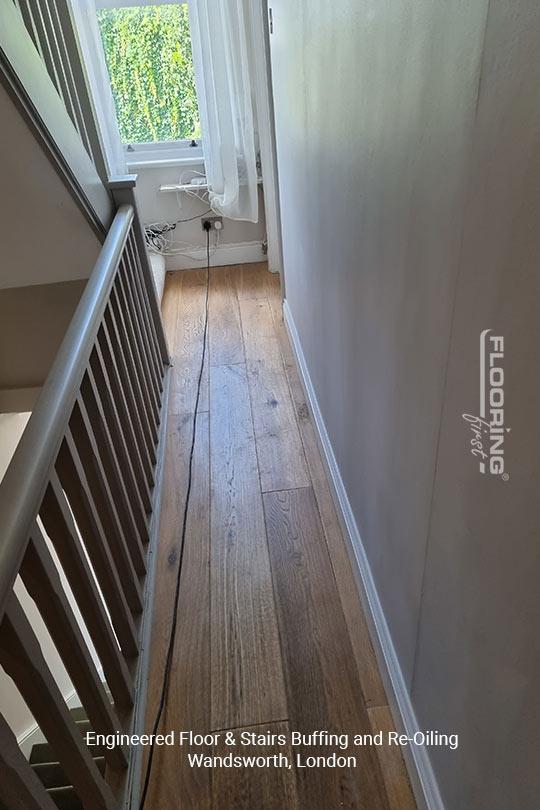
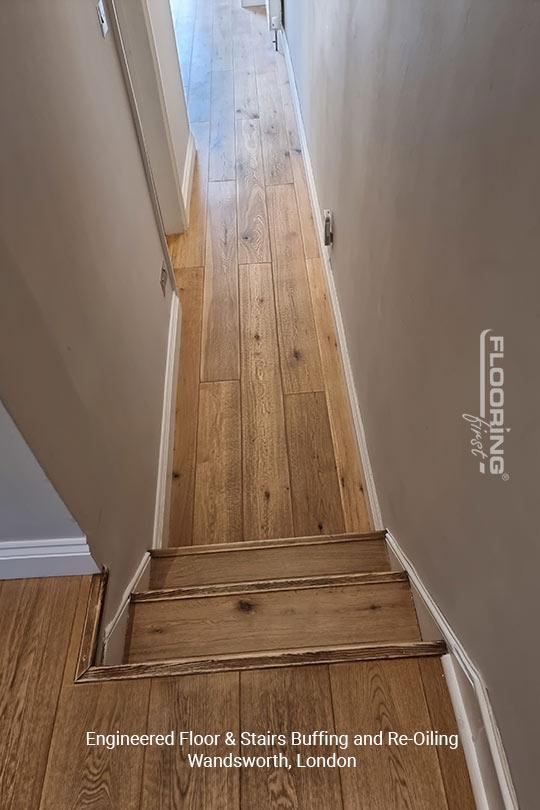
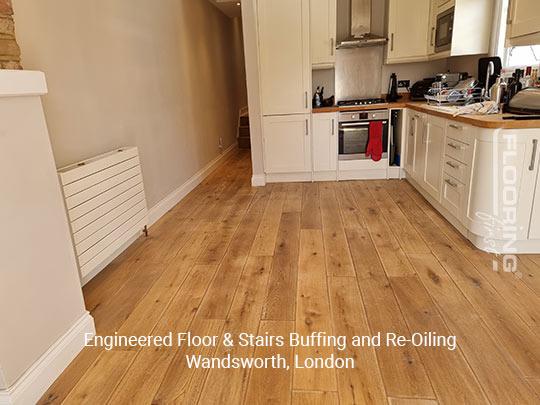
This project in Wandsworth covered the routine maintenance of an engineered wood floor and a matching wooden staircase. Both surfaces were in good overall condition but had started to lose their original sheen and protection after a few years of everyday use. The owner wanted to preserve the floor rather than undertake a full sand, which was the right call given the floor's solid condition. Re-oiling with a preparatory buff is one of the most cost-effective ways to keep an engineered wood floor in top shape, typically costing far less than a full sanding job.
The Challenge
Engineered wood floors have a top lamella of real hardwood, but that layer is thinner than a solid board. Over-sanding is the most common mistake made by inexperienced operators, and it can remove too much of the wear layer and leave the floor structurally compromised. For this Wandsworth floor, the finish had become dull and slightly worn in the heavy-traffic areas near doorways and the foot of the stairs, but the bare wood underneath was untouched. A full sand would have been unnecessary and wasteful. The challenge was determining the lightest effective treatment that would restore the protective barrier without cutting into the wood.
Our Approach
Inspection and assessment. We started by inspecting both the floor and the staircase under strong lighting to check for any deep scratches, loose boards or structural concerns that would require sanding before re-oiling. None were found.
Buffing the surface. Using a rotary buffing machine with a fine abrasive pad, we lightly abraded the surface of the floor and stair treads to remove the old, depleted oil layer and open the wood's pores. This creates the key the new oil needs to bond properly. Buffing also removes minor surface scuffs without taking any real wood off.
Applying the oil finish. Two coats of a high-quality oil finish were applied, allowing adequate drying time between coats. Oil finishes soak into the grain rather than sitting on top, so they nourish the wood from within and are far better at bringing out the natural colour and character of the boards than a lacquer coat over a dull surface.
Final inspection. Once dry, we went over both surfaces under good lighting to confirm even coverage, paying particular attention to the nosings on each stair tread as these receive the most wear.
The Result
The floor and stairs came up looking fresh and well-protected without requiring a full strip-back. The natural grain and warm tone of the wood were restored, and the new oil coat provides a good level of protection against spills and daily wear. The owner now has a straightforward maintenance schedule: a light re-oil every year or two will keep the surfaces in this condition indefinitely without ever needing a full sand. Re-oiling a floor costs considerably less per visit than a full sanding job, making it a practical long-term plan for anyone with an oiled finish.
Frequently Asked Questions
Does re-oiling an engineered floor require sanding first?
Not always. If the oil finish is simply worn rather than deeply scratched, a buff with a fine abrasive pad is enough to prepare the surface. Sanding is only needed when the floor has deeper damage that has penetrated through the finish into the wood.
How often does an engineered wood floor need re-oiling?
This depends on the level of traffic. In a family home with moderate use, re-oiling every one to two years is usually sufficient. High-traffic areas like hallways may need attention annually.
Can wooden stairs be re-oiled at the same time as the floor?
Yes, and it is advisable to do both at once so the finish matches. Stair treads are treated using smaller buffing equipment that can work around spindles and get into tight corners on each step.