Back to Wood Floor Fitting
How to Lay Herringbone Laminate Flooring
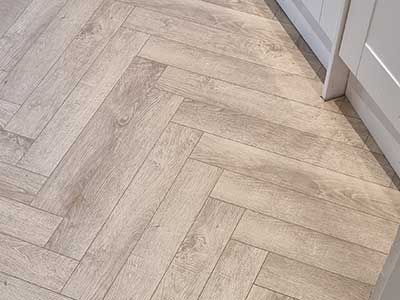 When it comes to choosing the right flooring for your home, the possibilities can seem endless. However, one trend that has been gaining popularity in recent years is herringbone laminate flooring. This classic yet modern pattern can add a touch of elegance and sophistication to any space, making it a popular choice among homeowners. The herringbone pattern, characterised by its distinctive V-shaped design, offers a number of advantages beyond just its visual appeal. Not only does it create a sense of movement and flow in a room, but it can also make small spaces appear larger and more spacious. Additionally, herringbone laminate flooring is durable, easy to maintain, and cost-effective, making it a practical choice for busy households.
Tools and Materials
When embarking on a herringbone laminate flooring installation project, it is essential to have the right tools and materials on hand. Herringbone laminate flooring planks are obviously a key component, along with floor underlayment to provide a smooth surface underneath. To ensure precision and accuracy during the installation process, you will need a saw (mitre or table saw) to cut the planks to fit into the herringbone pattern. Additionally, having a tape measure, pencil, and chalk line will help you keep your layout straight and symmetrical. Don't forget to use spacers to maintain proper expansion gaps around the edges of the room. A tapping block and hammer will also come in handy to click the planks into place.
Preparation for Herringbone Laminate Floor Installation
Before you can lay herringbone laminate flooring in your home, you must prepare the subfloor properly. First, you need to measure and plan the layout to ensure the wood flooring fits correctly. Acclimate the laminate planks to the room's temperature and humidity to prevent any warping or buckling once installed. Next, ensure the subfloor is clean, dry, and level to create the perfect base for your new floor. If you have underfloor heating, be sure to cut along the expansion gap to allow for movement. When it's time to install herringbone, you can choose from a standard herringbone pattern or double herringbone.
To fit herringbone flooring properly, it is essential to follow the manufacturer's instructions for your specific click flooring selection. Whether you are working with laminate, engineered wood, or another type of herringbone plank, take the time to learn how to lay the flooring correctly. With a wide selection of laminate flooring options available, you can choose the perfect style to complement your space.
Installing the First Row
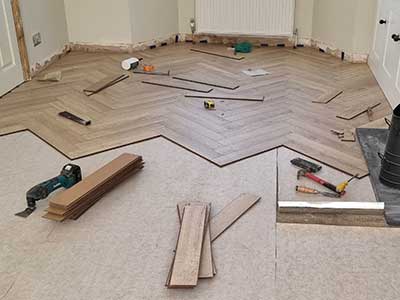 Installing the first row of herringbone laminate flooring sets the foundation for the rest of the floor. This popular flooring pattern adds a touch of elegance to any room, mimicking the look of real wood without the high cost. Herringbone flooring has become a trendy choice for homeowners looking to upgrade their flooring types. To start, the laminate herringbone flooring must be laid from left to right, forming the classic herringbone shape with an inverted triangle. Begin by adding underlayment suitable for laminate flooring to create a smooth surface. The underlayment helps to reduce noise and provide a moisture barrier.
After adding the underlayment, it's time to lay laminate planks to form the herringbone pattern. Place the first A board in the top left corner, followed by the first B board to the right. Continue alternating between A and B boards, ensuring each plank forms a precise angle to create the stunning herringbone laminate flooring. As you progress, make sure to click each board and place it securely. The fourth A board should meet the edge of the first B board to complete the inverted triangle. Repeat this process until the first row is complete, creating a solid foundation for the rest of the flooring in the room.
When aligning the first row of herringbone planks, pay close attention to ensure they are straight and level. Adjust the planks as needed to maintain a consistent pattern throughout the wood herringbone flooring. Check the alignment from right to left, making any necessary adjustments before proceeding to the next row. As you lay herringbone flooring, the boards should board and click seamlessly together.
Finishing Touches
Trimming and finishing when laying herringbone laminate flooring involves several important steps to ensure a professional and polished final result. It is essential to install transition pieces, such as thresholds or baseboards, to provide a clean and finished appearance. It is crucial to ensure all planks are securely locked in place to prevent shifting or uneven gaps. Once the planks are in position, it is important to carefully check for gaps, uneven edges, or imperfections. Any issues should be addressed promptly by making any necessary adjustments or corrections. Finally, before completing the project, it is essential to remove spacers and clean the floor of any debris to ensure a pristine finish.