Back to DIY Advice
Wood Floor Staining Guide: Colours, Application & Protection
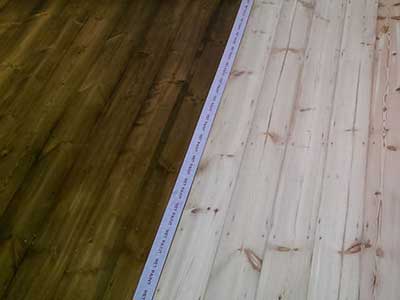
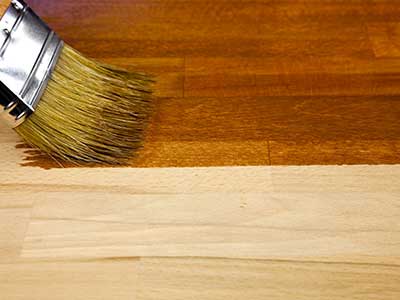
 Think of wood floor staining as a makeover for your home’s hardest-working surface. It’s not just about colour — it’s about unlocking the natural beauty hiding in those boards and giving your space a whole new personality. Want sleek and modern? Go darker. Prefer light and airy? A pale stain will do the trick.
In this guide, we’ll walk you through everything you need to know: how to choose the right stain, the tricks to applying it evenly, and the little pro tips that make the difference between a “meh” DIY and a magazine-worthy transformation. Ready to give your floors a glow-up? Let’s dive in.
Understanding the Magic of Wood Floor Staining
Before you grab a brush and start transforming your floors, it’s worth pausing to understand what wood floor staining really does. Think of it as the ultimate floor upgrade: not only does it protect and refresh your boards, but it also lets you choose a colour and tone that perfectly matches your home’s vibe. Want a cosy, rustic cabin look? Go darker. Dreaming of something bright and modern? A lighter stain will instantly open up the space.
Hardwoods like oak, maple, cherry, and walnut are the usual stars of the staining world because they soak up colour beautifully while keeping their natural character. But don’t worry — plenty of other species can be stained effectively too. The result? A floor that feels completely renewed. Staining can turn a tired, dated floor into a sleek showpiece, instantly warming up your interiors and setting the tone for your entire room. Whether your style is timeless classic or bold and contemporary, staining gives your wooden floors a new lease of life and makes them a true centrepiece of your home.
Choosing the Right Stain for Your Floors
This is the fun part — picking a stain is a bit like choosing an outfit for your floor. The colour you choose sets the mood for the entire room. Want cosy and traditional? Rich browns and honey tones bring warmth in spades. Prefer a sleek, modern edge? Cool greys or darker espresso shades deliver instant sophistication. And if you’re feeling adventurous, there’s a whole rainbow of custom tones waiting to turn your floor into a statement piece.
It’s not just about colour, though. The finish you choose makes a big difference too. A matt finish gives you that relaxed, understated elegance — think “Scandi minimalism.” A glossy finish, on the other hand, screams luxury with a mirror-like sheen that catches the light beautifully. For those who love character, distressed or weathered effects can add a charming, lived-in vibe that looks like it’s been part of the home for generations.
By mixing the right stain colour, finish, and effect, you’re not just refreshing your floor — you’re giving your whole room a new personality. The result? A floor that doesn’t just sit there quietly but becomes a feature worth showing off.
Getting Your Floors Ready for Staining
Before your floors can strut their stuff in a new colour, they need a bit of backstage prep. Staining without preparation is like painting over dust — the results will never look right. Here’s how to set the stage for a flawless finish:
- Clean, clean, clean: Sweep, vacuum, and mop to banish every speck of dust and dirt. Even the tiniest crumb can mess with your stain.
- Sand like a pro: Sanding smooths out old finishes and imperfections, giving the stain a perfect surface to cling to. Start coarse, finish fine — think rough to refined.
- Deal with old finishes: If your floor has layers of varnish or wax, strip them off properly. Otherwise, your stain will sit on top like bad makeup.
- Fill the flaws: Use wood filler to patch gaps, cracks, or nail holes. A seamless surface means a seamless final look.
Take your time with this stage. The better the prep, the better your stain will look — and the longer it will last. Think of it as laying the red carpet for your floors before the big reveal.
How to Apply Wood Floor Stain (Without Losing Your Mind)
 Applying stain isn’t rocket science — but it is a bit of an art. The tool you pick changes the vibe of the finish, so think of it like choosing a paintbrush for a masterpiece (except this one you’ll walk on). Here are the main approaches:
- Brush: Great for precision. Perfect if you like neat lines and full control.
- Sponge: Softer blending, smooth coverage, and less chance of streaks. Think “gentle makeover.”
- Rag: Want a rustic, textured look? A rag gives you that hand-rubbed finish that feels artisanal.
No matter which tool you choose, the golden rule is: consistency is king. Work in the direction of the wood grain, keep your strokes even, and don’t let puddles of stain sit around — unless you like patchy tie-dye floors (spoiler: you don’t).
Feeling adventurous? You can even layer stains for depth or create subtle patterns for a custom look. Just remember: less is more. Floors should whisper “wow,” not scream “DIY experiment gone wrong.”
Sealing the Deal: Protecting Your Newly Stained Floors
You’ve done the hard work — cleaned, sanded, stained — now it’s time to lock in that beauty so it doesn’t fade faster than a cheap spray tan. The secret? A good finish. Sealing your stained wood floors doesn’t just make them look gorgeous, it also adds the durability needed to handle everyday life (kids, pets, high heels — you name it).
Here are your main finishing options:
- Polyurethane: The bodyguard of finishes. Tough against scratches and spills, perfect for busy households and high-traffic zones.
- Oil-based: Warm, rich, and classic. Adds a golden glow and exceptional durability — ideal if you love that traditional, timeless look.
- Water-based: Quick-drying, low on fumes, and great for keeping the wood’s natural colour visible. Plus, you can walk on it sooner (bonus!).
Choosing the right finish is all about your lifestyle and style preferences. Want low maintenance? Go polyurethane. Crave warmth? Pick oil-based. Need something eco-friendlier and fast-drying? Water-based has your back.
Once sealed, your floors aren’t just stained — they’re protected, polished, and ready to impress. So step back, admire your handiwork, and enjoy walking on a floor that looks like it belongs in a showroom. You’ve just given your home a glow-up that will last for years.
Wood Floor Staining – FAQ
How long does wood floor stain take to dry?
Drying times vary depending on the type of stain and finish. On average, oil-based stains take 6–12 hours to dry, while water-based stains dry in 2–4 hours. Always check the manufacturer’s instructions before walking on your floors.
What’s the best stain colour for wood floors?
This depends on your style! Darker stains like espresso or walnut create a luxurious, dramatic look, while lighter stains such as oak or grey make spaces feel brighter and more modern. Neutral mid-tones are versatile and timeless.
Can I stain engineered wood floors?
Yes, but only if the engineered floor has a thick enough top layer (veneer) to allow sanding before staining. Thin veneers may not withstand the process, so always check before starting.
Do I need to seal my stained floors?
Absolutely! Stain alone won’t protect the wood. A finish such as polyurethane, oil-based, or water-based sealer is essential to protect against scratches, spills, and everyday wear and tear.
How often should stained floors be refinished?
It depends on foot traffic. In busy households, refinishing may be needed every 7–10 years. In quieter areas, your floors can stay beautiful for 15+ years with proper care.