Back to DIY Advice
Replacing Damaged Wood Floor Planks: DIY Step-by-Step Guide
 One damaged plank might look harmless at first — like a single missing button on your shirt — but ignore it, and suddenly it’s all you can see. Beyond being an eyesore, that dodgy plank can become a tripping hazard and, if left unchecked, spread its misery to neighbouring boards. Before you know it, what started as a small crack could turn into a full-on floor drama (and an expensive one at that).
Swapping out a damaged plank isn’t just about vanity. It restores your floor’s sleek, unified look, removes safety risks, and protects your investment from further damage. Think of it as fixing a small leak before it becomes a flood. Quick action means a longer life for your hardwood flooring — and fewer repair bills sneaking up on you later.
Step One: Play Detective with Your Floor
Before you go charging in with a saw, it’s time to do a little floor sleuthing. A damaged plank isn’t always just a surface issue — sometimes it’s hiding deeper problems. Start by checking for the usual suspects: rot, mould, or insect damage. These are like the uninvited guests that crash the party and cause chaos beneath the surface.
Don’t stop there. Inspect the neighbours too — surrounding planks can also show cracks, splits, or warping, especially if the damage has been sitting around for a while. Loose fasteners like screws or nails can also make things worse, so give them a quick check as well.
Finally, think about the environment. High moisture levels or poor ventilation could be silently plotting your floor’s downfall. If the problem is isolated, you’ll probably just need to replace a plank or two. But if there’s widespread damage, you may be looking at a bigger job (or even calling in the pros). Either way, catching the issue early keeps your floor safer, sturdier, and looking far less tragic.
Your Floor Fixing Toolkit
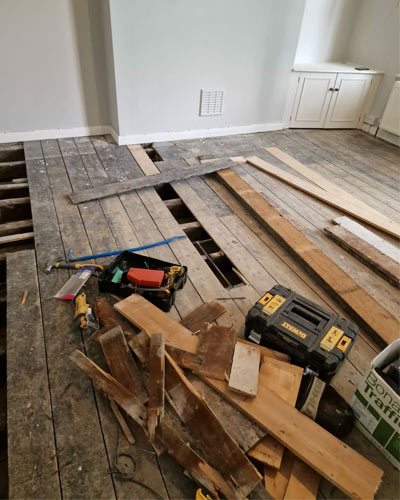
Before you start ripping out planks like a rockstar smashing a guitar, you’ll need the right gear. The good news? Most of it is a basic DIY kit you might already own. The essentials include:
- Circular or reciprocating saw: For cutting out the damaged plank cleanly.
- Hammer & chisel: Perfect for loosening stubborn bits of wood without wrecking the neighbours.
- Pry bar: To gently (or not so gently) lift the plank out of its spot.
- Measuring tape: Because “close enough” measurements usually aren’t.
Of course, the star of the show is the replacement plank. To avoid your repair job sticking out like a sore thumb, pick one that matches the species, grain pattern, width, and thickness of your existing floor. If the damaged area is near a wall or doorway, you’ll also want planks with a tongue-and-groove profile so everything locks neatly back into place.
With the right tools and materials ready, you’ll set yourself up for a smooth repair — and a finish that looks like it’s always been part of the floor, not a patch job.
How to Swap Out a Bad Plank Without Losing Your Mind
 Replacing a damaged plank might sound intimidating, but with the right approach, it’s more “DIY weekend project” than “mission impossible.” Here’s how to do it step by step:
- Spot the culprit: First, identify the damaged plank and decide how bad it is. Small scratches? Easy fix. Warped or rotting? Time to say goodbye and swap it out completely.
- Clear your workspace: Move any furniture, rugs, or curious pets out of the way. You’ll want plenty of elbow room.
- Make the cut: Use a circular saw or jigsaw to slice down the middle of the damaged plank. Work carefully to avoid grazing the neighbours (the other planks).
- Lift it out: Grab your hammer and chisel to pry the plank pieces loose. If it’s nailed down, a pry bar will be your new best friend.
- Clean the scene: Vacuum up dust and debris so your replacement plank has a nice, clean space to slide into.
- Fit the newbie: Pop the new plank into place, making sure it lines up neatly. Nail or glue it down securely, then sand the edges for a seamless blend with the rest of the floor.
And there you have it — a fresh plank, a smooth floor, and bragging rights for your DIY skills. If at any point you feel like you’re wrestling with the floor more than fixing it, don’t stress — a professional can swoop in with the tools and expertise to make it look effortless.
The Secret Sauce: Finishing & Blending
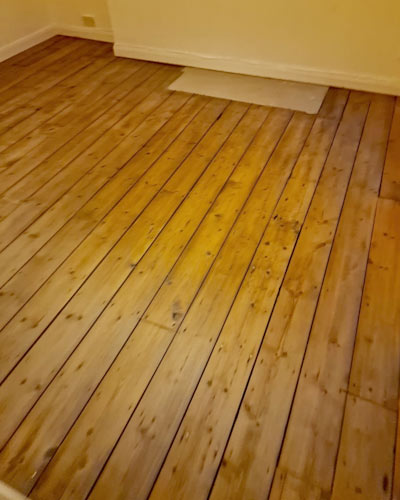
Swapping out a plank is only half the job — the real magic happens when you make the repair invisible. That’s where finishing and blending come in. Without them, your shiny new plank will stick out like a sore thumb (and you’ll be reminded of it every time you walk across the room).
Here’s how to nail it:
- Sanding: Start with coarse-grit sandpaper to level things out, then work your way down to finer grits for that silky-smooth finish. Think of it like exfoliating for your floor — rough first, gentle last.
- Refinishing: Apply stain or sealant that matches the existing floor colour. Finish it all off with a few coats of polyurethane for protection and a professional sheen.
- Blending: This is the art part. Matching the new plank’s shade and texture with the rest of the floor can take a bit of patience — sometimes staining, sometimes even a touch of paint. Done right, nobody will ever guess which plank was replaced.
Get this stage right, and your floor won’t just look repaired — it’ll look flawless. If you’re not confident with colour matching, don’t worry. Professional flooring specialists have the tools and the eye to make your floor repair completely undetectable, ensuring it stays strong and beautiful for years to come.
Conclusion: One Plank at a Time
Replacing a damaged wood floor plank might sound intimidating, but with the right tools, a little patience, and some finishing magic, it’s absolutely doable. Whether the damage is from a clumsy dropped pan, overenthusiastic pets, or just the slow march of time, a clean repair restores both safety and style to your home. And remember — if the job feels overwhelming, there’s no shame in calling in the pros to make your floor look brand new again. The goal is simple: a floor so seamless, even you’ll forget which plank was the troublemaker.
FAQ: Replacing Wood Floor Planks
- Can I replace just one plank? Yes, as long as you can access and cut it out without damaging the others. Matching the new plank’s size and colour is key.
- Do I need special tools? A circular saw, pry bar, chisel, and hammer will handle most jobs. For blending, sandpaper and stain are your best friends.
- Will the repair be visible? Not if you sand, stain, and finish properly. Blending is what makes the new plank disappear into the crowd.
- What if my floor is really old? Older floors can be trickier to match. In these cases, it’s often worth consulting a flooring specialist.
- Is it cheaper to repair or replace the whole floor? Repairing a plank is almost always cheaper and quicker. Full replacement is only needed if the damage is widespread.