Back to DIY Advice
DIY Hardwood Floor Painting – Step-by-Step Guide
 Want to transform your space without draining your wallet? Painting your wooden floor is one of the easiest, most budget-friendly ways to give your home a whole new vibe. With just a few tools and some patience, you can turn tired, scuffed boards into a bold design statement. Whether you’re after a sleek modern finish, a rustic distressed look, or even playful patterns, painted floors offer endless possibilities. Follow this step-by-step guide to learn how to paint hardwood floors like a pro — and enjoy a stunning new look without the cost of a full renovation.
Preparing Your Floor for Painting
A great paint job starts with great prep. Skip this step, and you’ll end up with patchy colour, peeling spots, or worse — a floor you’ll want to repaint next month. Here’s how to get your boards ready for their makeover:
- Clear the room: Move out all furniture and décor to give yourself plenty of space to work without tripping over a coffee table.
- Clean thoroughly: Vacuum and mop to remove dust and grime. Let the floor dry completely before painting — moisture and paint are not friends.
- Smooth the surface: If you find flaking finish or rough spots, sand them lightly with fine-grit sandpaper. This ensures the new paint sticks evenly.
- Remove hazards: Pull out old carpet tacks, staples, or stray nails. Nothing ruins a roller’s day faster than hitting metal.
- Mask and cover: Protect skirting boards with masking tape and drape plastic sheets over anything that could catch paint splatters.
Taking your time with prep makes painting easier, cleaner, and way more satisfying. Think of it as setting the stage — once this is done, the fun (and colour!) begins.
Choosing the Right Paint
Your floor takes a beating every day, so not just any paint will do. To avoid chips, scratches, and early regrets, always choose paint made specifically for wood floors. These are formulated to withstand foot traffic and everyday wear, giving you a finish that lasts.
- Go thin, not thick: Apply multiple thin coats rather than one heavy one. This gives you smoother coverage and avoids drips, streaks, or brush marks.
- Ventilate the room: Keep windows and doors wide open while painting. Proper airflow reduces fumes and keeps you breathing easy.
- Protect your space: Cover nearby furniture and fixtures with tarps or plastic sheets to shield them from splatter. Trust us, paint has a way of finding things you didn’t mean to paint.
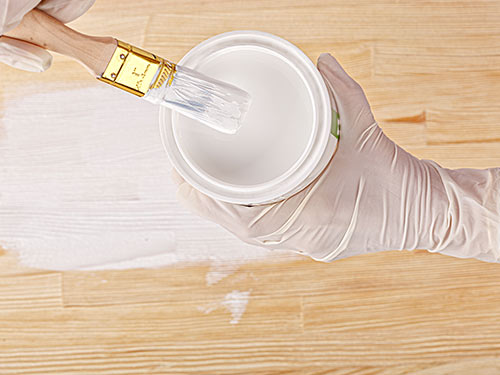
- Suit up: Wear gloves and a dust mask to protect yourself from fumes and irritants while working.
- Seal it in: Once the paint has fully dried, finish with a wood floor sealant. This adds durability and keeps your fresh new look safe from scuffs and heavy foot traffic.
With the right paint and a little patience, your wooden floor will not only look stunning but also stay that way for years.
Apply a Protective Varnish
 After painting, patience pays off. Let the paint dry fully — usually up to 24 hours, depending on the product, temperature, and humidity. Rushing this step is the fastest way to ruin your hard work.
- First coat: Apply a thin layer of varnish with a brush or roller, working crosswise. Leave it to dry for at least 4 hours, or until touch dry.
- Second coat: Apply lengthways across the boards to ensure full, even coverage. This creates a tough, durable finish that resists daily wear.
- Extra protection (optional): For households with kids, pets, or heavy traffic, an extra layer of wax can be added after the varnish for even more defence against spills, dirt, and scratches.
Two coats of varnish don’t just add protection — they also bring out a beautiful shine, turning your painted floor into a feature you’ll want to show off. With a little time and the right tools, you can completely transform the look of any room without breaking the bank.
Conclusion: A Painted Floor That Shines
Painting your hardwood floor is an affordable, creative way to breathe new life into your space. With careful preparation, the right paint, and a protective finish, you can achieve a look that’s stylish, durable, and entirely your own. The process does take patience, but the reward is a fresh, vibrant floor that feels like a brand-new feature in your home — without the hefty renovation price tag.
FAQ: DIY Hardwood Floor Painting
- Can you paint any wooden floor? Most hardwood and softwood floors can be painted, but make sure the surface is sanded, clean, and free of wax or oil finishes first.
- Do I need a primer before painting? Yes — primer helps the paint adhere properly and ensures an even, long-lasting finish.
- How many coats of paint should I apply? Usually two thin coats are enough, but high-traffic areas may benefit from a third.
- What’s the best paint for wooden floors? Use paint specifically formulated for wood floors — it’s tougher and more resistant to scratches and foot traffic.
- How long before I can walk on the floor? Light walking is possible after 24 hours, but wait at least 48–72 hours before moving furniture back in.